How to Install WonderCMS on AlmaLinux 9
WonderCMS is a lightweight, open-source content management system (CMS) designed to be simple and efficient. Unlike more complex platforms, it focuses on ease of use, making it an ideal choice for users who want to create and manage websites without extensive technical knowledge. WonderCMS operates without a database, relying instead on flat-file storage, which simplifies installation and maintenance. The entire system can be set up with a single file, and its minimalistic design ensures fast performance. It offers basic features like customizable themes, plugins, and SEO-friendly settings, allowing users to build functional websites with minimal hassle.
In this tutorial, we'll show you how to install WonderCMS on an AlmaLinux 9 server. You will run WonderCMS with the Httpd web server and PHP 8.x.
Prerequisites
Before you start, make sure you have the following requirements:
- An AlmaLinux 9 server.
- A non-root user with administrator privileges.
- A domain name pointed to a server IP address.
- A SELinux with the status permissive.
Installing Apache and PHP
WonderCMS is an open-source content management system written in PHP. It's a flat CMS, which means it doesn't require a database like MySQL/MariaDB to install. It used text files as a database.
In this guide, you will install WonderCMS with Apache/httpd web server and PHP 8.x on the AlmaLinux 9 server.
First, run the command below to install the httpd web server and PHP packages to your AlmaLinux server. At this time, you can install WonderCMS with PHP 8.x on your system.
sudo dnf install httpd php php-common php-curl php-opcache php-xml php-gd php-mbstring php-zip php-json wget unzip git
Type y to confirm the installation.
Once the installation is complete, open the default PHP configuration /etc/php.ini using the following nano editor command.
sudo nano /etc/php.ini
Change the default configuration with the following, and make sure to adjust both date.timezone, and memory_limit options with your environment.
date.timezone = Europe/Amsterdam
memory_limit = 512M

upload_max_filesize = 128MB
post_max_size = 128MB

max_execution_time = 300
max_input_vars = 5000
When finished, save the file and quit the editor.
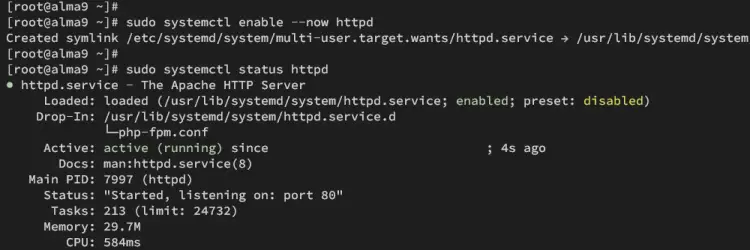
Now run the following command to start and enable the httpd service. Then, verify it to ensure that the service is running.
sudo systemctl enable --now httpd
sudo systemctl status httpd
If the httpd service running, you should get an output like the following:
Setting up Firewalld
After you have installed Apache and PHP, you need to open ports for both HTTP and HTTPS via the firewalld. This will allow access to your WonderCMS installation, on both HTTP and HTTPS protocols.
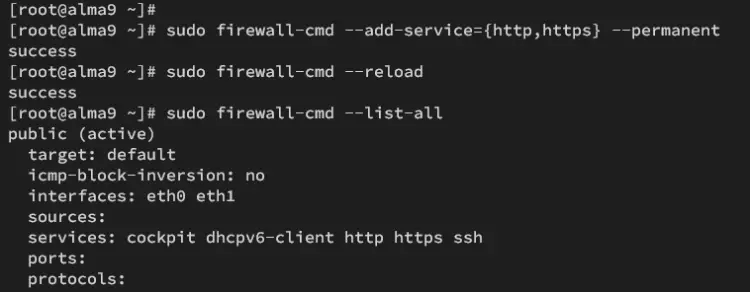
Open both HTTP and HTTPS service on firewalld using the command below. You will see an output success.
sudo firewall-cmd --add-service={http,https} --permanent
Now run the command below to reload firewalld rules and apply the new changes.
sudo firewall-cmd --reload
Lastly, verify the firewalld rules using the command below. Make sure both HTTP and HTTPS services is added to the firewalld.
sudo firewall-cmd --list-all
Downloading WonderCMS source code
In this section, you will be downloading the WonderCMS source code and configuring the document-root directory with proper permission and ownership. So make sure to visit the WonderCMS GitHub page and grab the latest download link.
Move to the /var/www directory and download the latest version of WonderCMS using the wget command below. Make sure to visit the WOnderCMS GitHub page to grab the latest version.
cd /var/www/
wget https://github.com/WonderCMS/wondercms/releases/download/3.4.3/wondercms-343.zip
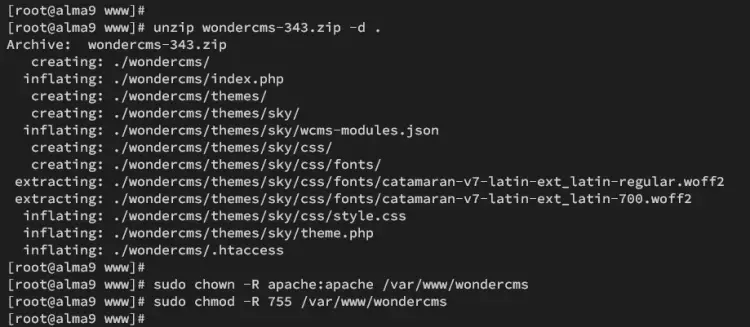
Once downloaded, run the unzip command below to extract the WonderCMS source code to /var/www/wondercms. This directory will be the DocumentRoot for WonderCMS.
unzip wondercms-343.zip -d .
Now run the following command to change the ownership of the /var/www/wondercms directory to the 'apache' user and the default permission to 755.
sudo chown -R apache:apache /var/www/wondercms
sudo chmod -R 755 /var/www/wondercms
Setting up httpd virtual host
After you have downloaded and configured Document-Root for WonderCMS, you will create a new Apache/httpd virtual host configuration that will be used to run WonderCMS installation. Make sure that you have a domain name pointed to your IP address. Also, you must ensure that the mod_rewrite module in httpd is enabled.
Create a new httpd virtual host configuration /etc/httpd/conf.d/wondercms.conf using the following nano editor command.
sudo nano /etc/httpd/conf.d/wondercms.conf
Insert the configuration below into the file and make sure to change the ServerName option with your target domain name.
```
<VirtualHost *:80>
 ServerName cms.howtoforge.local
 DirectoryIndex index.php
 DocumentRoot /var/www/wondercms
 Redirect /wondercms/loginURL /loginURL

 ErrorLog /var/log/httpd/cms.howtoforge.local-error.log
 CustomLog /var/log/httpd/cms.howtoforge.local-access.log combined

 <Directory /var/www/wondercms>
 Options FollowSymLinks
 AllowOverride All
 Require all granted
 </Directory>

</VirtualHost>
Save the file and exit the editor.
Now run the command below to verify your httpd syntax to ensure there is no error. You will see an output Syntax OK if you have proper httpd syntax.
sudo apachectl configtest
Lastly, restart the httpd web server to apply the new virtual host file for WonderCMS. After the command is executed, your WonderCMS installation should be accessible.
sudo systemctl restart httpd
Securing WonderCMS with HTTPS via Certbot
Now that you have created the Apache/httpd virtual host, the next step is to secure WonderCMS with HTTPS via Certbot and Letsencrypt. You must ensure that the EPEL repository is added to your system, the Certbot package is available on the EPEL repository.
Install the EPEL repository to your AlmaLinux server with the command below.
sudo dnf install epel-release
Once the EPEL repository is added, install the certbot and python3-certbot-apache plugin using the dnf command below. Type y to confirm the installation.
sudo dnf install certbot python3-certbot-apache
After the installation is complete, run the certbot command below to generate SSL/TLS certificates for your WonderCMS installation. Make sure to change the domain name and email address with your information.
sudo certbot --apache --agree-tos --no-eff-email --redirect --hsts --staple-oscp --email [email protected] -d cms.howtoforge.local
Accessing WonderCMS
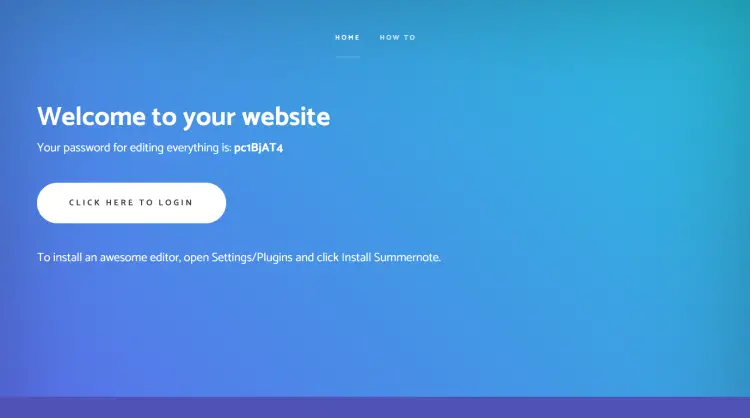
Open the web browser and visit your WonderCMS domain name, such as https://cms.howtoforge.local/. On the WonderCMS homepage, you should see the generated password. Copy the password save it in the secret place and press the button CLICK HERE TO LOGIN.
Paste your generated password and click LOGIN.
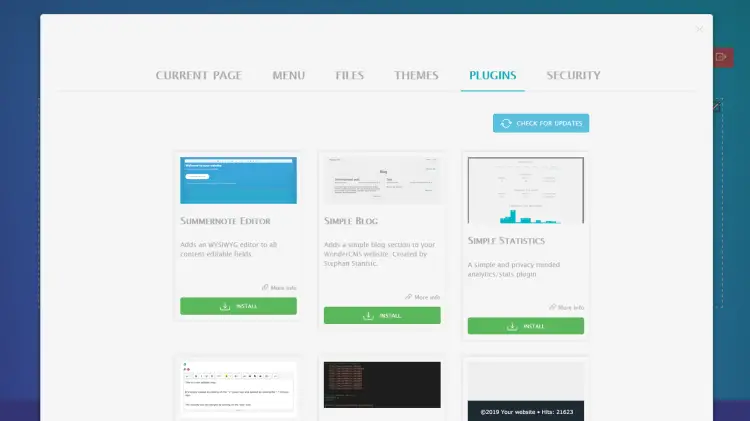
If successful, you should get the WonderCMS administration page like the following:
Conclusion
Congratulations! You have completed the installation of WonderCMS on the AlmaLinux 9 server. Your WonderCMS installation is running with Httpd web server and PHP 8.x. Also secured with firewalld and HTTPS via certbot. From here, you can upload text files, and install new themes or plugins.


