How To Install VMware Server 1.0.x On A Kubuntu 10.04 Desktop - Page 2
On this page
Next do this:
cd /home/mum/Downloads
wget -c http://www.insecure.ws/warehouse/vmware-update-2.6.32-5.5.9.tar.bz2
tar xvfj vmware-update*.tar.bz2
Before we finish the VMware Server installation, we must build a new kernel with the init_mm feature enabled. Become root...
sudo su
... and install the kernel source:
apt-get install linux-source-2.6.32
Next we install a few packages that we need to build the kernel:
apt-get install fakeroot build-essential crash kexec-tools makedumpfile kernel-wedge linux libncurses5-dev kernel-package
If you notice that a new kernel gets installed during this command, please reboot the system:
reboot
Now become root again:
sudo su
Next do this:
cd /usr/src
tar xvfj linux-source-2.6.32.tar.bz2
cd linux-source-2.6.32
Open arch/x86/kernel/init_task.c...
kate arch/x86/kernel/init_task.c
... and add the line
EXPORT_UNUSED_SYMBOL(init_mm);
right at the end of the file, behind
DEFINE_PER_CPU_SHARED_ALIGNED(struct tss_struct, init_tss) = INIT_TSS;:
[...] DEFINE_PER_CPU_SHARED_ALIGNED(struct tss_struct, init_tss) = INIT_TSS; EXPORT_UNUSED_SYMBOL(init_mm); |
Then copy the kernel configuration of the current kernel into the kernel source directory...
cp /boot/config-`uname -r` .config
... and run:
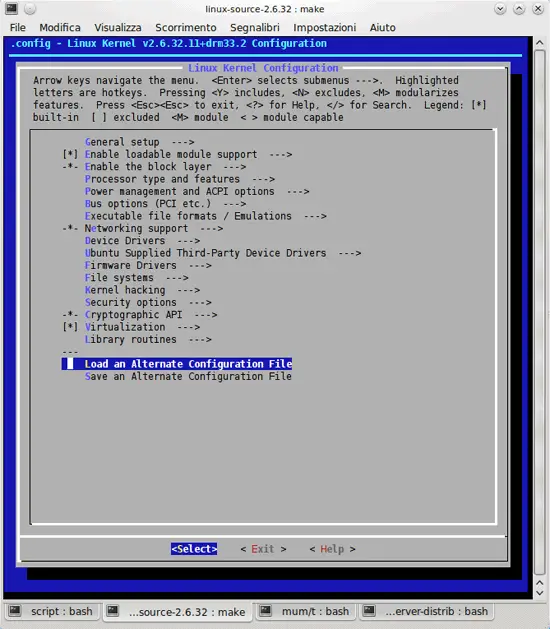
make menuconfig
In the kernel configuration menu, go to Load an Alternate Configuration File...
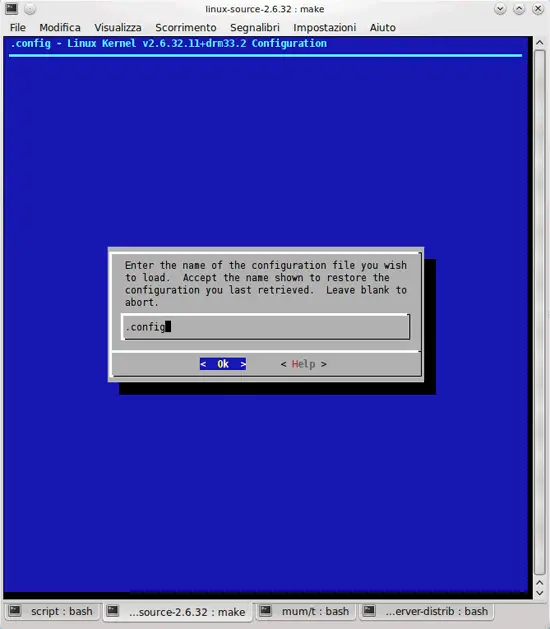
... fill in .config and select Ok:
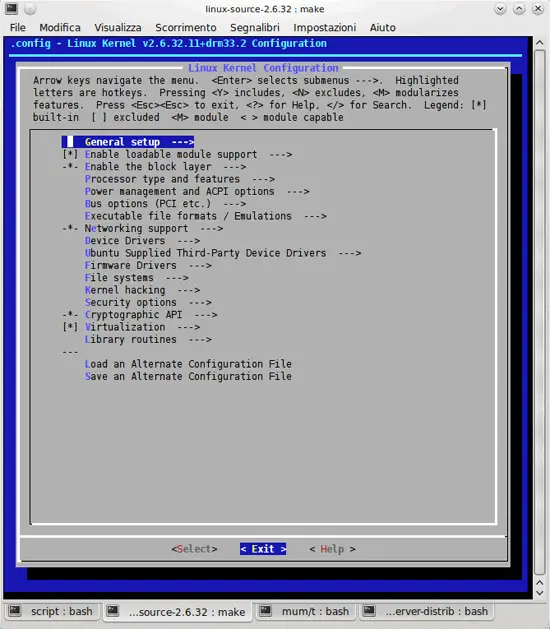
Next select Exit in the main kernel configuration menu...
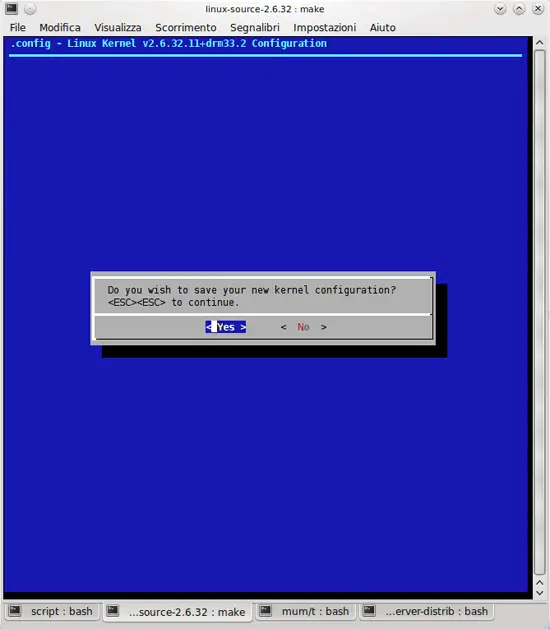
... and then Yes when you're asked: Do you wish to save your new kernel configuration?
Then run
make-kpkg clean
fakeroot make-kpkg --initrd --append-to-version=-custom kernel_image kernel_headers
to build the new kernel. This can take a lot of time so be patient.
Afterwards you can find a linux-image and a linux-headers .deb package in the /usr/src/ directory:
cd /usr/src/
ls -l
root@KubuMuM1004lts:/usr/src# ls -l
totale 105304
drwxrwsr-x 6 root src 4096 2010-05-17 12:36 .
drwxr-xr-x 11 root root 4096 2010-05-10 10:14 ..
drwxr-xr-x 24 root root 4096 2010-05-17 12:36 linux-headers-2.6.32.11+drm33.2-custom
-rw-r--r-- 1 root src 6506940 2010-05-17 12:27 linux-headers-2.6.32.11+drm33.2-custom_2.6.32.11+drm33.2-custom-10.00.Custom_amd64.deb
drwxr-xr-x 24 root root 4096 2010-05-13 13:46 linux-headers-2.6.32-22
drwxr-xr-x 7 root root 4096 2010-05-13 13:47 linux-headers-2.6.32-22-generic
-rw-r--r-- 1 root src 35487712 2010-05-17 12:26 linux-image-2.6.32.11+drm33.2-custom_2.6.32.11+drm33.2-custom-10.00.Custom_amd64.deb
drwxr-xr-x 26 root root 4096 2010-05-17 17:29 linux-source-2.6.32
-rw-r--r-- 1 root root 65806761 2010-04-28 20:17 linux-source-2.6.32.tar.bz2
root@KubuMuM1004lts:/usr/src#
Install both packages as follows...
dpkg -i linux-image-2.6.32.11+drm33.2-custom_2.6.32.11+drm33.2-custom-10.00.Custom_amd64.deb linux-headers-2.6.32.11+drm33.2-custom_2.6.32.11+drm33.2-custom-10.00.Custom_amd64.deb
Check at this time if the initrd image of your freshly compiled kernel is present in the /boot directory, running:
cd /boot
ls -l
totale 56120
-rw-r--r-- 1 root root 634929 2010-04-16 13:32 abi-2.6.32-21-generic
-rw-r--r-- 1 root root 634929 2010-04-28 18:50 abi-2.6.32-22-generic
-rw-r--r-- 1 root root 110372 2010-05-17 10:28 config-2.6.32.11+drm33.2-custom
-rw-r--r-- 1 root root 110365 2010-04-16 13:32 config-2.6.32-21-generic
-rw-r--r-- 1 root root 110365 2010-04-28 18:50 config-2.6.32-22-generic
drwxr-xr-x 3 root root 4096 2010-05-17 14:56 grub
-rw-r--r-- 1 root root 14393788 2010-05-17 14:53 initrd.img-2.6.32.11+drm33.2-custom
-rw-r--r-- 1 root root 8327398 2010-05-07 23:09 initrd.img-2.6.32-21-generic
-rw-r--r-- 1 root root 14447659 2010-05-13 16:32 initrd.img-2.6.32-22-generic
-rw-r--r-- 1 root root 160280 2010-03-23 10:40 memtest86+.bin
-rw-r--r-- 1 root root 2101323 2010-05-17 12:25 System.map-2.6.32.11+drm33.2-custom
-rw-r--r-- 1 root root 2152657 2010-04-16 13:32 System.map-2.6.32-21-generic
-rw-r--r-- 1 root root 2152657 2010-04-28 18:50 System.map-2.6.32-22-generic
-rw-r--r-- 1 root root 1336 2010-04-16 13:35 vmcoreinfo-2.6.32-21-generic
-rw-r--r-- 1 root root 1336 2010-04-28 18:53 vmcoreinfo-2.6.32-22-generic
-rw-r--r-- 1 root root 4008960 2010-05-17 12:25 vmlinuz-2.6.32.11+drm33.2-custom
-rw-r--r-- 1 root root 4037888 2010-04-16 13:32 vmlinuz-2.6.32-21-generic
-rw-r--r-- 1 root root 4038080 2010-04-28 18:50 vmlinuz-2.6.32-22-generic
And if not, then run:
sudo mkinitramfs -k -o /tmp/initramfs-2.6.32.11-custom 2.6.32.11+drm33.2-custom
sudo update-initramfs -c -k 2.6.32.11+drm33.2-custom
Check again if your /boot directory is correctly formed ... and then reboot the system:
reboot
Afterwards, run
uname -a
... as a normal user, and you should see your new kernel:
mum@KubuMuM1004lts:~$ uname -a
Linux KubuMuM1004lts 2.6.32.11+drm33.2-custom #1 SMP Mon May 17 10:55:41 CEST 2010 x86_64 GNU/Linux
mum@KubuMuM1004lts:~$
Now we can continue with the VMware Server installation:
cd /home/mum/Downloads/vmware-update*/
sudo ./runme.pl
Answer the following question with yes:
Before running VMware for the first time after update, you need to configure it
for your running kernel by invoking the following command:
"/usr/bin/vmware-config.pl". Do you want this script to invoke the command for
you now? [no] <-- yes
Afterwards you can accept the default values simply by hitting <ENTER>.
When the installer asks you
In which directory do you want to keep your virtual machine files?
[/var/lib/vmware/Virtual Machines]
you can either accept the default value or specify a location that has enough free space to store your virtual machines.
At the end of the installation, you will be asked to enter a serial number:
Please enter your 20-character serial number.
Type XXXXX-XXXXX-XXXXX-XXXXX or 'Enter' to cancel:
Fill in your serial number for VMware Server.
After the successful installation, you can delete the VMware Server download file and the installation directory:
cd /home/mum/Downloads
rm -f VMware-server*
rm -fr vmware-server-distrib/
rm -fr vmware-update*
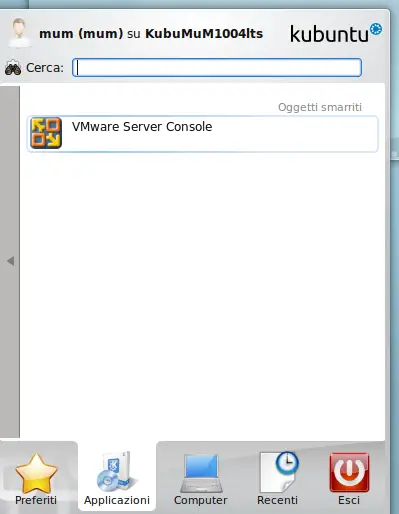
You will now find VMware Server under Applications > Lost Objects > VMware Server Console:
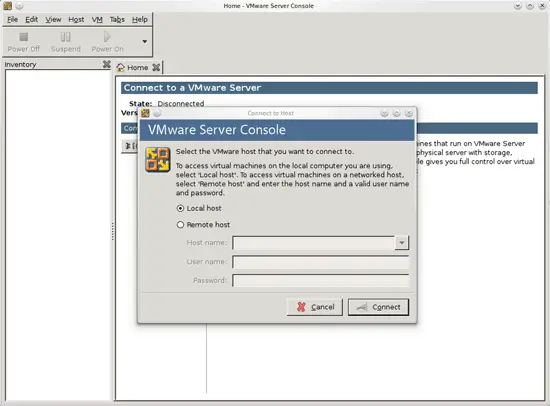
When you start it, select Local host:
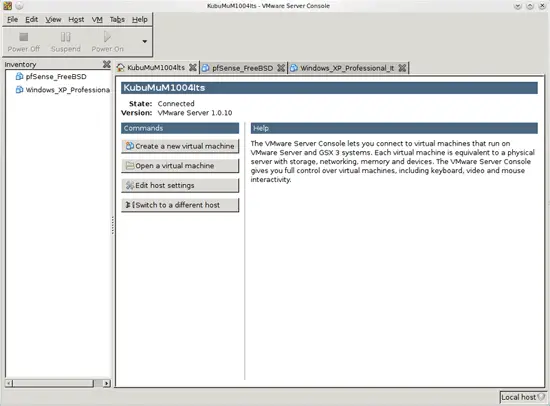
Afterwards, you can create virtual machines (or import your virtual Windows machine that you created with VMware Converter):
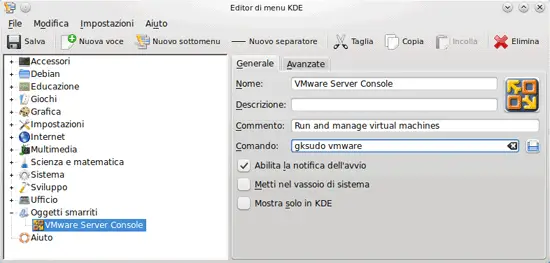
Note: May be necessary, sometimes, run it with "sudo" rights. To do so at "application launch", do:
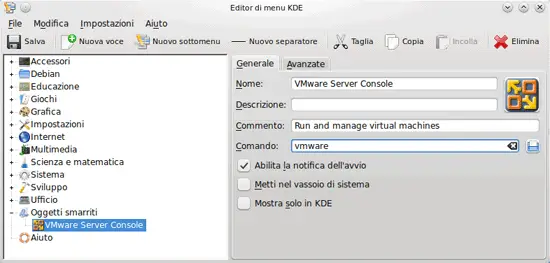
kmenuedit
and add to the command line the gksudo command:
Then save and close the kmenuedit window.
(For installing gksudo if you don't have it, run:
sudo apt-get install gksu
).
From the next lauch on, before VMware starts, the system will ask for your password for "sudo" privileges.
Links
- Kubuntu: http://www.kubuntu.com/
- VMware Server 1.0.x: http://downloads.vmware.com/d/info/datacenter_downloads/vmware_server/1_0

