How to Install SysPass Password Manager on Rocky Linux
SysPass is an open-source password manager written in PHP with AES-256 CTR encryption. It's designed for centralized and collaborative password management. provides advanced profile management, multiuser with users, group, and profile management. Supports authentication methods via MySQL/MariaDB and OpenLDAP Active Directory and designed interactively with material design via HTML5 and AJAX.
SysPass provides an API that allows you to integrate with other applications. Supports Keepass password database and CSV file for imports and exports. It also provides account history and restores points, multi-language, and public links without login (anonymous link).
In this tutorial, you will install SysPass Password Manager with Apache2, MariaDB, and PHP on the Rocky Linux server. You will also secure the SysPass installation with SSL certificates and also learning how to install Composer on Rocky Linux for managing PHP dependencies.
Prerequisites
To complete this tutorial, you will need the following requirements:
- A Rocky Linux server - You can use Rocky Linux v8 or v9.
- A non-root user with sudo root privileges.
- A full domain name is pointed to your server IP address.
Installing Httpd Web Server
For this guide, you will run the SysPass Password Manager with Apache or httpd web server. On Rocky Linux, the httpd web server is available by default on the BaseOS and AppStream repositories.
You will install the httpd web server easily via the official Rocky Linux repository.
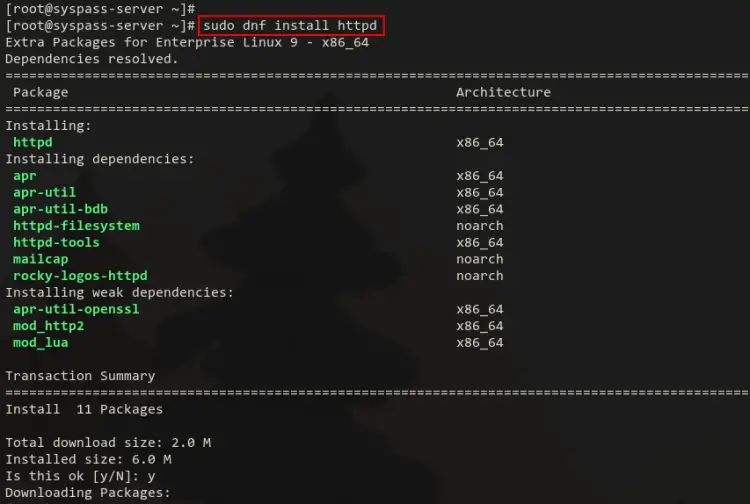
Run the dnf command below to install the httpd web server.
sudo dnf install httpd
Input Y to confirm the installation and press ENTER to proceed.
Once the httpd is installed, run the systemctl command below to start and enabled the httpd service. The 'systemctl enable' command allows you to run services on system boot.
sudo systemctl start httpd
sudo systemctl enable httpd
Now, run the following command to verify the httpd service status and make sure the service is running.
sudo systemctl status httpd
You will receive the output like the following screenshot. The httpd service is currently running and it's enabled.
Now, if you have the firewalld up and running on your Rocky Linux server, you must add both HTTP and HTTPS services to the firewalld.
Run the following firwewall-cmd command below to add HTTP and HTTPS service to the firewalld.
sudo firewall-cmd --add-service=http --permanent
sudo firewall-cmd --add-service=https --permanent
After that, reload the firewalld and verify the status of the rule using the below command.
sudo firewall-cmd --reload
sudo firewall-cmd --list-services
You should see the output of the HTTP and HTTPS service is added to the firewalld.
Installing MariaDB Server
The SysPass Password Manager supports MySQL or MariaDB for the database. In this step, you will install MariaDB and secure it through the mysql_secure_installation command.
The mysql_secure_installation is a command line provided by MariaDB packages that allow you to set your MariaDB installation such as setting up the root password, disabling remote login for the root user, removing the anonymous user, and database testing.
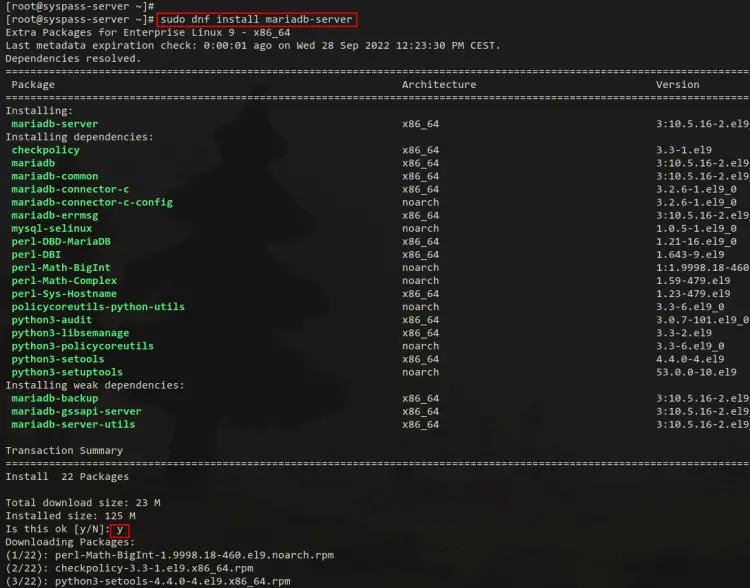
To install MariaDB, run the following dnf command. When prompted to confirm the installation, input Y and press ENTER to proceed.
sudo dnf install mariadb-server
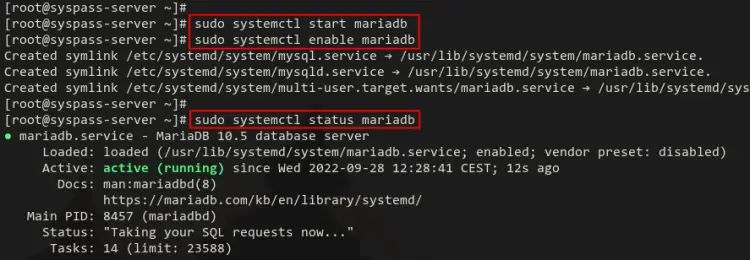
Once MariaDB is installed, start and enable the MariaDB service via the systemctl command below.
sudo systemctl start mariadb
sudo systemctl enable mariadb
Now verify the MariaDB service to make sure the service is enabled and running.
sudo systemctl status mariadb
You should see the output of the MariaDB service is enabled and will be run automatically at system boot. And the status of the MariaDB service is running.
Now that the MariaDB service is running, time to secure the MariaDB deployment via the 'mysql_secure_installation'.
Run the following command to secure your MariaDB deployment.
sudo mysql_secure_installation
Now you will be asked for the following MariaDB server configurations:
- Change authentication to unix_socket? input n for no.
- Change the MariaDB root password? input y to confirm, then input the new password for your MariaDB root user.
- Disable remote login for the root user? input y for yes.
- Remove anonymous user? input y.
- Remove the default database test? input y again.
- Lastly, reload tables privileges and apply new configurations? input y to confirm.
Now you have installed and secured MariaDB on your server.
Installing PHP
After installing the MariaDB, now you will install PHP to your Rocky Linux server. The SysPass Password Manager required PHP 7.4 to be installed, so you will now install it via the REMI repository.
For Rocky Linux 8 - run the following command to add the REMI repository.
sudo dnf install dnf-utils http://rpms.remirepo.net/enterprise/remi-release-8.rpm
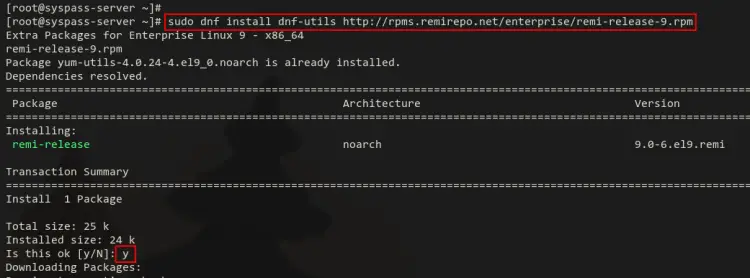
For Rocky Linux 9 - run the following command to add the REMI repository
sudo dnf install dnf-utils http://rpms.remirepo.net/enterprise/remi-release-9.rpm
Input y when prompted to confirm the installation.
Now, run the dnf command below to verify the list of available PHP packages. And you should see the REMI repository provides multiple PHP versions 7.4, 8.0, 8.1, and 8.2.
sudo dnf module list php
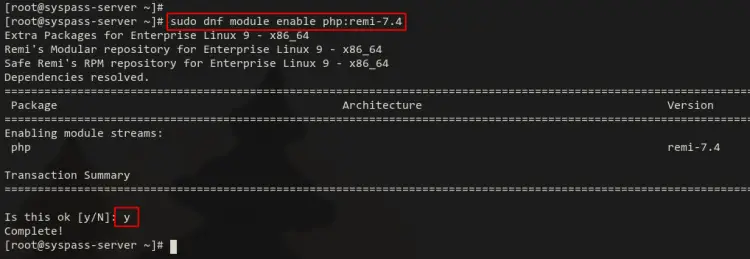
For the SysPass installation, you will install PHP 7.4. So, run the following command to enable the PHP module 'remi-7.4'. Input Y to confirm and enable the module.
sudo dnf module enable php:remi-7.4
Now run the following dnf command to install PHP 7.4 to your system.
sudo dnf install -y php php-pear php-cgi php-cli php-common php-gd php-json php-mysql php-readline php curl php-intl php-ldap php-mcrypt php-xml php-mbstring php-zip
The installation should begin and you will be prompted to confirm the installation. Input y and press ENTER to proceed.
Once PHP is installed, edit the default configuration file '/etc/php.ini' using the following command.
sudo nano /etc/php/7.4/apache2/php.ini
Change the default PHP configuration with the following settings. be sure to adjust the timezone and the memory_limit according to your system environment.
post_max_size = 120M
upload_max_filesize = 120M
max_execution_time = 6000
memory_limit = 256M
date.timezone = Europe/Stockholm
Save the file and exit the editor when you are done.
Now, run the following systemctl command to restart the httpd service and apply PHP configurations. And you have now finished the basic installation of LAMP Stack for SysPass Password Manager.
sudo systemctl restart httpd
Installing Composer
Another dependency that is required for SysPass is a Composer. This will be used to install PHP dependencies for the SysPass web application.
Run the following command to install Composer on your Rocky Linux machine.
curl -sS https://getcomposer.org/installer | php -- --install-dir=/usr/bin --filename=composer
Below you will receive the output:
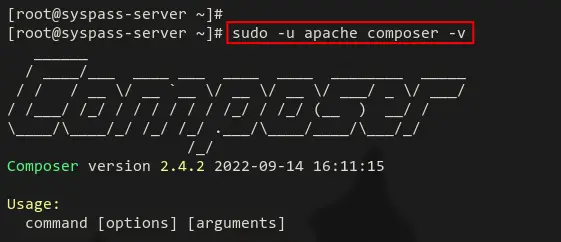
Now, verify the Composer using the command below. You should see the version of PHP Composer that is installed on your system.
sudo -u apache composer -v
After Composer is installed, you will next start the SysPass installation.
Installing SysPass Password Manager
To begin with, run the following dnf command to install git and unzip packages to your system.
sudo dnf install git unzip -y
Now, download the SysPass source code via git command to the target installation directory '/var/www/syspass'.
git clone https://github.com/nuxsmin/sysPass.git /var/www/syspass
Run the following command to change the ownership and permission of the SysPass installation directory. The ownership should be the user 'apache', which is the httpd running on.
sudo chown -R apache:apache /var/www/syspass
sudo chmod 750 /var/www/syspass/app/config /var/www/syspass/app/backup
Next, run the following command to create a cache directory for Composer. Then, change the ownership to the user apache. This directory will be used to store PHP dependencies for your application.
sudo mkdir -p /usr/share/httpd/.cache
sudo chown -R apache:apache /usr/share/httpd/.cache
Lastly, move to the SysPass installation directory '/var/www/syspass' and install PHP dependencies for SysPass via the composer command below.
cd /var/www/syspass
sudo -u apache composer install --no-interaction --no-dev
In the following screenshot, you will see the installation of PHP dependencies for the SysPass Password Manager.
Once PHP dependencies is installed, move to the below step.
Setting up SELinux
If you are running SysPass with SELinux in the enforcing mode, you must add a new SELinux rule to your system.
Before starting to manage SELinux, run the following command to ensure the following package is installed.
sudo dnf install policycoreutils-python-utils -y
After that, run the following command to add the SELinux policy that will be used by SysPass.
In this command, you will allow the httpd service to connect to the LDAP via the network (when you are using LDAP authentication), and also you are labeling the correct label for the SysPass source code.
sudo setsebool -P httpd_can_connect_ldap 1
sudo semanage fcontext -a -t httpd_sys_rw_content_t "/var/www/syspass/app/(config|backup|cache|temp)(/.*)?"
sudo restorecon -R -v /var/www/syspass
Configuring Httpd Virtual Host
Now you will set up the httpd/apache2 virtual host for the SysPass Password Manager. before you start, ensure that you have SSL certificates and the domain name is pointed to your server IP address.
Run the following dnf command below to install the mod_ssl package for the httpd web server.
sudo dnf install mod_ssl -y
After mod_ssl is installed, run the following command to generate SSL certificates for localhost. You must generate this certificate, otherwise, the httpd will not run. This certificates is used by localhost on the configuration '/etc/httpd/conf.d/ssl.conf'.
sudo openssl req -newkey rsa:4096 -x509 -sha512 -days 365 -nodes -out /etc/pki/tls/certs/localhost.crt -keyout /etc/pki/tls/private/localhost.key
Next, create a new virtual host configuration '/etc/httpd/conf.d/syspass.conf' using the following nano editor command.
sudo nano /etc/httpd/conf.d/syspass.conf
Add the following configuration to the file. And also make sure to change the domain name and the path of SSL certificates.
#
# File: syspass.conf
#

RedirectMatch "^/$" "/index.php"

<Directory "/var/www/syspass">
    DirectoryIndex index.php
    Options -Indexes -FollowSymLinks -Includes -ExecCGI

    <RequireAny>
      Require expr "%{REQUEST_URI} =~ m#.*/index\.php(\?r=)?#"
      Require expr "%{REQUEST_URI} =~ m#.*/api\.php$#"
      Require expr "%{REQUEST_URI} =~ m#^/?$#"
    </RequireAny>
</Directory>

<FilesMatch ".(png|jpg|js|css|ttf|otf|eot|woff|woff2|ico)$">
    Require all granted
</FilesMatch>

<VirtualHost *:80>
  ServerName syspass.howtoforge.local

  ServerAdmin webmaster@localhost
  DocumentRoot /var/www/syspass

  ErrorLog /var/log/httpd/error.log
  CustomLog /var/log/httpd/access.log combined

  <IfModule mod_ssl.c>
    RewriteEngine On
    RewriteCond %{HTTPS} !=on
    RewriteRule ^/?(.*) https://%{SERVER_NAME}/$1 [R,L]
  </IfModule>
</VirtualHost>

<IfModule mod_ssl.c>
  <VirtualHost *:443>
    ServerName syspass.howtoforge.local
    ServerAdmin webmaster@localhost
    DocumentRoot /var/www/syspass

    ErrorLog /var/log/httpd/error.log
    CustomLog /var/log/httpd/access.log combined

    SSLEngine on

    SSLCertificateFile        /etc/letsencrypt/live/syspass.howtoforge.local/fullchain.pem
    SSLCertificateKeyFile /etc/letsencrypt/live/syspass.howtoforge.local/privkey.pem

    <FilesMatch "\.(cgi|shtml|phtml|php)$">
              SSLOptions +StdEnvVars
    </FilesMatch>
    <Directory /usr/lib/cgi-bin>
              SSLOptions +StdEnvVars
    </Directory>

    BrowserMatch "MSIE [2-6]" \
      nokeepalive ssl-unclean-shutdown \
      downgrade-1.0 force-response-1.0
    # MSIE 7 and newer should be able to use keepalive
    BrowserMatch "MSIE [17-9]" ssl-unclean-shutdown
  </VirtualHost>
</IfModule>
Save the file and exit the editor when you are done.
Now run the following command to verify the httpd configuration and make sure you have proper httpd configurations.
sudo apachectl configtest
If you have correct and proper httpd configurations, you will see the output message such as 'Syntax OK'.
Lastly, run the systemctl command below to restart the httpd service and apply new changes. Your SysPass Password Manager is now installed and ready to set up.
sudo systemctl restart httpd
SysPass Password Manager Configuration
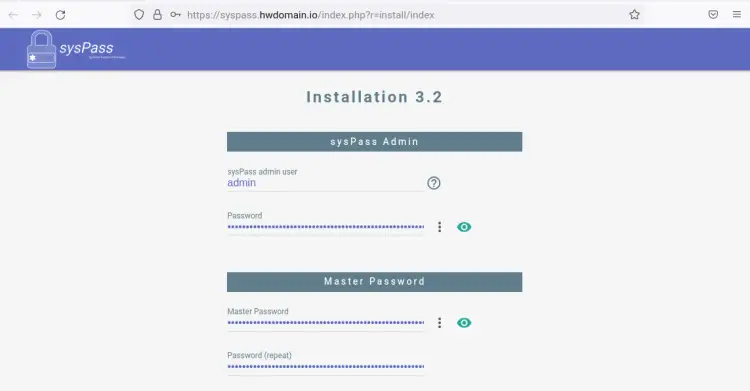
Open your web browser and visit the domain name of your SysPass installation (i.e: https://syspass.howtoforge.local).
Now, you will need to create a new admin user and password for your SysPass. Then, input the new master password. Be sure to use strong and easy to remember for both admin and master passwords.
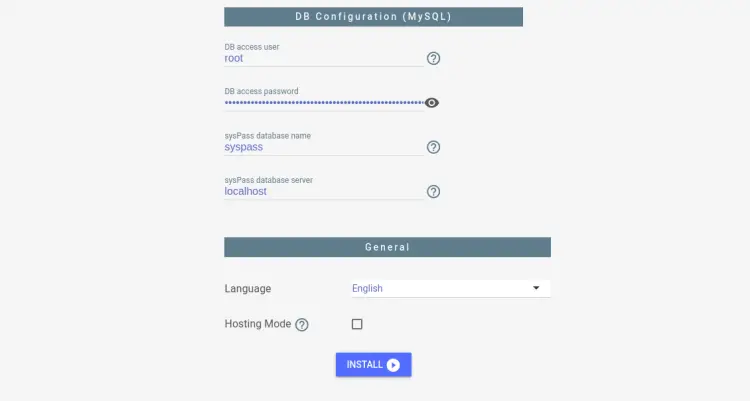
On the bottom page, input the database user name as root and input your password. Then, input the database name that will be created automatically by the SysPass installer.
Also, you can change the default installation language with your preferred language.
When you are ready, click "INSTALL" to start the SysPass installation.
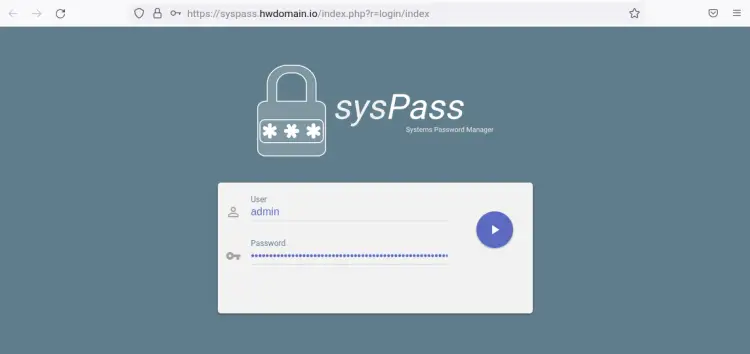
Once SysPass is installed, you will get the login page of SysPass Password Manager.
Input your admin user and password, then click the login button.
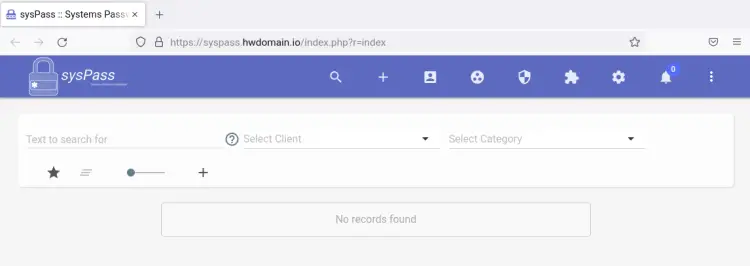
If you are using the correct user and password, you will see the SysPass Password Manager dashboard.
From there, you can now add new users and groups, import database passwords from CSV files or Kepass database files, or you can also integrate the authentication via LDAP.
Conclusion
In this tutorial, you installed and configured the SysPass Password Manager on Rocky Linux. You also have installed the LAMP Stack (Apache2/httpd, MariaDB, and PHP) and Composer on your Rocky Linux server.
With SysPass installed and secured, you can now use it as your daily password manager. or you can add more users for your internal organization.

