How to Install ownCloud on Rocky Linux
On this page
- Prerequistes
- Installing Basic Dependencies
- Installing PHP 7.4 Packages and Extensions
- Installing httpd Web Server
- Installing and Configuring MariaDB Server
- Downloading ownCloud Source Code
- Configuring httpd Virtual Host
- Setting up SELinux
- ownCloud Installation Process
- Finishing: Setting up Cron for ownCloud
- Conclusion
ownCloud is a software-suits for creating file-hosting services like Google Drive and DropBox. It's free and open-source file-hosting software that allows you to set up a self-hosted file-hosting on your own server. ownCloud offers the server application (the main component of the ownCloud software suits), and client applications that can be installed on multiple operating systems such as Linux, Windows, macOS, Android, and iOS.
ownCloud is mainly written in PHP, JavaScript, and Go. And allows you easily to sync calendar events, storing archives, images, and any file formats. And also allows you to organize such as tasks, address books, and many more. ownCloud is an extensible application that allows you to install the additional application on top of it.
In this tutorial, we will walk you through the process of installing and configuring an open-source file hosting ownCloud on the Rocky Linux server. This tutorial will provide the completed installations of ownCloud, which includes the LAMP Stack, Redis, configuring SELinux, and Firewalld.
Prerequistes
To begin, you will need the following requirements to complete this tutorial:
- A Rocky Linux server - This example uses the Rocky Linux 8.x with the hostname 'owncloud-server' and an IP address '192.168.5.100'.
- A non-root user with sudo/root administrator privileges - or you can use the root user.
- A domain name or sub-domain pointed to the server IP address - This example uses the domain name 'howtoforge.local'.
Installing Basic Dependencies
In the following step, you will set up repositories and install basic dependencies for ownCloud. You will install the EPEL repository, configure the Redis repository, and install the latest version of Redis v6, then install basic dependencies such as openssl, ImageMagick, and zip tools.
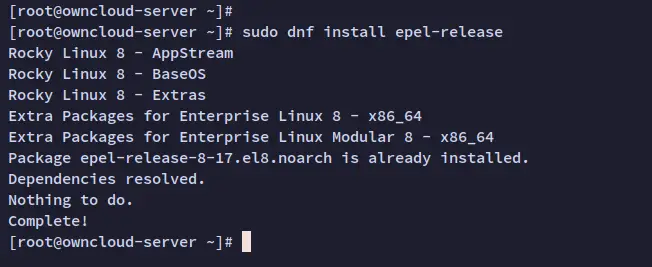
Install the EPEL repository via the dnf command below.
sudo dnf install epel-release
When prompted for confirmation, input y and press ENTER to proceed.
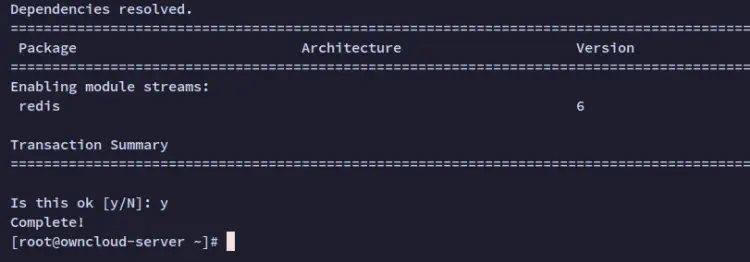
Next, run the following command to enable the repository for Redis v6. The Rocky Linux repository provides multiple versions of Redis, you should enable the latest for the ownCloud installation.
sudo dnf module reset redis
sudo dnf module enable redis:6
Input y when prompted and press ENTER to proceed.
Now that repositories are configured, run the following dnf command to install basic package dependencies for ownCloud.
sudo dnf install libsmbclient redis unzip libzip bzip2 openssl rsync ImageMagick
Press y when prompted for the configuration, then press ENTER.
Once the basic package dependencies are installed, run the following systemctl command to start and enable the 'redis' service.
sudo systemctl enable redis
sudo systemctl start redis
The Redis service should now be running and enabled, which means will be automatically run at system boot.
Lastly, verify the Redis service using the following systemctl command. You should see the Redis service running and enabled.
sudo systemctl status redis
Installing PHP 7.4 Packages and Extensions
The latest version of ownCloud is still required PHP 7.4 for installation and still not yet fully compatible with PHP 8. And for this tutorial, you will install PHP 7.4 via the third-party repository REMI.
You will now set up an additional REMI repository and install PHP 7.4 packages from the REMI repository.
First, run the following command to add the REMI repository for the Rocky Linux 8.x server.
sudo dnf install dnf-utils http://rpms.remirepo.net/enterprise/remi-release-8.rpm
Input y when prompted and press ENTER to proceed.
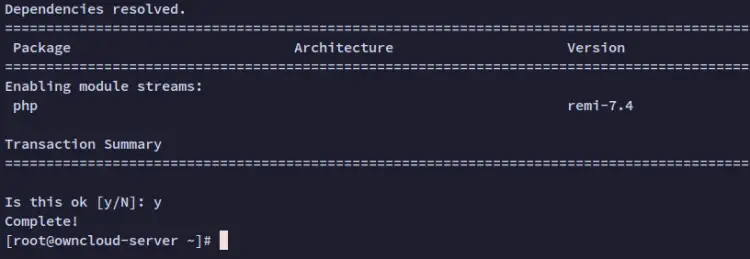
Next, run the following command to enable the REMI repository for PHP 7.4 packages. Input y and press ENTER to confirm.
sudo dnf module reset php
sudo dnf module enable php:remi-7.4
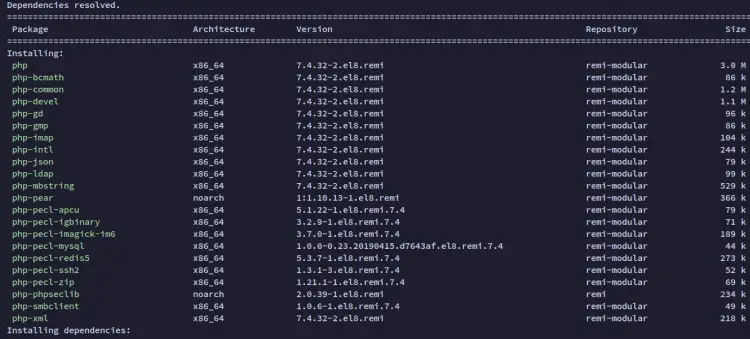
Now that the REMI repository is configured, run the following dnf command to install PHP 7.4 with additional PHP extensions for ownCloud.
sudo dnf install --enablerepo=remi php php-intl php-mysql php-mbstring \
  php-imagick php-igbinary php-gmp php-bcmath \
  php-curl php-gd php-zip php-imap php-ldap \
  php-bz2 php-ssh2 php-common php-json \
  php-xml php-devel php-apcu php-redis \
  php-smbclient php-pear php-phpseclib
When prompted, input y to confirm, then press ENTER.
Once PHP packages are installed, run the following command to verify the current version of PHP on your system.
php --version
You should see that PHP 7.4 are installed on your system.
Installing httpd Web Server
The ownCloud file hosting can be run on some popular web servers such as Apache/httpd, Nginx, and Microsoft IIS. In this example, you will use Apache/Httpd for your ownCloud deployment.
So, you will first install Httpd packages to your Rocky Linux server.
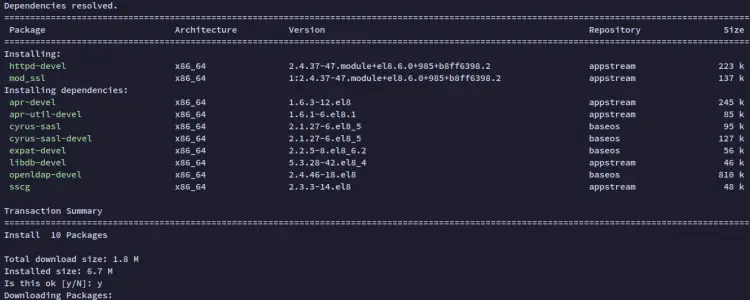
The default httpd web server packages are available on the Rocky Linux appstream repository, install it via the dnf command below.
sudo dnf install httpd httpd-devel httpd-tools mod_ssl
When prompted for the configuration, input y and press ENTER to proceed.
Once httpd is installed, run the following systemctl command to start and enable the httpd service. And now the httpd web server should be running.
sudo systemctl enable httpd
sudo systemctl start httpd
Verify the status of the httpd web server using the command below.
sudo systemctl status httpd
Once you run the command, the following will be printed on your terminal - the httpd service is currently running and enabled, which means the httpd will automatically be run at system boot.
Now that the httpd web server is running, you should now set up the firewalld and allow access to HTTP and HTTPS services.
Run the following command to add HTTP and HTTPS services to the firewalld.
sudo firewall-cmd --add-service=http --permanent
sudo firewall-cmd --add-service=https --permanent
After that, reload the firewalld to apply new changes and verify that HTTP and HTTPS services are added to the firewalld.
sudo firewall-cmd --reload
sudo firewall-cmd --list-services
The following output shows you that the HTTP and HTTPS services are added to the firewalld. And you can now access your httpd installation from outside of your network.
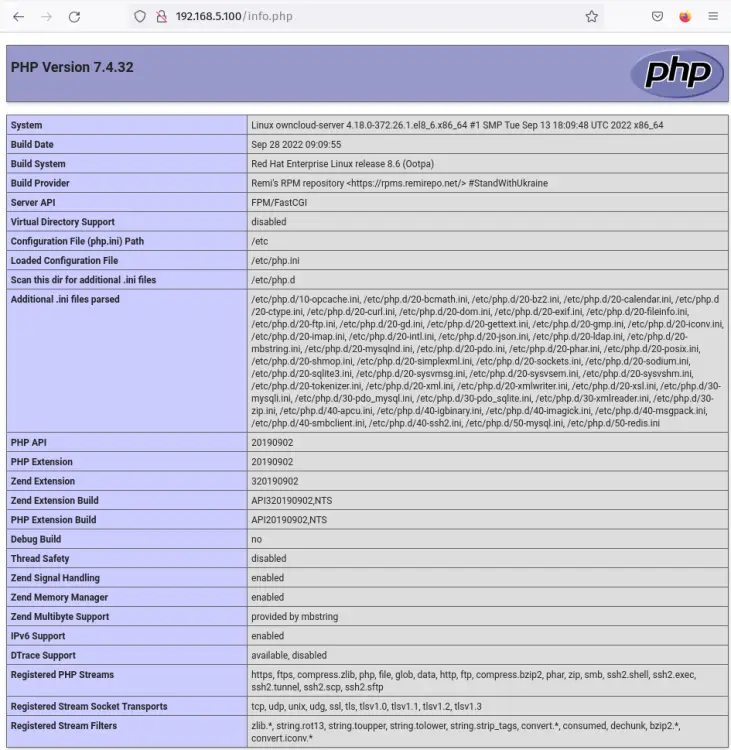
Now that you have installed PHP 7.4 and httpd web server, you will now verify the installation by creating a PHPINFO file and accessing it via the web browser. This will that both PHP 7.4 and httpd are working and you will get detailed information about your PHP configurations.
Run the following command to create a new PHPINFO file '/var/www/html/info.php'.
cat <<EOF | sudo tee /var/www/html/info.php
<?php
phpinfo();
?>
EOF
Lastly, open the web browser on your computer and visit the server IP address followed by the path '/info.php' (i.e: http://192.168.5.100/info.php).
You should the page like the following screenshot - The PHP 7.4 and httpd web server is working and you will also see detailed information and configurations of PHP on your screen.
Installing and Configuring MariaDB Server
ownCloud supports multiple databases for installation. It supports RDBMS such as MariaDB/MySQL, PostgreSQL, Oracle database, and SQLite (the default installation). For the production, you should run ownCloud with MySQL/MariaDB or PostgreSQL, which is more stable and gives you more performance.
In this step, you will install the MariaDB database server, secure the MariaDB via the 'mysql_secure_installation' tool, and create a new database and user for ownCloud deployment.
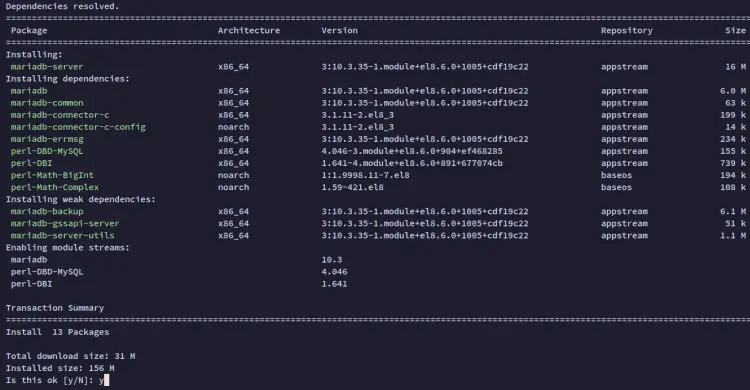
The default MariaDB database server is available on the Rocky Linux repository, run the dnf command below to install it.
sudo dnf install mariadb-server
Input y when prompted for the configuration and press ENTER to install.
Once MariaDB is installed, start and enable the 'mariadb' service via the systemctl command below.
sudo systemctl enable mariadb
sudo systemctl start mariadb
The MariaDB server should now be running, use the following command to verify the service and ensure that the service is running.
sudo systemctl status mariadb
In the following output, you can see the MariaDB database server is running and enabled.
After installing MariaDB, you will next secure your deployment via the 'mysql-secure_installation' command provided by MariaDB packages. This command helps you secure your MariaDB deployment by setting up the root password, deleting the default anonymous user and default database test, disable MariaDB root login remotely.
Execute the following command to start securing MariaDB.
sudo mysql_secure_installation
This will give you some questions about the MariaDB configuration and you should input y to confirm or n for no.
- Switch the authentication method for the root user to unix_socket? Input n.
- Change the MariaDB root password? Input y to confirm, then input the new password and repeat.
- Disallow remote login for the root user? Input y to confirm.
- Delete default anonymous user from MariaDB? Input y to remove the anonymous user.
- Delete default database test from MariaDB? Input y to delete the database test.
- Reload tables privileges? Input y to confirm and MariaDB will be reloading all privileges and applying new changes.
At this point, you have installed and secured the MariaDB installation. Now you will be setting up a new MariaDB database and user for ownCloud. And this can be done via the MariaDB/MySQL shell.
Log in to the MariaDB shell with the root user via the 'mysql' command below.
sudo mysql -u root -p
When asked for the password, input the password for your MariaDB root user.
Now run the following MariaDB queries to create a new database and user for ownCloud. In this example, you will create a new database and user 'owncloud' for the ownCloud installation. Also, be sure to replace the password.
CREATE DATABASE owncloud;
CREATE USER IF NOT EXISTS 'owncloud'@'localhost' IDENTIFIED BY 'owncloudpass';
GRANT ALL PRIVILEGES ON owncloud.* TO 'owncloud'@'localhost' WITH GRANT OPTION;
FLUSH PRIVILEGES;
Next, run the following query to verify the privilege of the 'owncloud' user. Then, run the query 'quit' or 'exit' to log out from the MariaDB shell.
SHOW GRANTS FOR 'owncloud'@'localhost';
quit
In the below screenshot, you will see the user 'owncloud' has access and privileges to the database 'owncloud'.
Downloading ownCloud Source Code
After you have installed MariaDB and created the database and user for wonCloud. In the next step, you will download the ownCloud source and set up the installation directory to '/var/www/owncloud'. At the time of this writing, the latest version of ownCloud is v10.11. and you will download its source code.
Move the working directory to '/var/www'.
cd /var/www
Download the latest version of the ownCloud source and the SHA256 file for verifying the source code.
wget https://download.owncloud.com/server/stable/owncloud-complete-latest.tar.bz2
wget https://download.owncloud.com/server/stable/owncloud-complete-latest.tar.bz2.sha256
Now verify the ownCloud source code via the sha256sum command below. If the source code is verified, you should get the output message 'OK'.
sudo sha256sum -c owncloud-complete-latest.tar.bz2.sha256 < owncloud-complete-latest.tar.bz2
Next, extract the ownCloud source code via the tar command below. You should get the new directory '/var/www/owncloud', which will be used as the installation for ownCloud.
sudo tar -xvjf owncloud-complete-latest.tar.bz2
Lastly, change the ownership of the ownCloud installation directory to the user 'apache' via the command below.
sudo chown -R apache:apache /var/www/owncloud
Configuring httpd Virtual Host
You have to create a new httpd virtual host configuration before accessing your wonCloud installation. Also, ensure you have a domain name pointed to your server IP address and generated SSL certificates for that domain.
You will now be creating a new httpd virtual host configuration for ownCloud. Also, you will enable the secure connection HTTPS for the owncloud via SSL certificates from Letsencrypt.
Create a new httpd virtual host configuration for owncloud '/etc/httpd/conf.d/owncloud.conf' via the nano editor below.
sudo nano /etc/httpd/conf.d/owncloud.conf
Add the following configuration to the file and be sure to change the domain and the path of SSL certificates. In this example, you will install owncloud on the sub-directory with the main domain 'howtoforge.local'.
<VirtualHost *:80>
  ServerName howtoforge.local
  Redirect permanent / https://howtoforge.local/
</VirtualHost>

<VirtualHost *:443>
  ServerName howtoforge.local
  DocumentRoot /var/www

  Protocols h2 http:/1.1

  <If "%{HTTP_HOST} == 'www.howtoforge.local'">
    Redirect permanent / https://howtoforge.local/
  </If>

  ErrorLog /var/log/httpd/howtoforge.local-error.log
  CustomLog /var/log/httpd/howtoforge.local-access.log combined

  SSLEngine On
  SSLCertificateFile /etc/letsencrypt/live/howtoforge.local/fullchain.pem
  SSLCertificateKeyFile /etc/letsencrypt/live/howtoforge.local/privkey.pem

  SSLCipherSuite ECDHE-ECDSA-AES128-GCM-SHA256:ECDHE-RSA-AES128-GCM-SHA256:ECDHE-ECDSA-AES256-GCM-SHA384:ECDHE-RSA-AES256-GCM-SHA384:ECDHE-ECDSA-CHACHA20-POLY1305:ECDHE-RSA-CHACHA20-POLY1305:DHE-RSA-AES128-GCM-SHA256:DHE-RSA-AES256-GCM-SHA384

  SSLProtocol All -SSLv2 -SSLv3 -TLSv1 -TLSv1.1
  SSLCompression off

  Header always set Strict-Transport-Security "max-age=63072000"

  Alias /owncloud "/var/www/owncloud/"

  <Directory /var/www/owncloud/>
    Options +FollowSymlinks
    AllowOverride All

    <IfModule mod_dav.c>
    Dav off
    </IfModule>

    SetEnv HOME /var/www/owncloud
    SetEnv HTTP_HOME /var/www/owncloud

  </Directory>

</VirtualHost>
Save the file and exit the editor when you are finished.
Next, run the following command to verify the httpd configuration and make sure that you have no error. If there is no error, you should get the output message such as 'Syntax OK'.
sudo apachectl configtest
Now restart the httpd service to apply new changes.
sudo systemctl restart httpd
At this point, the basic configurations of LAMP Stack for ownCloud installation are finished. You can access your ownCloud installation via your domain, but at last, you will need to set up SELinux if you are running ownCloud with SELinux enforcing mode.
Setting up SELinux
In this step, you will set up the SELinux configuration for ownCloud. First, you will install the SELinux management tool, then set up labeling for the ownCloud source code and allow the httpd service to access other services.
Run the following command to install the package 'policycoreutils-python-utils' for managing SELinux.
sudo dnf install policycoreutils-python-utils
Input y when prompted for the configuration and press ENTER to proceed.
Next, run the following command to set up the labeling for the ownCloud source code.
sudo semanage fcontext -a -t httpd_sys_rw_content_t '/var/www/owncloud/data(/.*)?'
sudo semanage fcontext -a -t httpd_sys_rw_content_t '/var/www/owncloud/config(/.*)?'
sudo semanage fcontext -a -t httpd_sys_rw_content_t '/var/www/owncloud/apps(/.*)?'
sudo semanage fcontext -a -t httpd_sys_rw_content_t '/var/www/owncloud/apps-external(/.*)?'
sudo semanage fcontext -a -t httpd_sys_rw_content_t '/var/www/owncloud/.htaccess'
sudo semanage fcontext -a -t httpd_sys_rw_content_t '/var/www/owncloud/.user.ini'

sudo restorecon -Rv '/var/www/owncloud/'
Now run the following command to allow httpd services for accessing other network services.
sudo setsebool -P httpd_can_network_connect_db on
sudo setsebool httpd_unified on
sudo setsebool -P httpd_can_connect_ldap on
sudo setsebool -P httpd_can_network_connect on
sudo setsebool -P httpd_can_network_memcache on
sudo setsebool -P httpd_can_sendmail on
sudo setsebool -P httpd_use_cifs on
sudo setsebool -P httpd_use_fusefs on
sudo setsebool -P httpd_use_gpg on
Now that the SElinux is configured, you can start the ownCloud installation via web browser.
ownCloud Installation Process
Now that you have finished the configuration of LAMP Stack and added the virtual host for ownCloud, also configured the SELinux. You can now start the ownCloud installation from your web browser.
In this step, you will start the ownCloud installation and learn how to create a new directory and upload files via the ownCloud user dashboard.
Open your web browser and visit the domain name of your ownCloud installation following the path '/owncloud' (i.e: https://howtoforge.local/owncloud/).
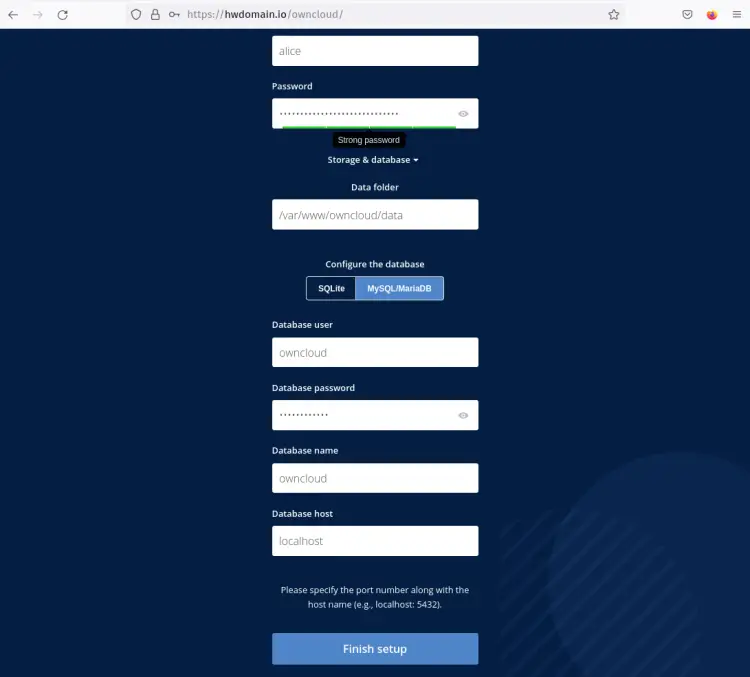
You should now get the page of the ownCloud installation.
Input the new admin user and password for your ownCloud. Then, select the database type MySQL/MariaDB and input details MariaDB database that you have created, and lastly, click the 'Finish setup' button to proceed and install.
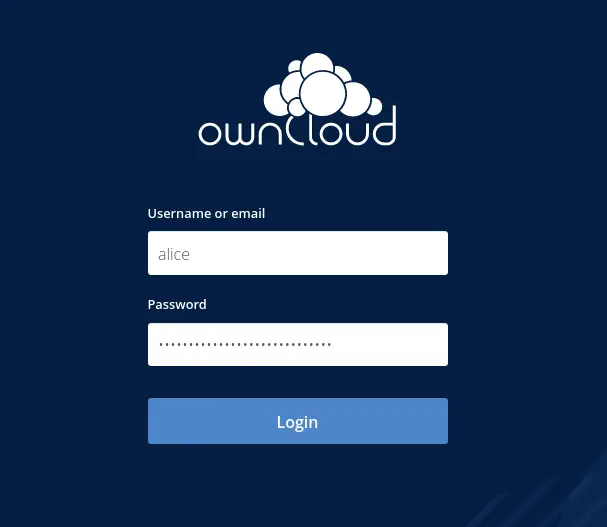
Once ownCloud is installed, you will get the ownCloud login page.
Input the admin user and password for your ownCloud and click 'Login'.
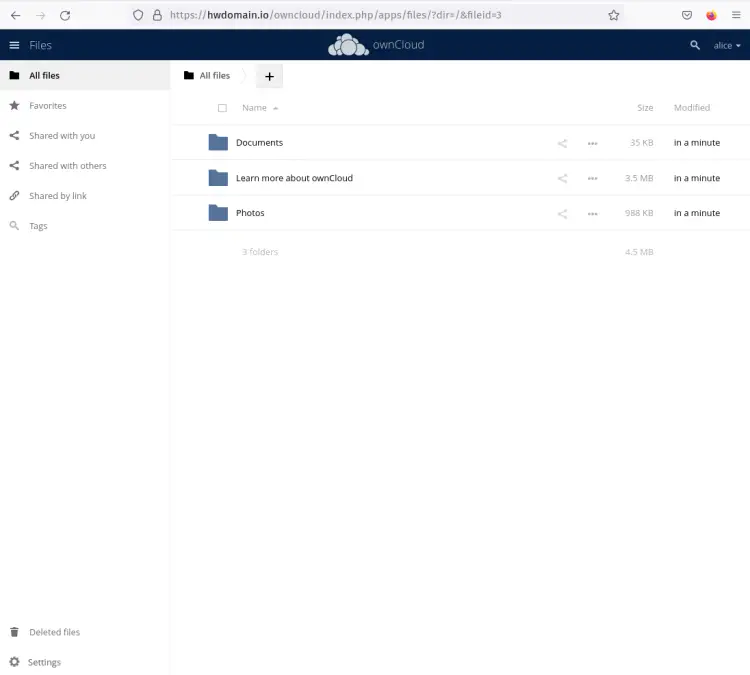
If you are using the correct admin user and password, you should get the page of the ownCloud user dashboard.
From the ownCloud user dashboard, you can now create a new directory and upload new files to the ownCloud.
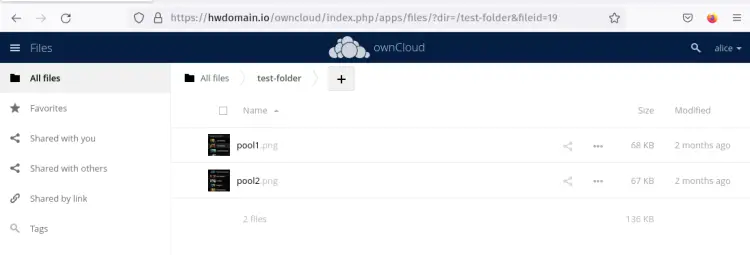
Click the + button on top to create a new directory and upload new files.
In the following screenshot, you can see the new directory 'test-directory' are created with new files uploaded to the directory.
Finishing: Setting up Cron for ownCloud
The ownCloud provides multiple ways for running the process in the background. And you should use cron to run the ownCloud process in the background.
Run the following command to switch the ownCloud background process to cron.
sudo -u apache /var/www/owncloud/occ background:cron
Now create a new cron via the command below.
sudo crontab -u apache -e
When prompted to select the editor, choose the preferred editor and add the new configuration below to the file.
*/15 * * * * /usr/bin/php -f /var/www/owncloud/occ system:cron
Save the file and exit the editor when you are finished.
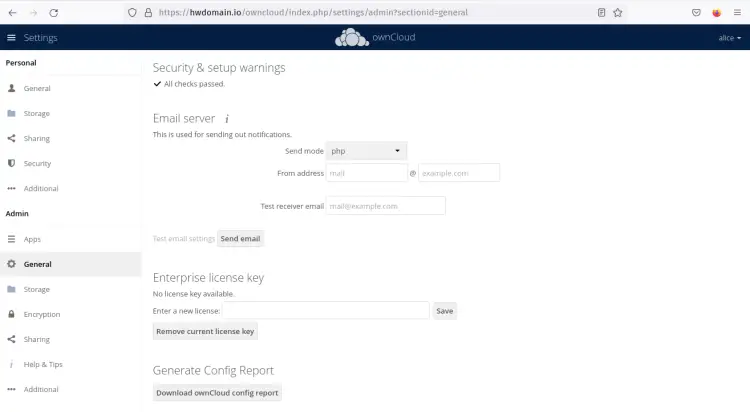
Now back to the ownCloud user dashboard and click the user menu on top, then select 'Settings'.
Next, click the 'General' menu on the left and on the 'Security and setup warnings' section, you should see the message 'All checks passed'. You have finished the ownCloud installation on Rocky Linux without any errors.
Conclusion
In this tutorial, you have installed ownCloud on a Rocky Linux server. You've installed ownCloud self-hosted file hosting with the LAMP Stack (Linux, Apache2/httpd, MariaDB/MySQL, and PHP). You have also secured the ownCloud installation via SSL certificates and running ownCLoud with the SELinux enabled on a Rocky Linux server.
With this completed ownCLoud installation, you can now begin to upload files to your ownCloud server. Or if you'd like to continue, you can now integrate ownCloud with third-party applications that can leverage the functionality of ownCloud, such as from file hosting to collaboration tool.

