How to Install NFS Server and Client on AlmaLinux 9
What is NFS? NFS, or Network File System, is a protocol that allows local users to access remote data from multiple disks and directories like local access. The NFS protocol is originally developed by Sun Microsystem and become the standard protocol for sharing files over a network. It's widely used in a centralized environment where users or client computers will be able to store and access data on/to the one centralized remote server.
NFS can be installed and configured easily on most Linux systems for both NFS Server and Client. Almost every Linux distribution provides NFS packages by default on their repository. The package name is different, but the configuration is still the same for almost Linux distributions.
This tutorial will show you how to install NFS Server on AlmaLinux 9. Moreover, you will also set up a client machine to mount shared directories from NFS Server and set up auto-mount at boot via /etc/fstab file.
Prerequisites
Before you begin, you must ensure that you have the following:
- An AlmaLinux 9 server - In this demo, we're using a server with the hostname almalinux9-server and IP address 192.168.10.15.
- A non-root user with sudo/administrator root privileges.
- One or more client machines - It can be any RHEL-based distribution.
Installing NFS Server
To set up an NFS (Network File Storage) on Almalinux, you just need to install the nfs-utils on both the NFS server and client. It's available on the AppStream repository, you can easily install it via DNF.
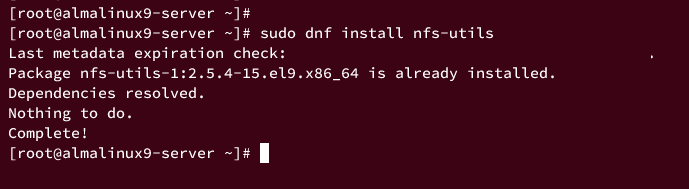
Run the following command to install the nfs-utils package. Input y when prompted, then press ENTER.
sudo dnf install nfs-utils
Now, open the file /etc/idmapd.conf using the nano editor command below.
sudo nano /etc/idmapd.conf
Uncomment the Domain parameter and change the value to your server FQDN (fully qualified domain name) or use the hostname.
Domain = almalinux9-server
Save and exit the file when finished.
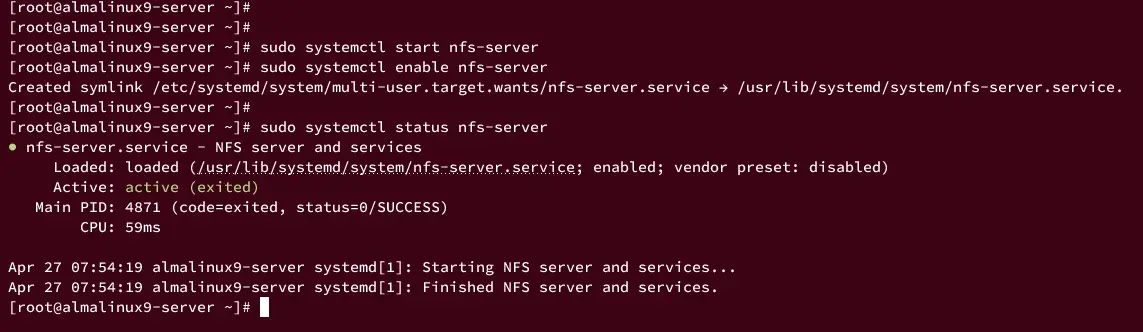
Next, run the following command to start and enable the NFS service.
sudo systemctl start nfs-server
sudo systemctl enable nfs-server
Then, verify the NFS service using the below command to ensure that the NFS is running.
sudo systemctl status nfs-server
If your installation is successful, you should receive an output like this:
Creating Shared Directories
Now that you have the NFS server up and running, the next step is to set up the shared directory for clients. So let's get started.
First, create two directories /mnt/shared and /mnt/backup using the following command.
sudo mkdir -p /mnt/shared /mnt/backup
Change the ownership of both directories to user and group nobody, then change the default permission to 775.
sudo chown -R nobody:nobody /mnt/shared /mnt/backup
sudo chmod 775 /mnt/shared /mnt/backup
Next, create a new configuration file aa using the nano editor.
sudo nano /etc/exports
Insert the following lines into the file. In this example, we'll set up three shared directories /mnt/backup and /home for the client 192.168.10.21, and /mnt/shared for the entire network in 192.168.10.0/24.
/mnt/backup  192.168.10.21(rw,sync,no_subtree_check)
/home 192.168.10.21(rw,sync,no_root_squash,no_subtree_check)
/mnt/shared 192.168.10.0/24(rw,sync,no_subtree_check)
Save and close the file when you're finished.
Here are some important NFS parameters that you should know:
- rw: Enable read and write for target shared directory.
- sync: This option will ensure that data is written to the disk first before client make new another request. This way, your data is safe, but at a slower speed for read/write operations.
- no_subtree_check: Disable subtree checking to improve the speed and performance of the NFS server. The subtree checking is a process to ensure there will be no conflict when users change the filename.
- no_root_squash: This will disable squashing, which allows NFS clients to have the root privileges within the shared directory. In this example, we will disable squashing for only the shared directory /home.
Now, run the following command to restart the NFS server and apply the changes.
sudo systemctl restart nfs-server
Once NFS restarted, run the following command to check the list of shared directories on the NFS server.
sudo exportfs -v
If operations were successful, you should see the list of NFS shared directories on your terminal like this:

Securing NFS Server with Firewalld
Having the NFS shared directory configured, the next step is to set up firewalld and open some ports/services for clients. Before you start, ensure that you've firewalld up and running.
Now, run the following command to add some NFS services to the firewalld.
sudo firewall-cmd --add-service={nfs,nfs3,mountd,rpc-bind} --permanent
Then, reload the firewalld to apply the changes.
sudo firewall-cmd --reload

After that, verify your firewalld rules using the below command.
sudo firewall-cmd --list-all
The expected output should be like this:

Setting Up NFS Client
This section will cover how to set up an NFS client using also AlmaLinux server, which can be implemented on most RHEL-based distributions.
Log in to your client, then run the following command to install the nfs-utils package. When prompted, input y to confirm and press ENTER.
sudo dnf install nfs-utils
Now, run the following command to check available shared directories on the NFS server 192.168.10.15.
sudo showmount -e 192.168.10.15
You should expect to see three different shared directories available on your NFS server, /mnt/backup, /mnt/shared, and /home.

Next, enter the following command to create new directories/data, /backup, and /shared that will be used to mount NFS shared directories.
sudo mkdir -p /data /backup /shared
Run the following command to mount NFS-shared directories. In this example, we'll mount the shared directory /mnt/backup to /backup, /mnt/shared to /shared, and /home to /data.
sudo mount 192.168.10.15:/mnt/backup /backup
sudo mount 192.168.10.15:/mnt/shared /shared
sudo mount 192.168.10.15:/home /data
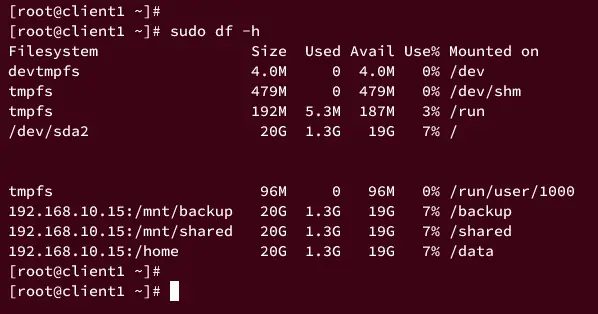
Lastly, verify the list of mounted file systems on the client machine using the following command.
sudo df -h
If the process was successful, you will see NFS shared directories mounted on the client machine like this:
Verify Write Access from Client
After NFS shared directories are mounted on the client machine, you must ensure read and write access to the shared directories.
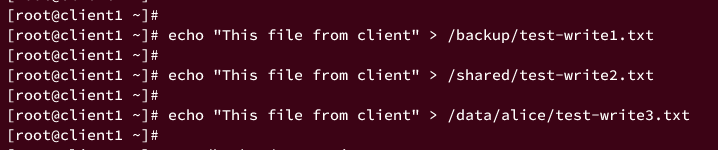
On the client machine, run the following command to create new files /backup/test-write1.txt, /shared/test-write2.txt, and /home/alice/test-write3.txt.
echo "This file from client" > /backup/test-write1.txt
echo "This file from client" > /shared/test-write2.txt
echo "This file from client" > /data/alice/test-write3.txt
If the NFS server and client installation are successful, the new files you've created on the client machine will be available on the NFS server.
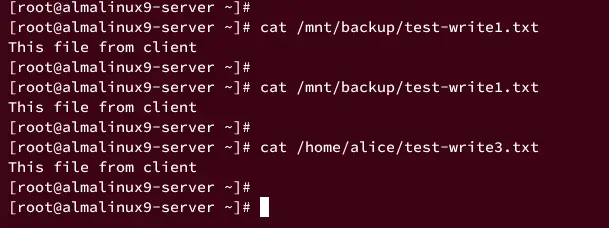
Now go back to the NFS server and run the following command to ensure that new files are available on the NFS server.
cat /mnt/backup/test-write1.txt
cat /mnt/shared/test-write2.txt
cat /home/alice/test-write3.txt
From the output below, we can see that the file is available on the NFS server.
Configuring auto-mount NFS Shared Directory via /etc/fstab
After verifying the read and write access on NFS, you may also need to set up auto-mount of the NFS server on the client machine. So, whenever the client machine is restarted, the NFS shared directory will be mounted automatically during the boot, and this can be done via the /etc/fstab file.
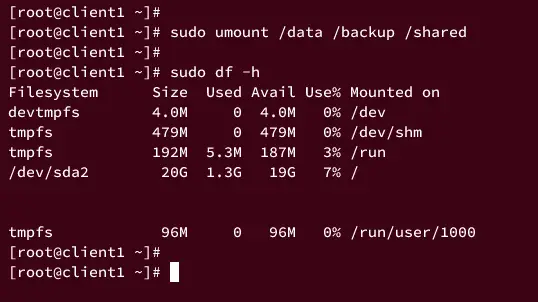
First, umount and verifyNFS shared directories on the client machine using the following command.
sudo umount /data /backup /shared
sudo df -h
Open the /etc/fstab file using the following nano editor command.
sudo nano /etc/fstab
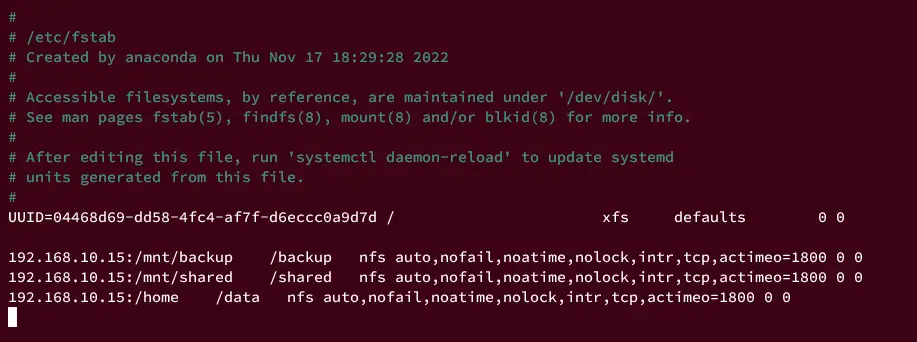
Add the following options and be sure to customize the details of shared directories and target mount directories.
192.168.10.15:/mnt/backup    /backup   nfs auto,nofail,noatime,nolock,intr,tcp,actimeo=1800 0 0
192.168.10.15:/mnt/shared    /shared   nfs auto,nofail,noatime,nolock,intr,tcp,actimeo=1800 0 0
192.168.10.15:/home    /data   nfs auto,nofail,noatime,nolock,intr,tcp,actimeo=1800 0 0
Save the file and exit the editor once you're done.
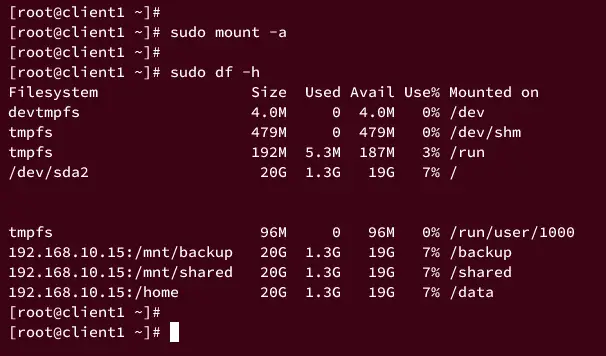
Next, run the following command to verify the /etc/fstab configuration. And if you have a proper fstab file, the NFS shared directories will be mounted after the command is executed.
sudo mount -a
Verify using the following command to get your client's mounted file systems list.
sudo df -h
You should see NFS shared directories are mounted on the client via the 'mount -a' command based on the /etc/fstab file.
The client machine will automatically mount NFS-shared directories at system boot.
Conclusion
Congratulations! You've successfully installed NFS Server and Client on AlmaLinux 9 server. You've also learned the basic usage of some commands such as mount for mounting file systems, exportfs for managing NFS shared directories, and df for displaying mounted file systems. Moreover, you've also configured the auto-mount of NFS shared directories on the client machine via the /etc/fstab file.
For the next step, take a look at additional security for the NFS server.

