How to Install Neos CMS on Debian 11
Neos is a free and open-source content management system with intuitive editing, complete internationalization, maximum flexibility, and ease to integration with 3rd party systems.
Neos is an enterprise content management built-in with custom content modeling that provides an effective way to edit and manage content, SEO optimization such as automatic redirects and SEO metadata, and powerful roles and user management.
In this tutorial, we will explore how to install the latest version of Neos CMS on a Debian 11 server. For this example, we will set up Neos CMS with the MariaDB database server, PHP 8.1, and the Apache2 web server.
Prerequisites
To follow this tutorial, you will need a Debian 11 server with the non-root user and the sudo/administrator privileges, and the UFW firewall enabled. Also, you will need a domain name that is pointed to your Debian server IP address, especially if you're installing Neos CMS for production.
Installing Apache2 Web Server
The Neos CMS can be running on multiple web servers and for this demo, you will use the Apache2 web server.
Before start installing packages, run the following apt command to update and refresh your Debian repositories.
sudo apt update
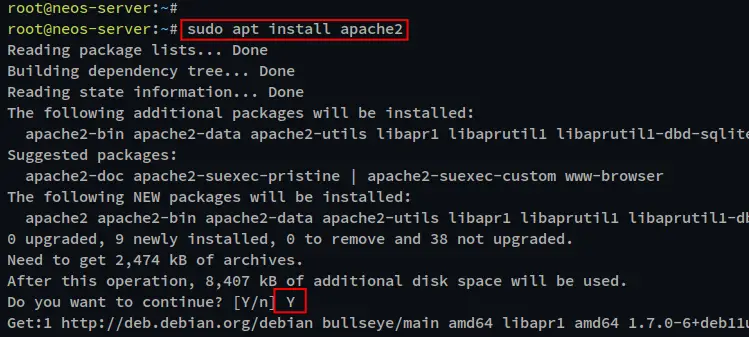
Then, install the Apache2 web server with the command apt below. You will be asked to confirm the installation. Press y and ENTER to proceed with the installation.
sudo apt install apache2
Once Apache2 installation is complete, check and verify the 'apache2' service via the systemcl command below.
sudo systemctl is-enabled apache2
sudo systemctl status apache2
You will see the output of the 'apache2' is enabled and will be running automatically at boot. And the status of the 'apache2' service is running.
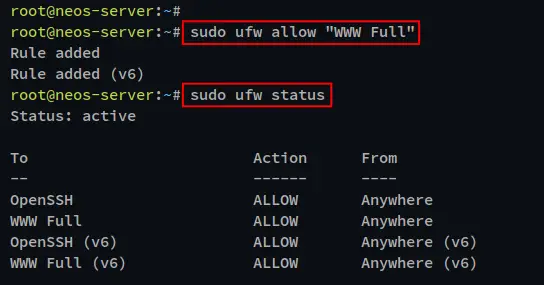
Lastly, open the HTTP and HTTPS ports on the Debian server and allow traffic into it via the ufw command below. The ufw application profile "WWW Full" will allow access to both HTTP and HTTPS ports.
sudo ufw allow "WWW Full"
sudo ufw status
You will see the output of the current status of the UFW firewall is active and the list of ports and enabled application profiles.
Installing MariaDB Database Server
The Neos CMS supports two databases, MariaDB and PostgreSQL. In this example, you will run the Neos CMS with the MariaDB database server. At the time of this writing, the current Neos CMS required at least MariaDB 10.2.2.
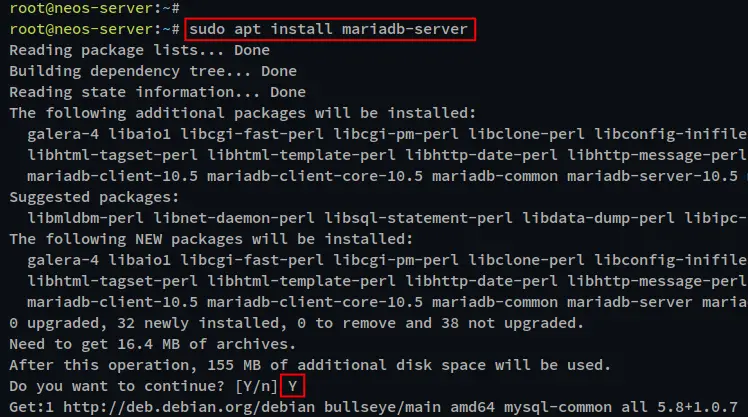
Run the following apt command to install the MariaDB on your Debian server. The default MariaDB version on the Debian repository is MariaDB 10.5, which is compatible with the Neos CMS installation.
sudo apt install mariadb-server
When prompted to confirm the process, input y and ENTER to proceed with the installation.
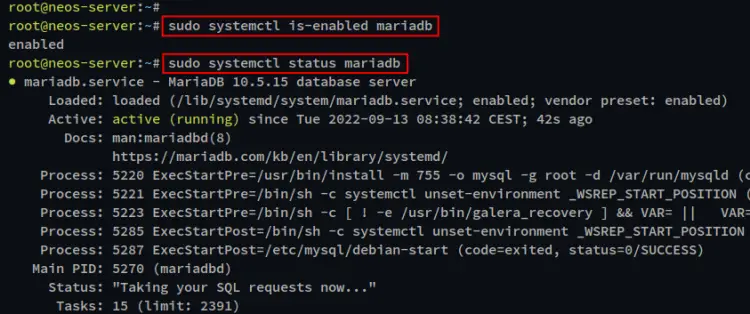
Once the MariaDB is installed, check the MariaDB service and verify the service is running via the systemctl command as below.
sudo systemctl is-enabled mariadb
sudo systemctl status mariadb
You will see the output of the MariaDB service is enabled, which means it will be running automatically at system boot. And the current status of the MariaDB service is running.
Lastly, you will need to secure your MariaDB server installation. To do that, you can use the script 'mysql_secure_installation' that is included by default on the MariaDB package.
Run the following command 'mysql_secure_installation'.
sudo mysql_secure_installation
You will be guided step-by-step for securing your MariaDB server installation. This process includes the configuration of the MariaDB root password. So, be sure to use a strong password for your MariaDB server installation.
On the next prompts, you will be asked about the configuration such as removing the default anonymous user, disallowing remote login for the root user, removing the default database test, and reloading tables privileges. Input Y for all of these prompts and press ENTER to proceed.
Setting up MariaDB Database and User
After you have installed and secured the MariaDB server, you will create a new MariaDB database and user for Neos CMS installation. To do that, you must log in to the MariaDB shell.
Run the mysql command below to log in to the MariaDB shell via the default user root. When prompted for the password, input your MariaDB root password.
sudo mysql -u root -p
Now, run the following queries to create a new database and user for Neos CMS. In the following queries, you will create the database neosdb, the MariaDB user neos@localhost.
Be sure to replace the password for the neos@localhost user with a storng password.
CREATE DATABASE neosdb;
CREATE USER neos@localhost;
GRANT ALL PRIVILEGES ON neosdb.* TO neos@localhost IDENTIFIED BY 'Password';
FLUSH PRIVILEGES;
After that, run the following query to verify the privileges for the neos@localhost user.
SHOW GRANTS FOR neos@localhost;
If your database and user are configured properly, you will see the output of the neos@localhost user has the privilege to the database neosdb.
Lastly, input the following query to log out from the MariaDB shell.
quit
Installing PHP 8.1 Packages
Now you will be installing PHP packages to your Debian server. The latest version of Neos CMS required at least the PHP 7.3, and for this example, you will install PHP 8.1 from a third-party repository.
In the following table, you can see the latest version of Neos CMS v8 required the PHP 8.0 or 8.1.
Neos version    Flow version    compatible PHP version
-------------------------------------------------------
4.3             5.3             7.1 - 7.4*
5.x             6.x             7.2 - 7.4
7.x             7.x             7.3 - 7.4 / 8.0 - 8.1
8.x             8.x             8.0 - 8.1
Before installing PHP, run the following apt command to install some basic packages for managing third-party repositories. Input Y when prompted to confirm the installation and press ENTER to proceed.
sudo apt install ca-certificates apt-transport-https software-properties-common wget curl lsb-release
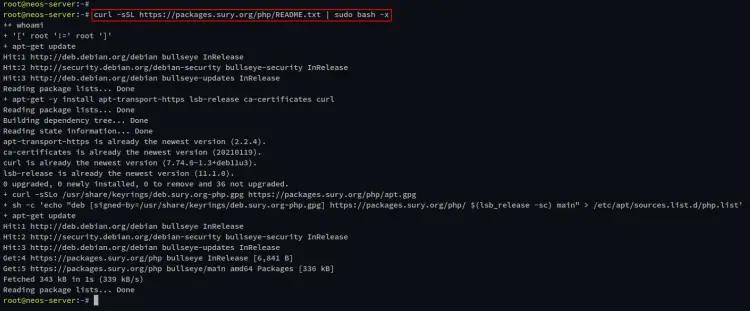
Now, run the following command to add the repository of PHP 8.x to your Debian server. This repository provides multiple versions of PHP packages for Debian systems.
curl -sSL https://packages.sury.org/php/README.txt | sudo bash -x
During the process, you will see the output like the following:
Next, install PHP 8.1 packages using the following apt command. These commands will install some PHP extensions and additional packages such as ImageMagick for the image process that will be used by Neos CMS.
sudo apt install php8.1 php8.1-cli php8.1-common php8.1-imap php8.1-redis php8.1-snmp php8.1-xml php8.1-zip php8.1-imagick php8.1-mbstring php8.1-curl libapache2-mod-php php8.1-mysql imagemagick
Input Y when asked to confirm the installation and press ENTER to proceed.
After PHP installation is complete, open the file '/etc/php/8.1/apache2/php.ini' using nano editor.
sudo nano /etc/php/8.1/apache2/php.ini
Change the default configuration as below.
date.timezone = Europe/Stockholm
Save the file and exit the editor when you are finished.
Lastly, run the following to restart the Apache2 service and apply new changes to PHP configurations.
sudo systemctl restart apache2
Installing Composer
Composer is the package management tool for PHP packages. You will install Composer on your Debian server which will be used to install PHP dependencies for Neos CMS.
Run the following command to install the Composer on the Debian system. This command will download the Composer installer script, then run it. The target installation directory for Composer is /usr/bin with the file name composer.
curl -sS https://getcomposer.org/installer | php -- --install-dir=/usr/bin --filename=composer
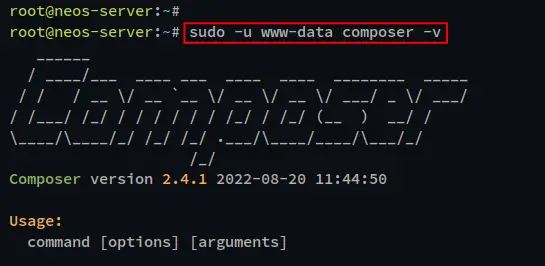
Now, verify the Composer installation using the following command.
sudo -u www-data composer -v
You will see the output of the Composer version that is installed on your Debian system.
Installing Neos Base Distribution
At this point, you have finished the installation of package dependencies for Neos CMS, which includes the Apache2 web server, MariaDB database server, PHP 8.1, and PHP Composer.
Now, you will download the Neos CMS source code and install PHP package dependencies via the Composer command.
Run the following git command to download the Neos CMS source code to the directory /var/www/neos.
git clone https://github.com/neos/neos-base-distribution.git /var/www/neos
Next, move to the directory /var/www/neos and run the composer command to install PHP dependencies for Neos CMS.
cd /var/www/neos
composer install
Once the PHP dependencies installation is complete, run the following command to change the ownership and permission of the /var/www/neos directory to the www-data user.
sudo ./flow core:setfilepermissions www-data www-data
With the Neos CMS source code and PHP dependencies installed, you're ready to move on to creating an Apache2 virtual host configuration for your installation.
Setting up Apache2 Virtual Host
If you are running the Neos CMS in the production environment, be sure your domain name is pointed to your Debian server IP address. Also, be sure you have generated SSL certificates for your domain installation.
Before creating Apache virtual host configuration, run the following command to enable Apache2 modules mod_ssl and mod_rewrite.
sudo a2enmod ssl rewrite
Now, create a new virtual host config file '/etc/apache2/sites-available/neos.conf' using the following nano editor.
sudo nano /etc/apache2/sites-available/neos.conf
Change the domain name with your domain, and change the path of the SSL certificate with your path. Then, paste the configuration to the file.
<VirtualHost *:80>

    ServerName howtoforge.local
    ServerAdmin [email protected]

    # Redirect Requests to SSL
    Redirect permanent "/" "https://howtoforge.local/"

    ErrorLog ${APACHE_LOG_DIR}/howtoforge.local.error.log
    CustomLog ${APACHE_LOG_DIR}/howtoforge.local.access.log combined

</VirtualHost>

<IfModule mod_ssl.c>

    <VirtualHost _default_:443>

        ServerName howtoforge.local
        ServerAdmin [email protected]

        #SetEnv FLOW_CONTEXT Production
        DocumentRoot /var/www/neos/Web

        # Add security
        php_flag register_globals off

        ErrorLog ${APACHE_LOG_DIR}/howtoforge.local.error.log
        CustomLog ${APACHE_LOG_DIR}/howtoforge.local.access.log combined

        SSLEngine on
        SSLCertificateFile /etc/letsencrypt/live/howtoforge.local/fullchain.pem
        SSLCertificateKeyFile /etc/letsencrypt/live/howtoforge.local/privkey.pem

        <Directory /var/www/neos/Web>
                AllowOverride All
        </Directory>

        <Directory /var/www/neos/Web/>
            RewriteEngine on
            RewriteBase /
            RewriteCond %{REQUEST_FILENAME} !-f
            RewriteRule ^(.*) index.php [PT,L]
        </Directory>

    </VirtualHost>

</IfModule>
Save the file and exit the editor when you are finished.
Next, activate the virtual host configuration 'neos.conf' using the following command. Then, verify Apache2 configuration files.
sudo a2ensite neos.conf
sudo apachectl configtest
If you have proper Apche2 configuration files, you will see the output such as "Syntax OK".
Lastly, restart the 'apache2' service to apply new changes via the systemctl command as below.
sudo systemctl restart apache2
Configuring Neos CMS Installation
To start the configuration of the Neos CMS installation, open your web browser and visit the domain name of your Neos CMS installation (i.e: https://howtoforge.local/).
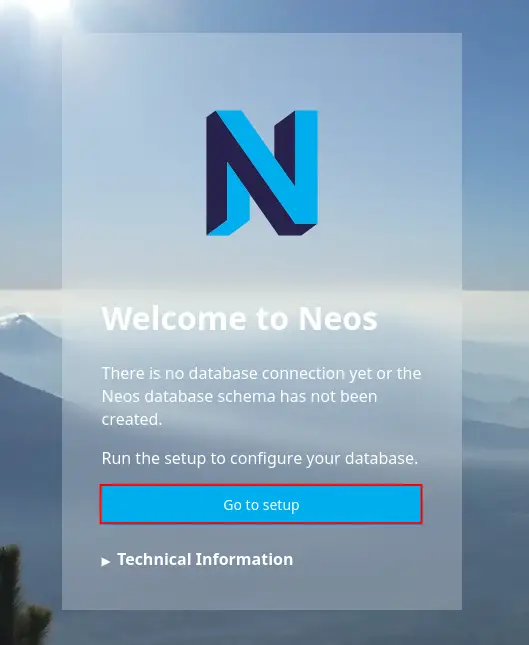
First, you will see the welcome message from Neos. Click "Go to setup" to start configuring Neos CMS.
The Neos CMS initialization will begin.
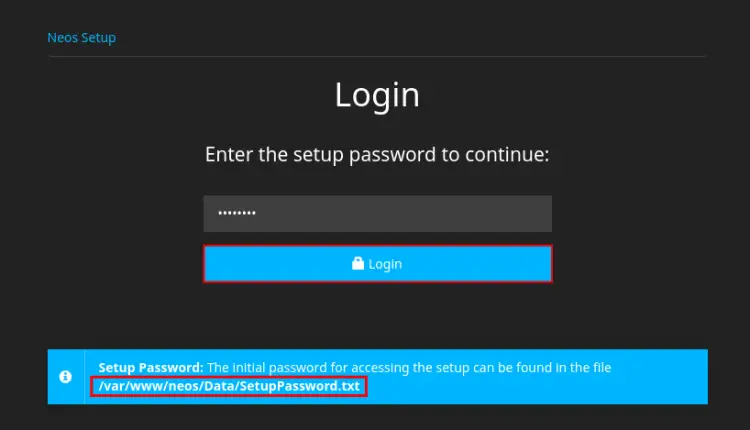
To start the Neos CMS configuration, you will be asked for the setup password.
Back to your terminal server and run the following command to show the setup password for Neos CMS.
cat /var/www/neos/Data/SetupPassword.txt
Copy the generated setup password and paste it to the Neos setup page. Then, click "Login".
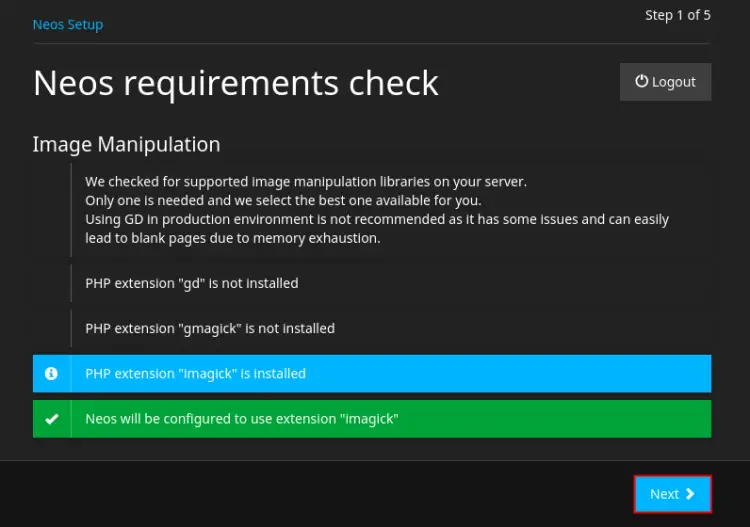
Now you will be shown the page of the Neos requirements check. Be sure one of the image manipulations is installed. Then, click "Next".
In this example, we are using the image manipulation ImageMagick, and the php-imagick and ImageMagick packages is installed.
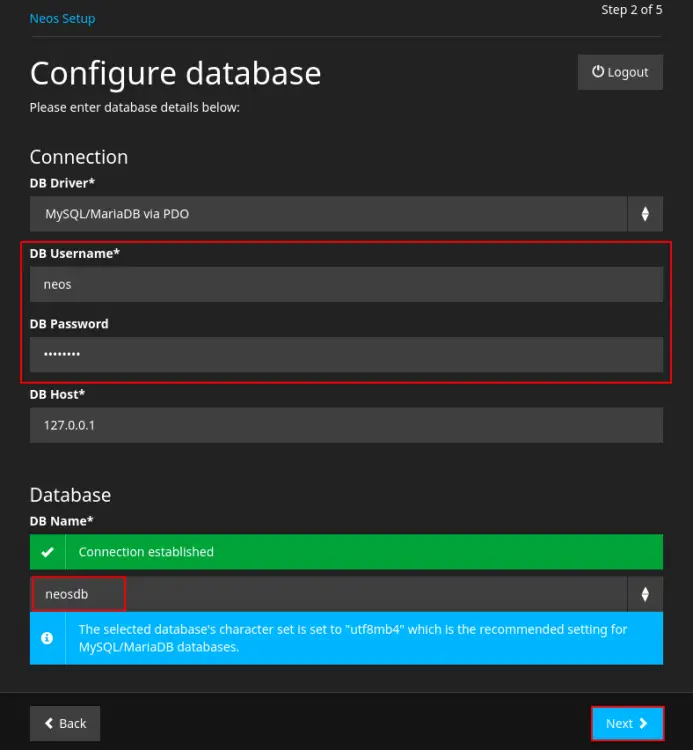
For the database configurations, input the database username, password, and host. Then, choose the database for Neos CMS installation. After that, click "Next" to proceed to the next configuration.
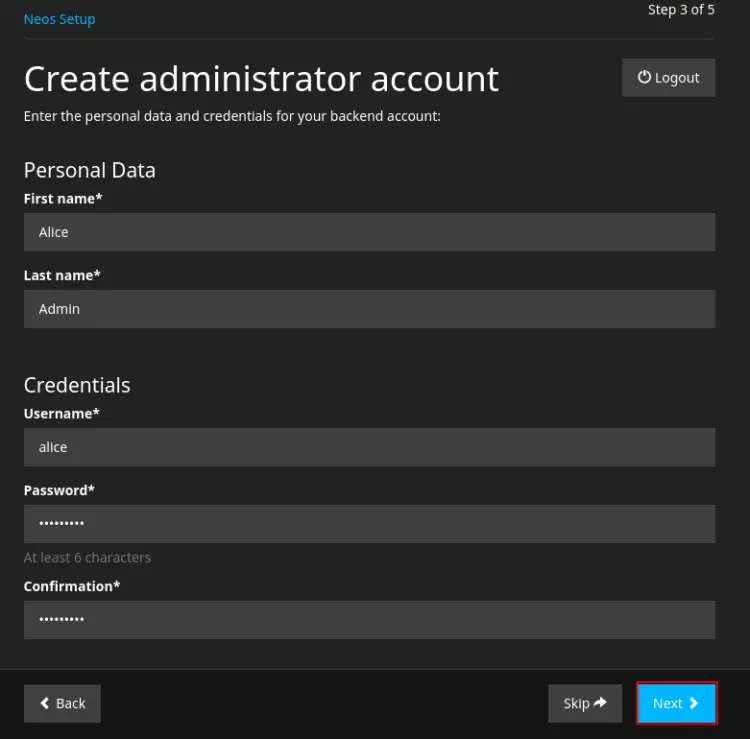
Now click details new admin user and password, first name, and last name. Then, click "Next".
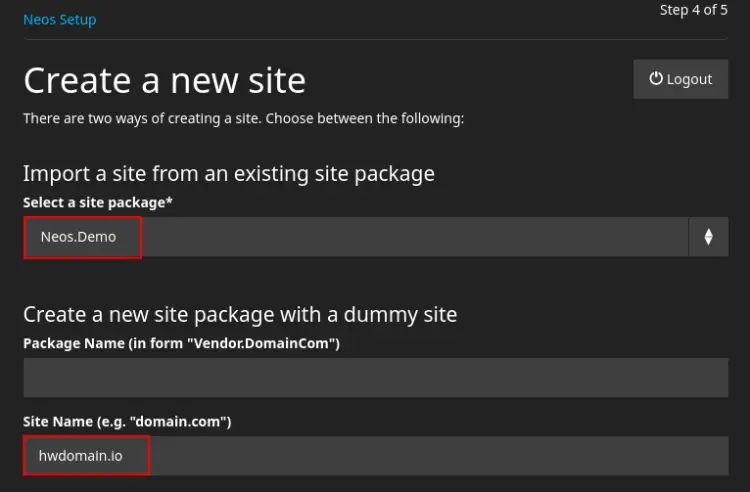
For the new Neos site configuration, select "Neos.Demo" on the site package and input the domain name of your Neos CMS installation on the Site Name configuration.
Click "Next" to proceed with the installation.
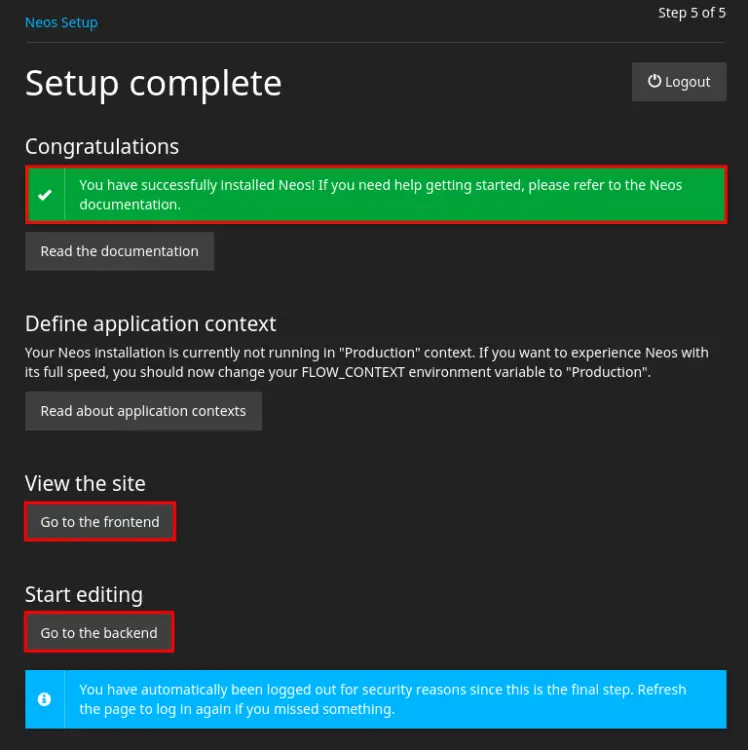
When Neos CMS installation and configuration is finished, you will see the following page.
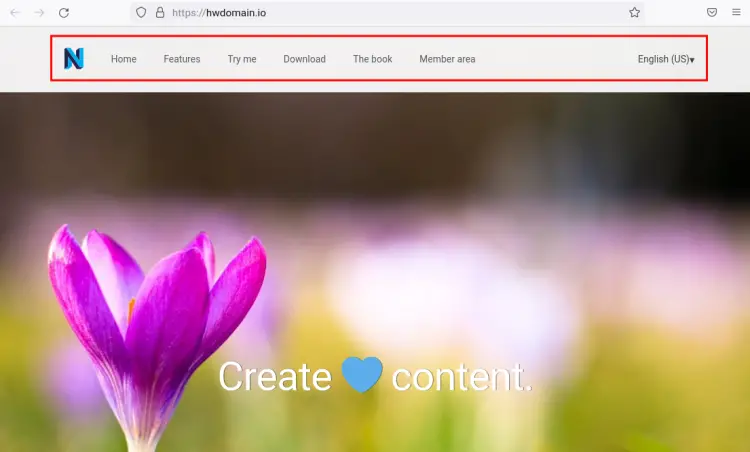
Click the button "Go to the front end" to get the default home page of your Neos CMS installation. Or you can click "Go to the backend" to get the Neos CMS administration dashboard.
Below is the default home page of Neos CMS installation with the "Neos.Demo" site package.
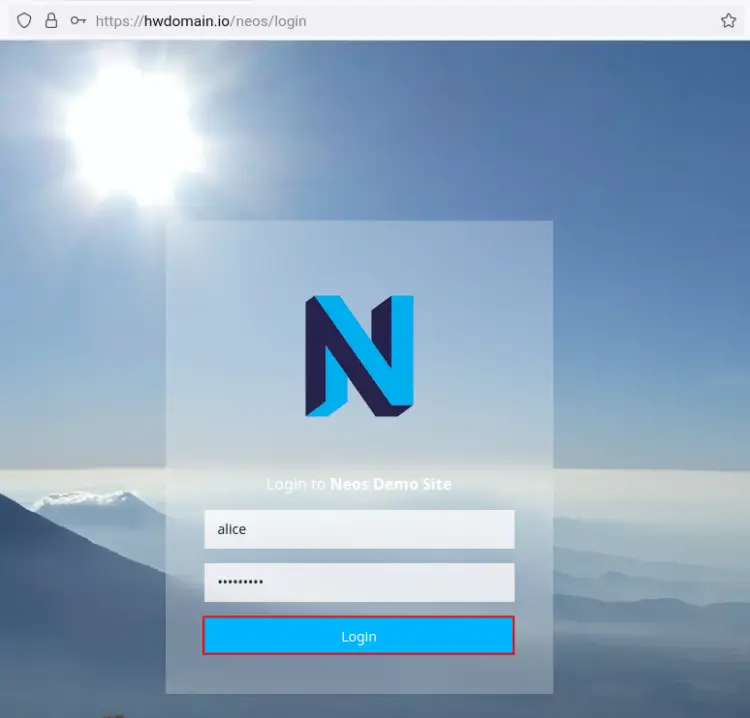
When you click the "Go to the backend" button, you will be redirected to the Neos CMS login page. Input your user and password for Neos CMS installation and click "Login".
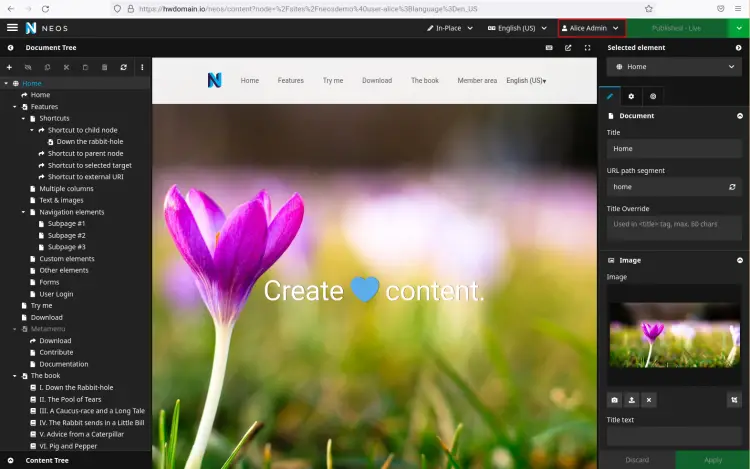
if the username and password for your neos CMS is correct, you will see the administration dashboard of your Neos CMS.
Conclusion
In this guide, you have installed the Neos CMS with Apache2 web server, MariaDB database server, and PHP 8.1 on the Debian 11 server. Also, you have learned the installation of PHP Composer for installing PHP package dependencies. You also created the Apache virtual host configuration for Neos CMS with secure SSL enabled.
Neos CMS is the next generation of CMS and is flexible for different types of usage. You can now start managing your content and publishing your site using Neos CMS in no time.

