How to Install GlusterFS on AlmaLinux 9
GlusterFS or Gluster File System, is a free and open-source distributed file system developed by RedHat. GlusterFS is a scalable file system formed from several servers into one entity file system that allows users to connect and mount the GlusterFS volume.
GlusterFS is a modern file system that can handle petabytes of data. Also, it's easy to install and maintain, and it's also easy to scale the file system.
In this guide, we'll take you through the installation process of GlusterFS Cluster on AlmaLinux 9 servers. You will set up high-availability file system storage using GlusterFS on AlmaLinux 9 servers.
Prerequisite
Before proceeding, ensure that you have the following:
- Two to more AlmaLinux 9 servers - This demo uses two AlmaLinux servers srv1 with the IP address 192.168.10.41 and srv2 with the IP address 192.168.10.42.
- A non-root user with root administrator privileges.
- A new disk will be used by GlusterFS.
Preparing Disk and Partition
It's recommended to use a separate disk for creating the GlusterFS cluster. This way, your data will always be safe. The following demonstration uses two different servers and each server has additional disk /dev/sdb.
In this section, you will create a new partition of the /dev/sdb disk that will be used by GlusterFS.
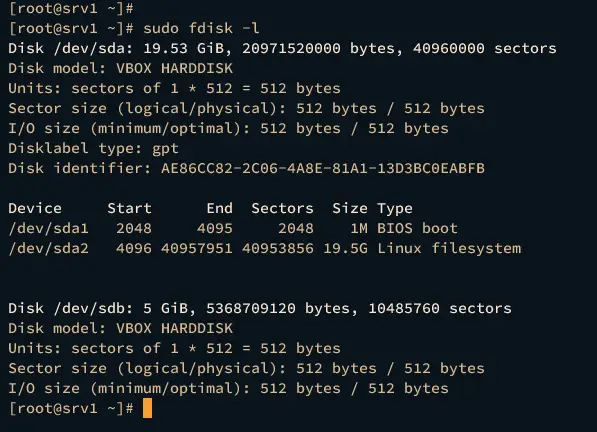
Execute the following command to check the list of available disks on your system. In this case, we've two disks /dev/sda and /dev/sdb, and the /dev/sdb disk will be used for GlusterFS.
sudo fdisk -l
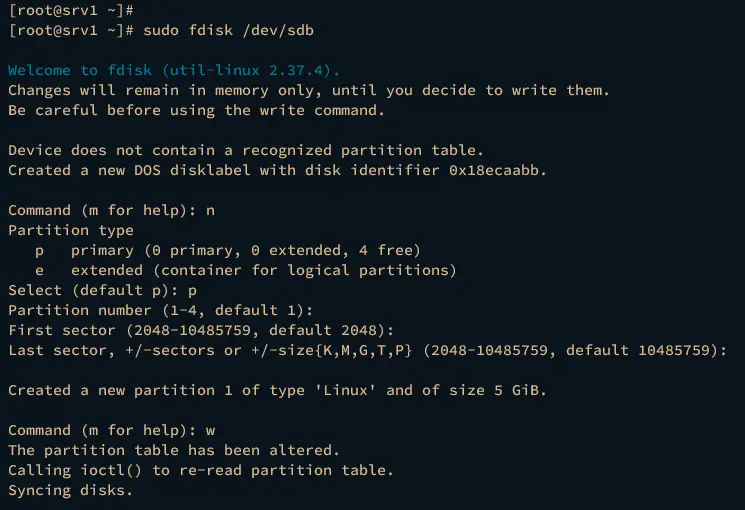
Enter the following command to create a new partition on /dev/sdb disk.
sudo fdisk /dev/sdb
- Input n to create a new partition.
- Select the partition type to p for primary.
- For partition number, input 1 to create 1 partition.
- For the first and last sector of the partition, leave it as default and press ENTER.
- Lastly, input w to save the changes.
The new partition /dev/sdb1 will be created.
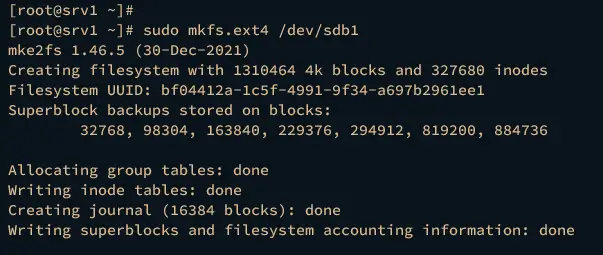
Now run the following command to format the /dev/sdb1 partition to the ext4 file system.
sudo mkfs.ext4 /dev/sdb1
After that, run the command below to create a new directory that will be used as the target mount directory for /dev/sdb1.
# Run this on srv1
sudo mkdir -p /data/vol1

# Run this on srv2
sudo mkdir -p /data/vol2
Next, run the following command to mount the /dev/sdb1 to /data/vol1 directory, then check the list mounted file system and new directory /data/vol1/brick0.
# Run this on srv1
sudo mount /dev/sdb1 /data/vol1
sudo df -h
sudo mkdir -p /data/vol1/brick0

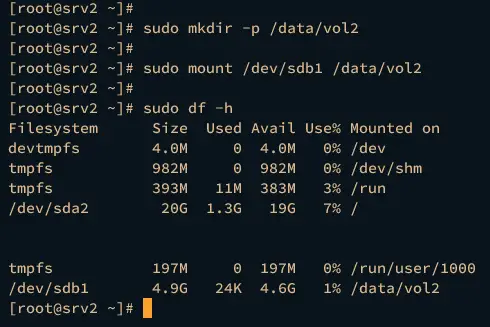
Repeat the command on the srv2 server like this:
# Run this on srv2
sudo mount /dev/sdb1 /data/vol2
sudo df -h
sudo mkdir -p /data/vol2/brick0
Configuring FQDN
In this section, you will be setting up fqdn (fully qualified domain name) for each AlmaLinux server that will be used to create the GlusterFS cluster,
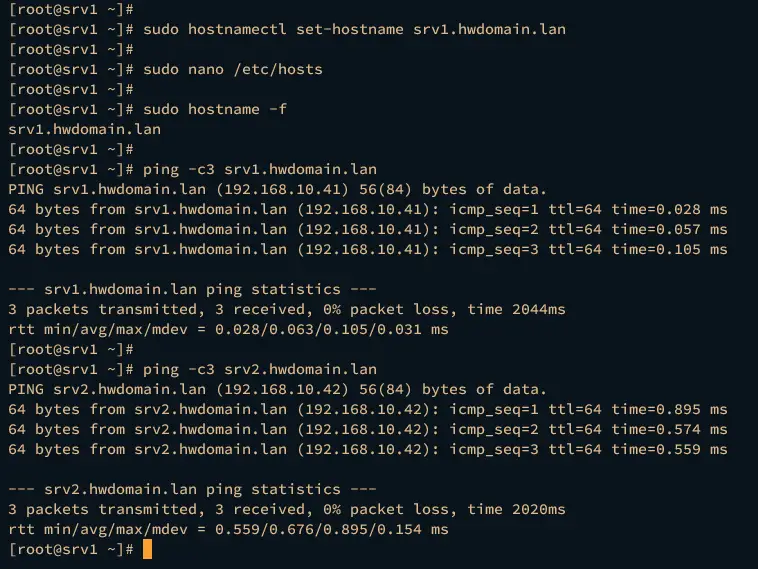
Run the following command to set up the fqdn for each server. In this case, the srv1 will have fqdn srv1.hwdomain.lan, and the srv2 server will have fqdn srv2.hwdomain.lan.
sudo hostnamectl set-hostname srv1.hwdomain.lan
sudo hostnamectl set-hostname srv2.hwdomain.lan
Open the /etc/hosts file using the following nano editor command.
sudo nano /etc/hosts
Insert the following configuration and be sure to change the details of each IP address.
192.168.10.41 srv1.hwdomain.lan srv1
192.168.10.42 srv2.hwdomain.lan srv2
Save and exit the file when you're done.
Next, run the following command to verify the fqdn on each server and ensure that the fqdn is pointed to the proper IP address.
sudo hostname -f
ping -c3 srv1.hwdomain.lan
ping -c3 srv2.hwdomain.lan
Installing GlusterFS
Now you will be installing the GlusterFS package to all of your AlmaLinux servers, then you will also add the GlusterFS service to the firewalld. As for RHEL-based distribution, GlusterFS packages are available on CentOS SIG (SpecialInterestGroup) repository.
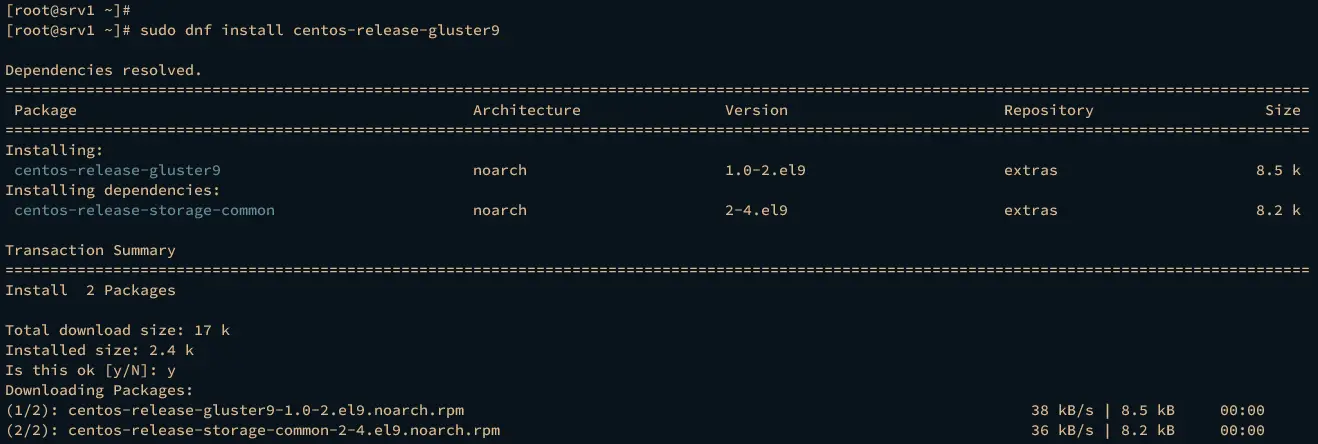
First, run the dnf command below to add the GlusterFS repository to your servers. Input y when prompted and press ENTER to confirm.
sudo dnf install centos-release-gluster9
Now run the command below to verify the list of repositories on your system. If successful, you should see the GlusterFS repository added.
sudo dnf repolist

Next, run the following dnf command to install GlusterFS packages to each server. When prompted, input y to confirm and press ENTER.
sudo dnf install glusterfs glusterfs-libs glusterfs-server
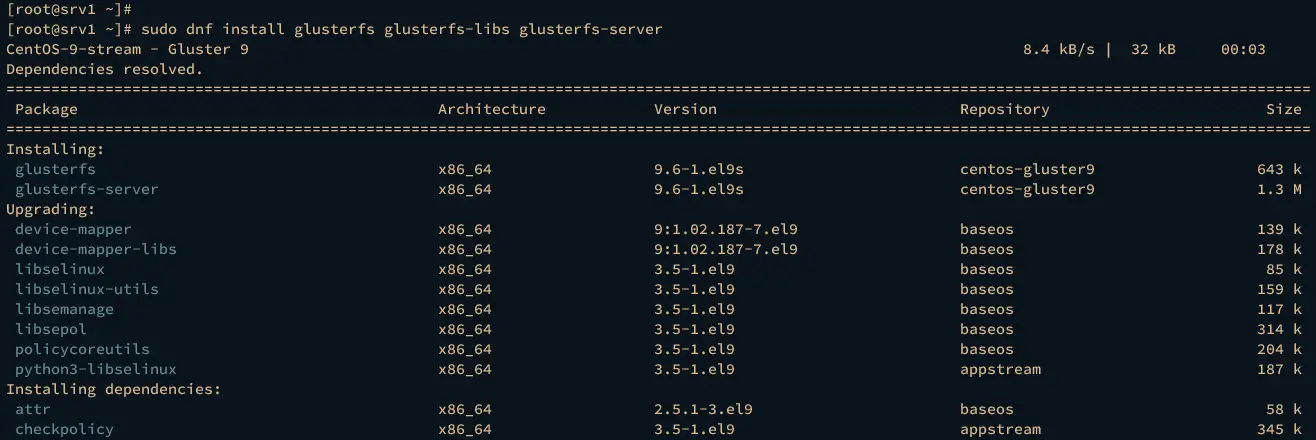
Also, input y again to add the GPG key of GlusterFS repository.

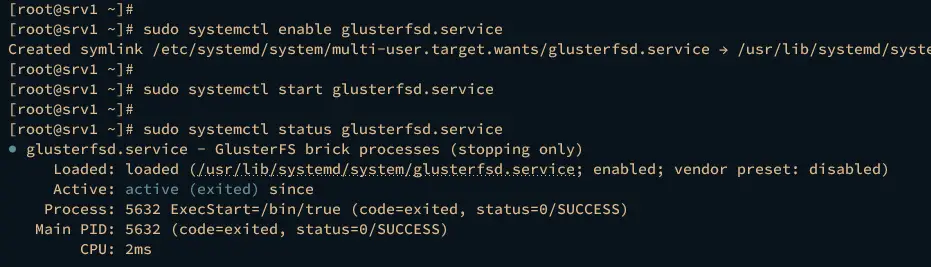
After GlusterFS is installed, run the systemctl command below to start and enable the glusterfsd service.
sudo systemctl enable glusterfsd.service
sudo systemctl start glusterfsd.service
Then verify the glusterfsd service to ensure that the service is running.
sudo systemctl status glusterfsd.service
If glusterfsd is running, you should get an output active (running).
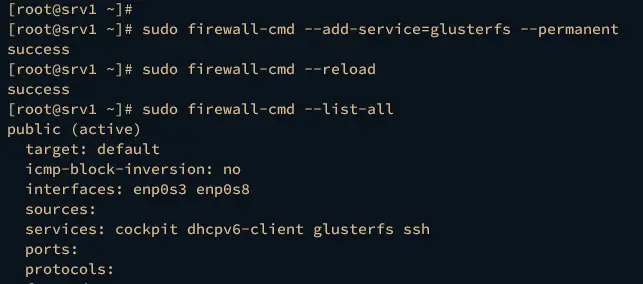
Now run the firewall-cmd command below to add the GlusterFS port and reload the firewalld to apply the changes.
sudo firewall-cmd --add-service=glusterfs --permanent
sudo firewall-cmd --reload
Verify the list of available services on firewalld using the following command. If successful, you should see the service glusterfs in the firewalld service list.
sudo firewall-cmd --list-all
Initializing GlusterFS Cluster
With the GlusterFS service running and the firewalld configured, you will next initialize the GlusterFS cluster.
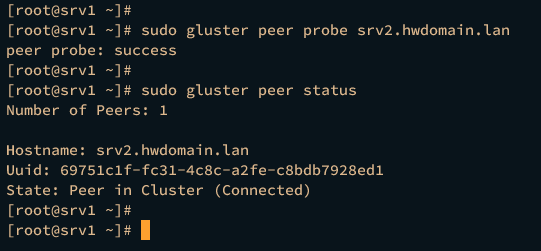
On the srv1, run the gluster command below to initialize the GlusterFS cluster. And be sure to change the srv2.hwdomain.lan with the fqdn of your second server.
sudo gluster peer probe srv2.hwdomain.lan
If initialization is successful, you should get the message "peer probe success".
Now run the following command to check the GlusterFS cluster status. You should see that the current GlusterFS cluster with member srv2.hwdomain.lan server.
sudo gluster peer status
Lastly, move to the srv2.hwdomain.lan server and run the gluster command below to check the GlusterFS cluster status.
sudo gluster peer status
If the installation is successful, you should see the member of the GlusterFS cluster is srv1.hwdomain.lan server.

At this point, you have finished the installation of the GlusterFS cluster. In the next step, you will be creating the GlusterFS volume that will be mounted by client machines.
Creating GlusterFS Volume
In the following section, you will create the GLusterFS volume that will automatically replicate your data between servers within the GlusterFS cluster.
Run the following command to create a new GlusterFS volume testvol. Input y and press ENTER to confirm.
sudo gluster volume create testvol replica 2 srv1.hwdomain.lan:/data/vol1/brick0 srv2.hwdomain.lan:/data/vol2/brick0

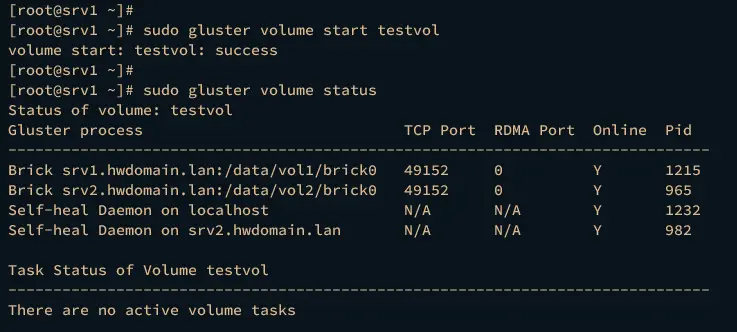
After the testvol volume is created, run the command below to start the testvol volume.
sudo gluster volume start testvol
Now verify the GlusterFS volume status using the following command. You should see the testvol volume with two GLusterFS servers srv1.hwdomain.lan and srv2.hwdomain.lan.
sudo gluster volume status
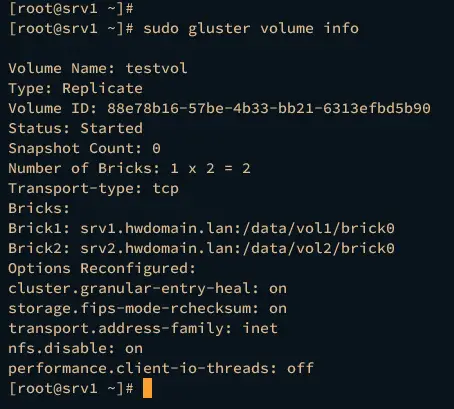
Lastly, you can also get detailed information about the GlusterFS volume using the following command.
sudo gluster volume info
Mounting GlusterFS Volume to Client
With the GlusterFS volume created, the next step will be mounting the volume to the client machine. To achieve that, you must install the GlusterFS client package on your client machines.
On your client machine, add the GlusterFS repository using the dnf command below.
sudo dnf install centos-release-gluster9
Now execute the dnf command below to install the glusterfs-client package.
sudo dnf install glusterfs-client
With the glusterfs-client installed, you can mount the GlusterFS volume.
Create a new directory backup using the following command. This will be used as the target mount directory of the GlusterFS volume.
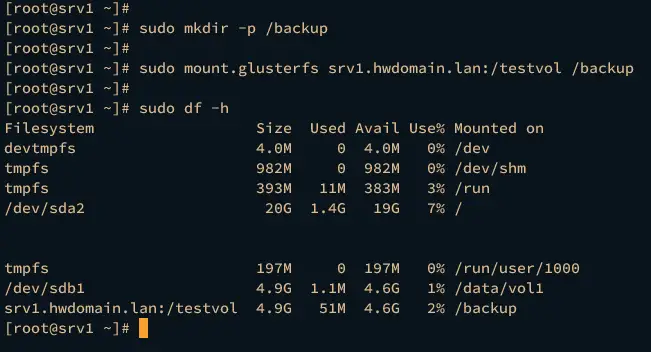
sudo mkdir -p /backup
Now run the following command to mount the GlusterFS volume testvol from the server srv1.hwdomain.lan.
sudo mount.glusterfs srv1.hwdomain.lan:/testvol /backup
Verify the list of mounted file systems on your system via the df command below.
sudo df -h
You should see that the volume testvol from the GlusterFS server srv1.hwdomain.lan is mounted to the target directory /backup.
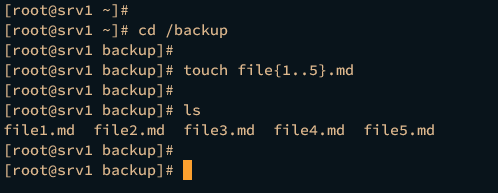
Next, move to the /backup directory and create new test files to ensure read and write access. Also, new files that you have created will automatically be replicated to the GlusterFS cluster.
cd /backup
touch file{1..5}.md
ls
On the srv1 server, run the following command to check the list of files available on the /data/vol1/brick0 directory.
ls /data/vol1/brick0
If data is replicated, you should see new files you created earlier.
For the srv2 server, run the ls command like this. If the replication is successful, you should see new files also available on the srv2 server.
ls /data/vol2/brick0

Conclusion
Great job! You've successfully installed GlusterFS on your AlmaLinux machines and created a GlusterFS cluster using two servers. You've also learned how to create partitions via the command line, create and manage GlusterFS volume, and mount the GlusterFS volume on the client machine.
You can now start storing files on your GlusterFS cluster, and your data will automatically be replicated to multiple servers.

