How to Install FreeIPA Server on CentOS 7
FreeIPA is a free and open-source Identity, Policy, and Audit (IPA) suite sponsored by RedHat. It's an IPA solution combination of Linux (Fedora), 389 Directory Server, MIT Kerberos, NTP, DNS Bind, Dogtag, Apache web server, and Python.
FreeIPA comes with the command-line administration tool and a beautiful web-UI interface running on top of Python and Apache webserver. Currently, reach the latest stable version 4.7.0.
In this tutorial, we will show you how to install and configure FreeIPA on CentOS 7 Server. We're going to use the latest CentOS 7 server with 2GB of memory, and install the latest stable version of the FreeIPA packages.
Basic system requirements:
- Recommended memory RAM 2GB or more
- RHEL or CentOS 7 or Fedora with root privileges
What we will do:
- Setup Hosts
- Install FreeIPA Packages
- Setup FreeIPA Server
- Verify Admin
- Add New User
- Test Login
Step 1 - Setup Hosts
First of all, we're going to change the server hostname, and then edit the '/etc/hosts' file and set up the FQDN.
Run the following command to change the hostname of the server.
hostnamectl set-hostname ipa.hakase-labs.io
After that, edit the '/etc/hosts' file of the system.
vim /etc/hosts
Add the following configuration.
10.9.9.15 ipa.hakase-labs.io ipa
Save and close.
Now log out from the server and log in again, then verify the hostname and FQDN using following commands.
hostname
 hostname -f
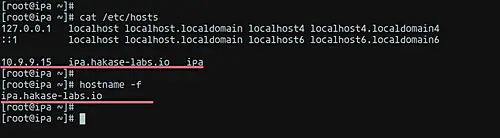
So that we have the CentOS 7 server with a hostname 'ipa' and the FQDN 'ipa.hakase-labs.io'.
Step 2 - Install FreeIPA Packages
After setting up the hostname and FQDN of the server, we're going to install FreeIPA packages from the official CentOS repository.
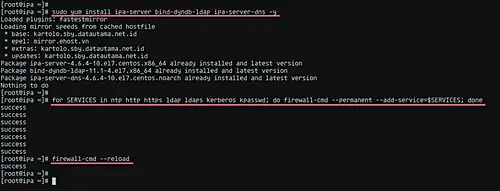
Run the following yum command as root.
sudo yum install ipa-server bind-dyndb-ldap ipa-server-dns -y
After packages installation, we are going to add new services to the firewall. Most importantly, add http, https, ldap, ldaps, Kerberos, and kpasswd services to the firewall configuration.
Run the following bash command, then reload the firewalld service.
for SERVICES in ntp http https ldap ldaps kerberos kpasswd dns; do firewall-cmd --permanent --add-service=$SERVICES; done
 firewall-cmd --reload
As a result, FreeIPA packages have been installed and all FreeIPA services have been added to the firewall configuration.
Step 3 - Setup FreeIPA Server
In this step, we are going to set up the FreeIPA server and the DNS. For that purpose, FreeIPA provides an interactive command-line. So we can easily administrate the FreeIPA configuration.
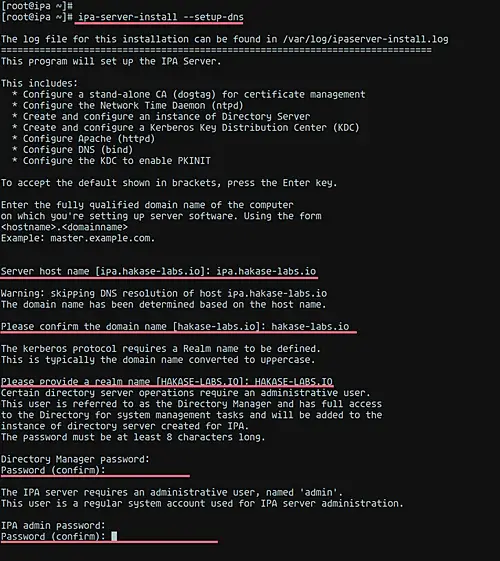
Run the following command to configure the FreeIPA server.
ipa-server-install --setup-dns
Firstly, we need to configure the server hostname, domain name, and the REALM name. Type your own domain name and server name as below, then continue.
Server host name [ipa.hakase-labs.io]: ipa.hakase-labs.io
 Please confirm the domain name [hakase-labs.io]: hakase-labs.io

 Please provide a realm name [HAKASE-LABS.IO]: HAKASE-LABS.IO
After that, you need to configure the directory manager and the FreeIPA admin passwords. Type your own credentials and continue.
Directory Manager password: hakasemanager123
 Password (confirm): hakasemanager123

 IPA admin password: hakaseadmin123
 Password (confirm): hakaseadmin123
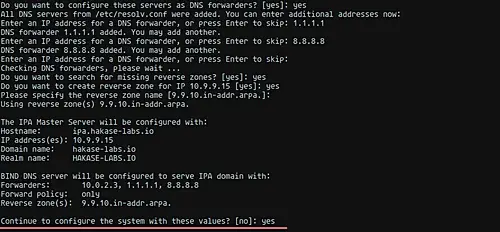
Next, type 'Yes' for the DNS forwarder configuration. Then type additional resolver IP addresses and continue.
Do you want to configure DNS forwarders? [yes]: yes
 Do you want to configure these servers as DNS forwarders? [yes]: yes

 Enter an IP address for a DNS forwarder, or press Enter to skip: 1.1.1.1
 Enter an IP address for a DNS forwarder, or press Enter to skip: 8.8.8.8
 Enter an IP address for a DNS forwarder, or press Enter to skip: Press Enter
type 'yes' and continue to search and create the missing reverse zone.
Do you want to search for missing reverse zones? [yes]: yes
Now you will be prompt for creating the reverse zone of the FreeIPA server IP address. Type 'yes' and continue.
Do you want to create reverse zone for IP 10.9.9.15 [yes]: yes
 Please specify the reverse zone name [9.9.10.in-addr.arpa.]: Press Enter
And the last, you will be asked to apply all the above configurations to the system. Type 'yes' and wait for the FreeIPA configuration.
Continue to configure the system with these values? [no]: yes
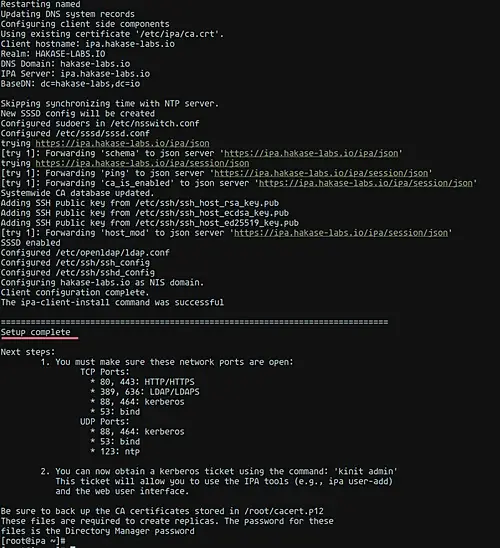
And the FreeIPA configuration is complete, you will get the following result.
Step 4 - Verify Admin
At this stage, we've already set up the FreeIPA on CentOS 7 server. Now we're going to verify our configuration.
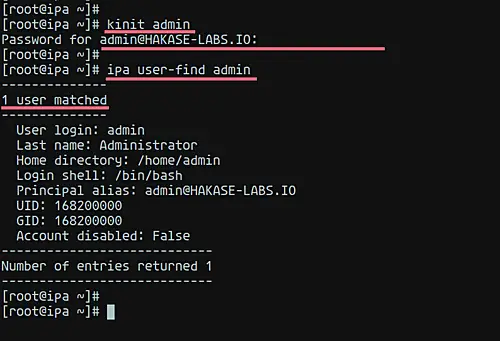
verify the Kerberos admin password using the kinit command.
kinit admin
Type your admin password and make sure you have no error.
After that, verify the admin user is available on the FreeIPA database using the following command.
ipa user-find admin
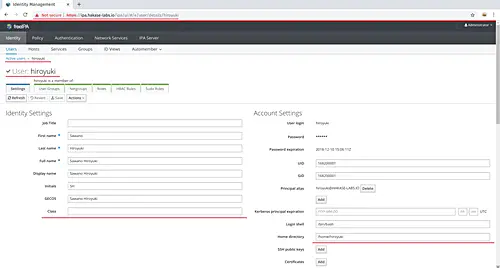
Next, we're going to verify the FreeIPA admin web-UI.
Open the web browser, type your FreeIPA domain name on the address bar. Mine is:
https://ipa.hakase-labs.io/
And you will get the FreeIPA web-UI login page.
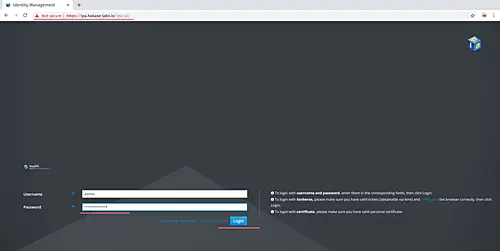
Log in with the user 'admin' and the password you choose on step 3.
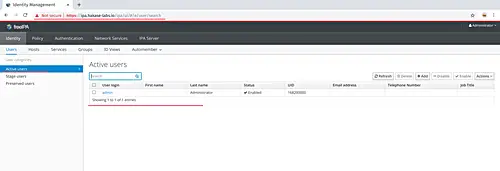
And you will get the FreeIPA admin dashboard. In other words, the FreeIPA installation and configuration on CentOS 7 is correct.
Step 5 - Add New User
For this example, we will create a new FreeIPA user called 'hiroyuki'. And of course, you can replace that with your own user. Then trying to access the server through SSH using that new user.
Before you begin, edit the LDAP client configuration to enable 'create home directory'. Run the following command below.
sudo authconfig --enablemkhomedir --update
Now create the 'hiroyuki' by running the ipa command below.
ipa user-add hiroyuki --first=Sawano --last=Hiroyuki [email protected] --shell=/bin/bash --password
Type your strong password.
After that, check your user on the FreeIPA system. Ensure you get your user on the server.
ipa user-find hiroyuki
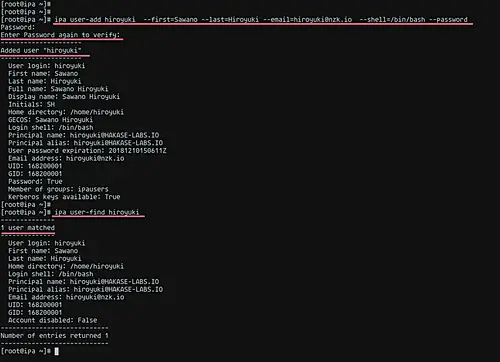
The new FreeIPA user has been created and we're ready to test.
Step 6 - Test Login
We will do a test to connect to the FreeIPA server through SSH from the local computer, and using the user we just created on step 5, for this example is 'hiroyuki'.
From your local system, run the ssh command below.
ssh [email protected]
Now type your password. When it's complete, you will be shown the password expired notification, type your current password in order to change with the new password.
As a result, now you're on your home directory and successfully log in to the server using the FreeIPA use that we just created.
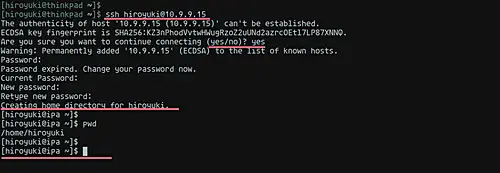
Finally, the FreeIPA installation and configuration on CentOS 7 server has been completed successfully.

