How to Install Flask with Nginx and Gunicorn on Rocky Linux
Flask is a microframework written in Python for developing modern web applications and API (Application Programming Interface). It's based on the Werkzeug toolkit and Jinja2 template. Instead of using complex architecture, Flask is a small web framework that easy-to-extent the core and is easy to learn because Flask has less code. Flask doesn't include the ORM, but still has cool features like URL routing and a template engine.
Gunicorn or "Green Unicorn" is a WSGI HTTP Server with pre-fork worker mode. It's ported from the Ruby's Unicorn project. Gunicorn can be paired with several web frameworks, it's lightweight on server resources and fast. Gunicorn stands between your application and the web server, so you can pair the Gunicorn with a web server such as Nginx and Apache2.
In this tutorial, we will show how to install and configure the Flask Python Web Framework with Gunicorn and Nginx on the Rocky Linux server. You will also learn how to set up Supervisord as a process manager for managing the Python Flask application.
Prerequisites
To complete this tutorial, you will need some of the following requirements in place:
- A Rocky Linux server - You can use both Rocky Linux v8 or v9 - Desktop or Server.
- A non-root user with sudo root administrator privileges.
- A dummy domain name for local development.
Installing Dependencies
In the first step, you will install some package dependencies that will be used for installing and deploying Flask Web Framework. This includes such as Python Pip, Nginx, and Supervisord.
All of these package dependencies is available on the Rocky Linux repository, you can easily install it via the DNF command.
First, ensure the EPEL repsoitory is installed on your system. or you can just install and enable it via the dnf command below.
sudo dnf install epel-release
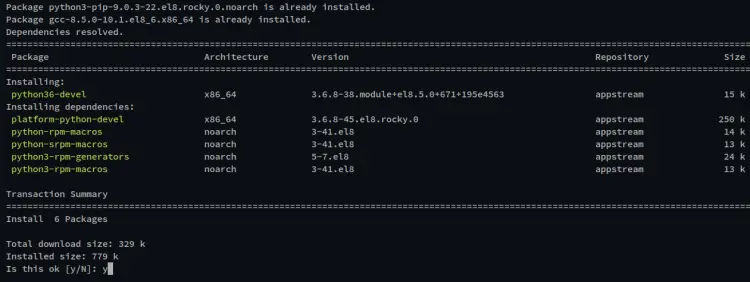
Now, install some python packages 'python3-pip' and 'python3-devel' and the GCC compiler using the dnf command below. These packages will be used for installing Python packages.
sudo dnf install python3-pip python3-devel gcc
When prompted to confirm the installation, input y and press ENTER to proceed.
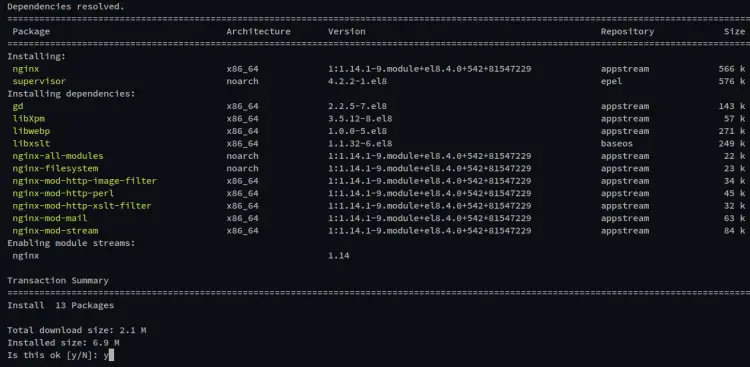
Next, run another dnf command below to install the Nginx web server and the supervisord packages. The Nginx here will be used as a reverse proxy for your Flask project, and the supervisord will be used to manage your Flask application process.
sudo dnf install nginx supervisor
Input y and press ENTER to confirm the installation.
Now, start and enable the Nginx service via the systemctl command below. Then, verify the Nginx service to make sure it's running.
sudo systemctl start nginx
sudo systemctl enable nginx
sudo systemctl status nginx
You will see the output like the following - The Nginx service is enabled and will be run automatically at system boot. And the status of the Nginx service is running.
And for the supervisord service, run the following command to start and enable it. Then, verify the status of the supervisord service to make sure it's running.
sudo systemctl start supervisord
sudo systemctl enable supervisord
sudo systemctl status supervisord
You will see the supervisord service is enabled and will be run automatically at startup. And the status of supervisord service is running.
Setting up User
After installing package dependencies, you will now set up a new user that will be used to run the Flask project.
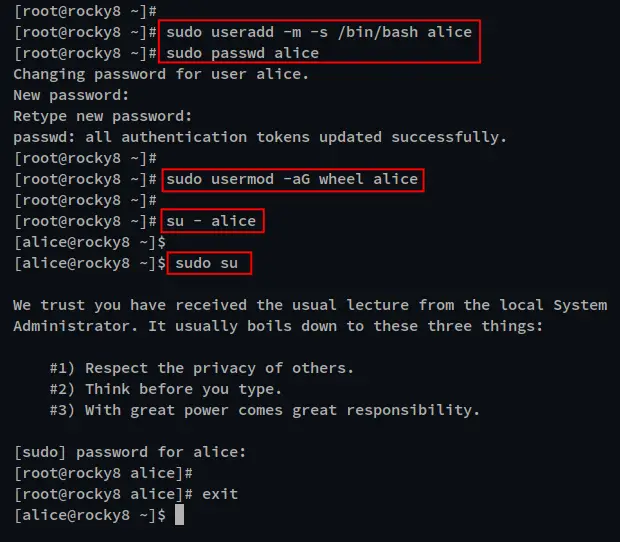
Run the following command to create a new user and set up the password. In this example, you will create new user alice.
When prompted for creating a new password, input your password and repeat.
sudo useradd -m -s /bin/bash alice
sudo passwd alice
Now, run the following command to add the user alice to the 'wheel' group so the user can execute the sudo command.
sudo usermod -aG wheel alice
Lastly, log in to the new user and run the 'sudo' command to verify the root privileges. Input your password when prompted.
su - alice
sudo su
You should see the root shell of your Rocky Linux machine.
Setting up Python Virtual Environment
In this step, you will be setting up Python Virtual environment for the Flask web framework.
Log in as your user using the following command.
su - alice
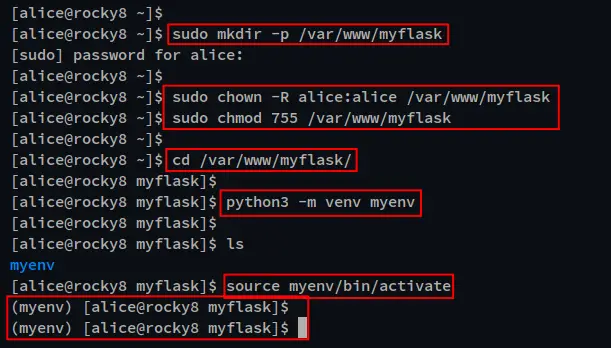
Create a new Flask installation directory '/var/www/myflask' using the following mkdir command.
sudo mkdir -p /var/www/myflask
Change the ownership and permission of the Flask installation directory using the below command. The ownership should be under the user alice with permission 755.
sudo chown -R alice:alice /var/www/myflask
sudo chmod 755 /var/www/myflask
Now, move your working directory to the Flask installation directory '/var/www/myflask' and create a new Python virtual environment via the python command below.
cd /var/www/myflask
python3 -m venv myenv
You will see a new directory 'myenv' is created.
Next, activate the Python virtual environment using the following command. If activated, you will see the prompt format is changed to such as '(myenv alice@hostname'.
source myenv/bin/activate
To deactivate from the virtual environment, you should run the following command.
deactivate
Installing Flask and Gunicorn
Before installing Flask, ensure you are in the virtual environment. or you can just run the following command to log in.
su - alice
cd /var/www/myflask
source myenv/bin/activate
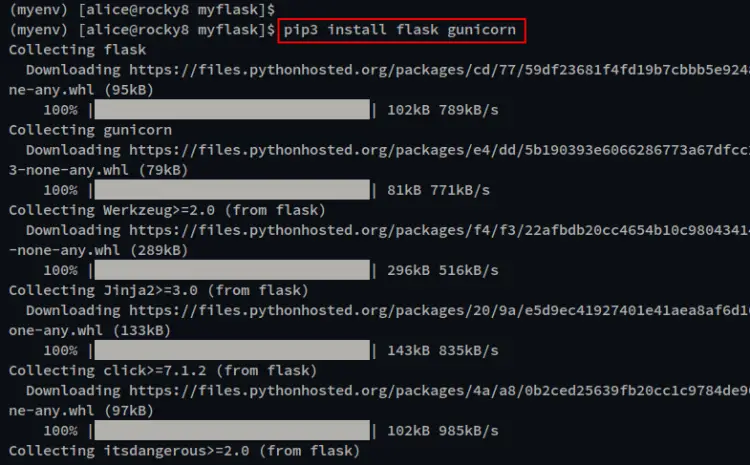
Now, install Flask and Gunicorn via the pip command below. This will install the Flask and Gunicorn on the virtual environment, not in the system-wide.
pip3 install flask gunicorn
After Flask and Gunciron is installed, you are ready to create the first application using Flask Web Framework.
Creating First Flask Application
Before start creating a Flask application, ensure that you are in your Python virtual environment.
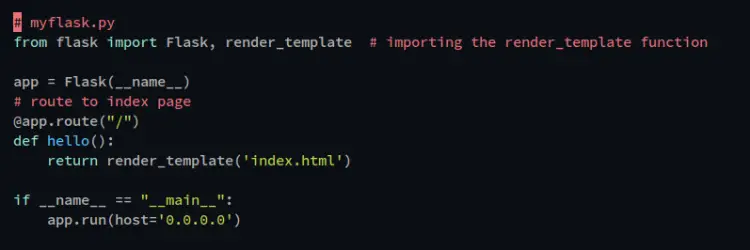
Create a new Python file 'myflask.py' using your preferred editor. In this example, we will use nano editor.
nano myflask.py
Now add the following script to the file.
# myflask.py
from flask import Flask, render_template  # importing the render_template function

app = Flask(__name__)
# route to index page
@app.route("/")
def hello():
    return render_template('index.html')

if __name__ == "__main__":
    app.run(host='0.0.0.0')
Save the file and exit the editor when you are finished.
Next, create a new directory 'templates' for your static files and create a new index.html file on top of it.
mkdir -p templates
nano templates/index.html
Add the following HTML script to the file.
<html>
    <body>
        <h1><center>Hello Flask - Rocky Linux!</center></h1>
    </body>
</html>
Save the file and exit the editor when you are done.
Now execute the Python Flask script 'myflask.py' using the below command. This will run your Flask application in development mode, running the server IP address with default port 5000.
python3 myflask.py
Below is a similar output you will get.
Next, open another terminal and run the curl command below to access your Flask application. You will see the script of the 'index.html' file that you have created.
curl localhost:5000
Now press 'Ctrl+c' to terminate your Flask application.
Setting up Gunicorn and Supervisord
In this step, you will be setting up your Flask application with Gunicorn and Supervisord. This allows you to run and manage your Python application manageable and controllable via the Supervisord process.
Create a new Python file 'uwsgi.py' within the same directory of your Flask application. In this example, the directory should be '/var/www/myflask'.
nano wsgi.py
Add the following Python script to the file.
# import myflask Flask application
from myflask import app

if __name__ == "__main__":
    app.run(debug=True)
Save the file and exit the editor when you are finished.
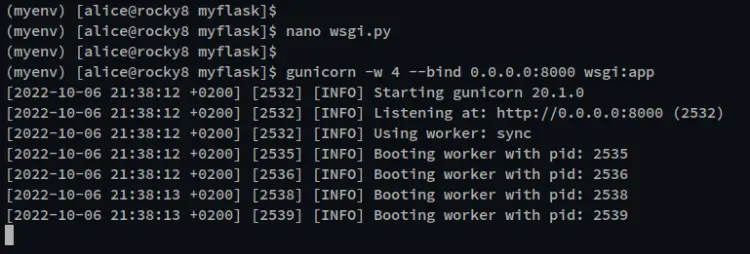
Now, run the following gunicorn command to start the Flask application and verify the configurations of Gunicorn. The application should now be running under the Gunicron with port 8000.
gunicorn -w 4 --bind 0.0.0.0:8000 wsgi:app
Below is the output of the gunicorn command.
Next, open your web browser and visit the server IP address followed by port 8000 (i.e: http://192.168.5.100:8000/). You should see the index.html page of your Flask application.
At this point, your Flask application is running with Gunicorn without any errors. You can now back to your terminal and press 'Ctrl+c' to terminate the gunicorn process and start configuring the Supervisord process managaer.
Create a new Supervisord INI file configuration for the Flask application '/etc/supervisord.d/flaskapp.ini' via the following nano command. The configuration should be stored in the '/etc/supervisord.d' directory.
sudo nano /etc/supervisord.d/flaskapp.ini
Add the following configuration to the file. And be sure to change the details path of your applications, the user and group, and the log path.
With this configuration, your Flask application will be running under the UNIX socket that will be created by Gunicorn. This unix socket also will be used to interact with the Nginx reverse proxy.
[program:myflask]
command=/bin/bash -c 'source /var/www/myflask/myenv/bin/activate; gunicorn -w 3 --bind unix:/var/www/myflask/ipc.sock wsgi:app'
directory=/var/www/myflask
user=alice
group=www-data
autostart=true
autorestart=true
stdout_logfile=/var/www/myflask/myflask.log
stderr_logfile=/var/www/myflask/error.log
Save the file and exit the editor when you are done.
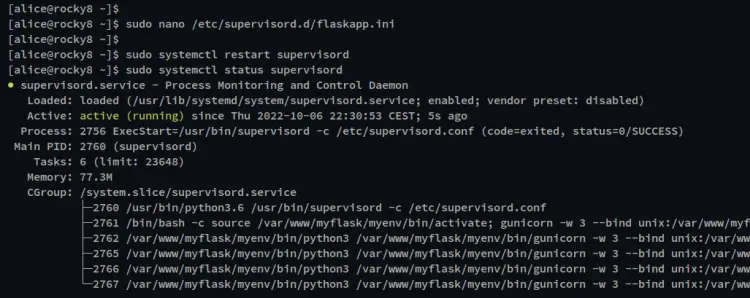
Now, run the following systemctl command below to restart the Supervisord service and apply new changes. Then, verify the Supervisord status and make sure the service is running.
sudo systemctl restart supervisord
sudo systemctl status supervisord
In the below screenshot, you can see the Supervisord is running with a new additional configuration for the Flask application.
Lastly, you can now verify the process of your Flask application via the supervisorctl command below. You should see there is one process named myflask with the status OK.
sudo supervisorctl status
Setting up Nginx Reverse Proxy
In this step, you will learn how to set up Nginx as a reverse proxy for the Flask application that running under the Supervisord process manager. You will create a new Nginx Server Block for the reverse proxy and using the local domain name for the Flask application.
Create a new Nginx server block configuration '/etc/nginx/conf.d/flaskapp.conf' using the following nano editor.
sudo nano /etc/nginx/conf.d/flaskapp.conf
Add the following configuration to the file. And be sure to change the domain name www.myflask.local with your local development domain.
server {
    listen 80;
    server_name www.myflask.local;

    location / {
        include uwsgi_params;
        proxy_pass http://unix:/var/www/myflask/ipc.sock;
    }
}
Save the file and exit the editor when you are finished.
Next, verify the Nginx configuration to ensure you have the correct configuration. Then, restart the Nginx service to apply new changes.
sudo nginx -t
sudo systemctl restart nginx
At this point, your Flask application is now accessible via the Nginx reverse proxy that runs on the default HTTP port.
Now on your local machine, edit the /etc/hosts file using the nano editor.
sudo nano /etc/hosts
Define the Ubuntu machine IP address with the domain name "www.myflask.local" as below.
192.168.5.28 www.myflask.local
Save and close the file.
Now open up your web browser and input the Flask project domain name (i.e http://www.myflask.local) on the address bar. And you should get the index page of your Python Flask project.
Conclusion
Congratulation! You have successfully installed the Python Flask web framework with Gunicorn and Nginx on the Rocky Linux server. You have also learned how to create the first Python Flask project, set up a Python virtual environment, and set up Supervisord process management for the Flask project.

