How to Install Drupal CMS with Apache2 on Ubuntu 22.04
This tutorial exists for these OS versions
- Ubuntu 24.04 (Noble Numbat)
- Ubuntu 22.04 (Jammy Jellyfish)
On this page
Drupal is a free and open-source web content management system written in PHP and distributed under GNU General Public License. Drupal provides a robust content management tool with sophisticated APIs for multichannel publishing. Drupal is used among at least 14% of the top 10,000 websites on the internet, it's used for global enterprise industries, governments, education, and institutions sites. Drupal provides a high-scalable system, integrated with digital applications, and can be used to create multisite for different organizations with multilingual support.
In this guide, I will show you how to install the latest version of Drupal on an Ubuntu 22.04 system. This guide includes the installation of some package dependencies such as Apache2 web server, MariaDB database, PHP 8.1, and Composer as the PHP package management tool. The goal here is you will have completed Drupal installation with LAMP Stack and secured with SSL certificates.
Prerequisites
To finish this guide, you will need the following requirements:
- An Ubuntu 22.04 server. This demo uses an Ubuntu server with the hostname 'server-ubuntu' and the UFW firewall enabled.
- A non-root user with administrative privileges.
- A domain name pointed to the Ubuntu server IP address.
Installing Apache2 Web Server
In the first step, you will install the Apache web server via APT from the Ubuntu repositories. At the time of this writing, the latest version of Drupal 9 required at least Apache v2.x.
The majority of Drupal development is running with Apache web server, but also still another web server such as Nginx.
Before installing packages, run the following apt command as your non-root sudo user to update and refresh your package index repository. You can also use the direct root user on your server.
sudo apt update
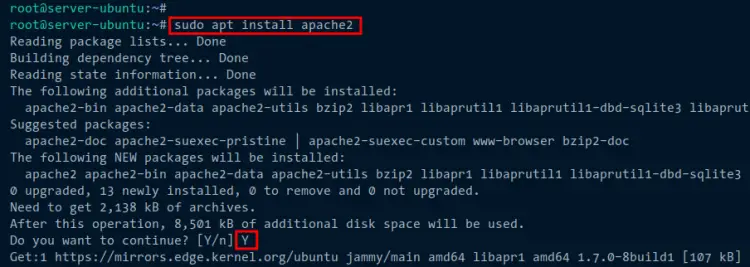
Now install the Apache web server by running the apt command below. You will be prompted to confirm Apache installation, input Y to agree, and press ENTER.
sudo apt install apache2
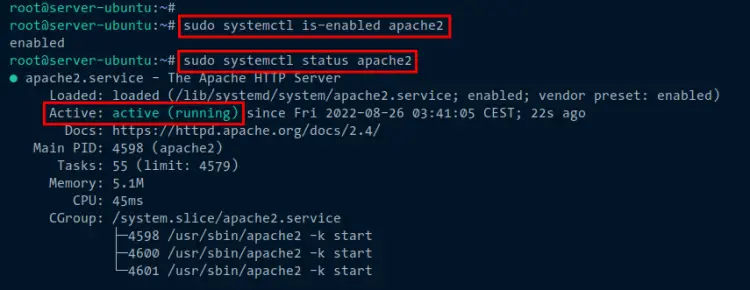
Next, use the following systemctl commands below to check and verify the 'apache2' service.
You should get the output that the 'apache2' service is 'enabled' and will be running automatically at system boot. Also, you will receive the output of the status of the 'apache2' service running.
sudo systemctl is-enabled apache2
sudo systemctl status apache2
Lastly, you will need to add the rule "Apache Full" to the UFW firewall. The rule "Apache Full" will automatically allow access to HTTP and HTTPS ports, and this is included by default with Apache packages.
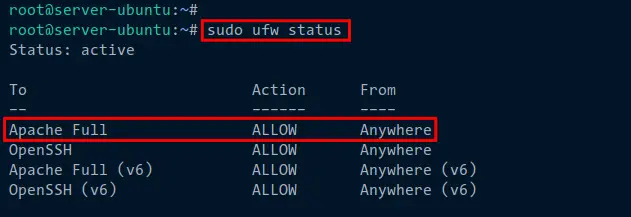
Run the following command to add the "Apache Full" rule. Then, check and verify the status of the UFW firewall. You should receive an output that the "Apache Full" rule is added to the UFW firewall.
sudo ufw allow "Apache Full"
sudo ufw status
Installing MariaDB Server
Drupal supports multiple RDBMS (Relational Database Management System) such as MySQL/MariaDB, PostgreSQL, and SQLite. In this example, you will install Drupal with the MariaDB database server.
The current latest version of Drupal 9 required at least the MariaDB server v10.3.x. And the latest Ubuntu repository provides the MariaDB server v10.6.
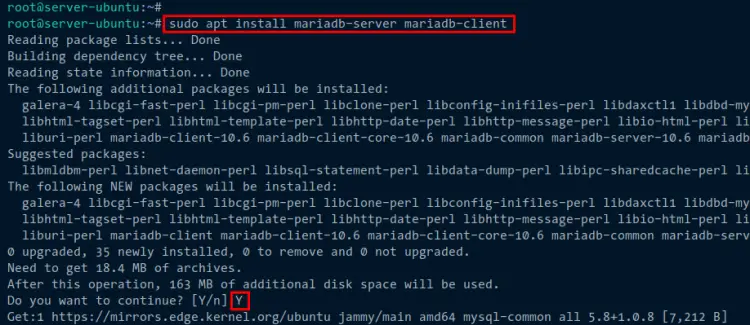
Use the following apt command to install MariaDB server packages. When prompted to confirm the installation, input Y to confirm, then press ENTER.
sudo apt install mariadb-server mariadb-client
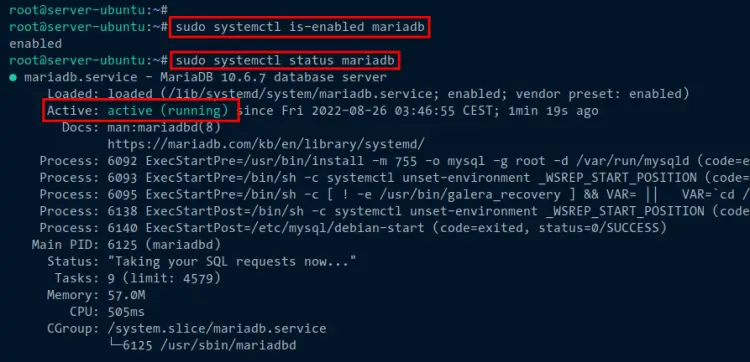
Once the MariaDB server is installed, run the following systemctl command to check the status of the 'mariadb' service.
You will receive an output that the 'mariadb' server is 'enabled' and will be running automatically at system boot/startup. And the current status of the 'mariadb' service is 'running'.
sudo systemctl is-enabled mariadb
sudo systemctl status mariadb
Now that the 'mariadb' service is running, you need to set up and secure the MariaDB server installation. To do this, you can use the command-line tool 'mysql_secure_installation' that is provided by the MariaDB server package.
Run the following command to start configuring and securing the MariaDB server installation.
sudo mysql_secure_installation
You will now be prompted with the following questions:
- For the default MariaDB server installation without a root password, press ENTER when asked about the password.
- The local authentication for MariaDB root users is secured by default, input 'n' when asked to change the authentication method to 'unix_socket'.
- Input 'Y' to create a new MariaDB root password. Then, input the strong password for your MariaDB root user and repeat.
- When asked to disable remote authentication for the MariaDB root user, input 'Y' to agree.
- The default MariaDB server installation comes with the database 'test' and allows an anonymous user to access it. Input 'Y' for both settings to remove the default database 'test' and remove anonymous privilege.
- Lastly, input 'Y' to confirm for reloading tables privileges.
At this point, you have now configured the MariaDB root password and secured the MariaDB server installation. Now you will create a new database and user for Drupal. To do this, you must first log in to the MariaDB shell via the 'mysql' command (MySQL/MariaDB client).
Use the following 'mysql' command to log in to the MariaDB shell as the user root. When prompted for the password, input your MariaDB root password. Also, you can just press ENTER if you are running this command as the system Linux user 'root'.
sudo mysql -u root -p
Next, run the following queries to create a new MariaDB database and user for Drupal. In this example, you will create the database 'drupaldb' with the user 'drupal' and the password is 'password'. You can replace the 'password' with your new strong password.
CREATE DATABASE drupaldb;
CREATE USER drupal@localhost IDENTIFIED BY 'password';
GRANT ALL ON drupaldb.* TO drupal@localhost WITH GRANT OPTION;
FLUSH PRIVILEGES;
Now run another following query to check the privilege of the MariaDB user 'drupal@localhost'. Then, you can exit from the MariaDB shell via the 'quit' query or just press 'Ctrl+d'.
You should receive the output that the MariaDB user 'drupal@localhost' has an access to the database 'drupaldb'.
SHOW GRANTS FOR drupal@localhost;
quit
Installing and Configuring PHP 8.x
At the time of this writing, the latest version of Drupal 9 is recommended to use PHP 8.x for the installation. Also, you will need to install some additional PHP extensions such as 'php-apcu' for cache, 'php-gd' for image processing, 'php-mysql' as the driver for the MariaDB database, and others.
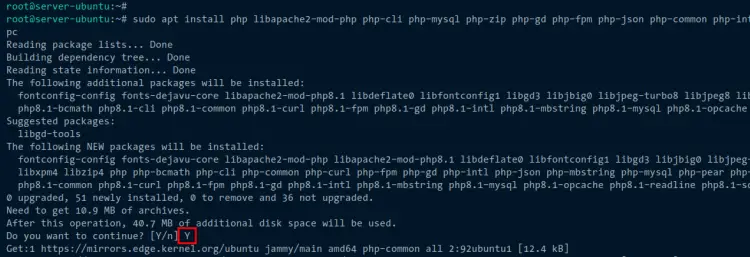
In this example, you will install PHP 8.1 provided by Ubuntu repositories. Use the following 'apt' command to install PHP 8.1 and some additional extensions and packages needed.
When asked to confirm the installation, input 'Y' to agree and press ENTER.
sudo apt install php php-apcu php-dev libapache2-mod-php libcurl4-openssl-dev php-cli php-mysql php-zip php-gd php-fpm php-json php-common php-intl php-mbstring php-curl php-xml php-pear php-tidy php-soap php-bcmath php-xmlrpc
Once PHP is installed, you will need to install an additional PHP extension 'uploadprogress' from the PECL (PHP Extensions Community Library) repository. To do this, you can use the 'pecl' command line provided by the 'php-pear' package.
The 'uploadprogress' extension is used by Drupal to show and track details progress of a file upload, which includes estimated time remaining, and access to the contents of the file as it is being uploaded.
Use the 'pecl' command below to install the PHP extension 'uploadprogress'. The 'pecl' command will now download the source of the 'uploadprogress' extension and automatically compile and install the extension.
sudo pecl install uploadprogress
Once installation is finished, run the following command to create a new configuration file for the 'uploadprogress' PHP extension.
cat <<EOF | sudo tee /etc/php/8.1/mods-available/uploadprogress.ini
; configuration for php uploadprogress module
; priority 15
extension=uploadprogress.so
EOF
Now run the following command to enable the 'uploadprogress' extension on your PHP installation.
sudo ln -s /etc/php/8.1/mods-available/uploadprogress.ini /etc/php/8.1/apache2/conf.d/15-uploadprogress.ini
You have now finished the installation of all PHP packages for Drupal. Now you will need to set up your PHP installation by editing the 'php.ini' file.
Open the file '/etc/php/8.1/apache2/php.ini' using your text editor. In this example, we will use 'nano'.
sudo nano /etc/php/8.1/apache2/php.ini
Change some of the options as below. The 'memory_limit' option should be depending on the server memory, and the 'date.timezone' option should be depending on your timezone.
memory_limit = 512M
upload_max_filesize = 60M
max_execution_time = 300
date.timezone = Europe/Paris
Save and close the file when you are finished.
Next, use the following systemctl command to restart the 'apache2' service and apply new changes to the PHP configurations.
sudo systemctl restart apache2
Now that you have finished the installation and configuration of PHP 8.1, you can now verify the installation by creating the phpinfo file.
Run the following command to create a new phpinfo file '/var/www/html/info.php'. This file contains the phpinfo script that will show you the detaild configurations of your PHP on your web browser.
cat <<EOF | sudo tee /var/www/html/info.php
<?php
phpinfo();
?>
EOF
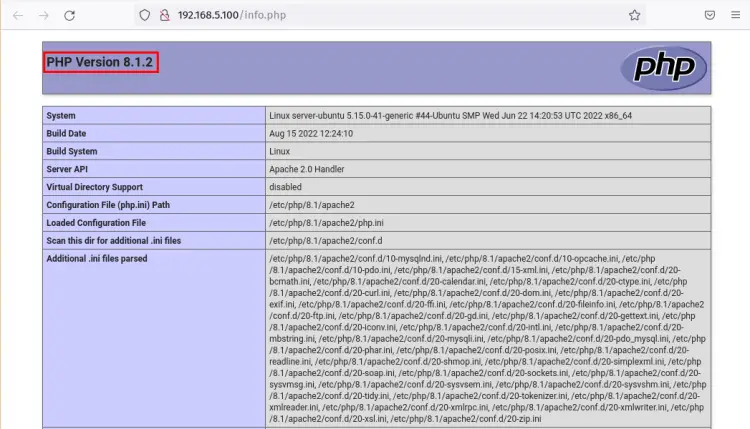
Lastly, open your web browser and visit your Ubuntu server IP address following the path URL '/info.php' (i.e: http://192.168.5.100/info.php). You should see the page for your details on PHP 8.1 installation.
Installing Composer
A composer is a command-line tool for managing PHP package dependencies. You need to install Composer which will be used for installing PHP packages dependencies of your Drupal installation.
To install Composer, run the following command.
php -r "copy('https://getcomposer.org/installer', 'composer-setup.php');"
php -r "if (hash_file('sha384', 'composer-setup.php') === '55ce33d7678c5a611085589f1f3ddf8b3c52d662cd01d4ba75c0ee0459970c2200a51f492d557530c71c15d8dba01eae') { echo 'Installer verified'; } else { echo 'Installer corrupt'; unlink('composer-setup.php'); } echo PHP_EOL;"
php composer-setup.php
php -r "unlink('composer-setup.php');"
Here is what each commands used:
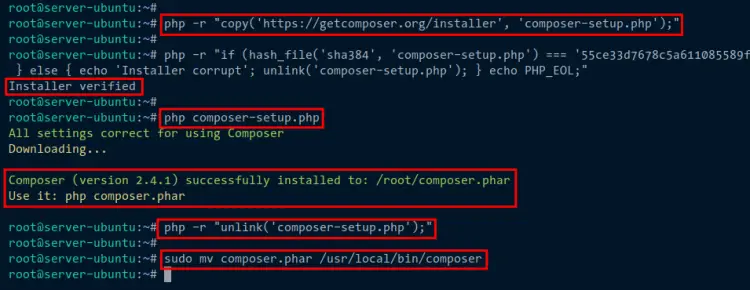
- The first command will download the Composer installer script to 'composer-setup.php'. Then, the second command will verify the hash of the installer script. Be sure you receive the output message 'Installer verified'.
- The last two commands will run the installer script and install the Composer PHP packages dependencies management tool. After that, the installer script 'composer-setup.php' will be deleted.
- Lastly, you will get the Composer binary file as 'composer.phar' on your current working directory.
Next, run the following command to move the binary file 'composer.phar' to '/usr/local/bin/composer'. This action will allow all users to execute the 'composer' command.
sudo mv composer.phar /usr/local/bin/composer
You can now run the command 'composer' to check and verify your installation. The following command will show you a detailed help page of the Composer command.
composer --help
Download Drupal Latest Version
Because you have installed all of the package dependencies for Drupal, now you will download the Drupal source code and install PHP package dependencies via the Composer.
Use the following wget command to download the latest version of Drupal. You will see the file 'drupal.tar.gz' on your current working directory.
wget https://www.drupal.org/download-latest/tar.gz -O drupal.tar.gz
Now extract the file 'drupal.tar.gz' via the tar command below. Then, move the extracted drupal directory to '/var/www/drupal'. This directory will be used as the 'Document-root' directory for your Drupal installation.
tar -xvf drupal.tar.gz
mv drupal-* /var/www/drupal
Next, change the ownership and permission of the Drupal installation directory '/var/www/drupal' by using the following command. The ownership must be user and group 'www-data' with the normal user permission '755'.
sudo chown -R www-data:www-data /var/www/drupal/
sudo chmod -R 755 /var/www/drupal/
Now move to the '/var/www/drupal' directory and run the composer command as below to install all PHP dependencies for your Drupal installation.
cd /var/www/drupal
sudo -u www-data composer install --no-dev
Setting Up Apache2 Virtual Host for Drupal
After you downloaded Drupal and installed PHP package dependencies, you will now set up and configure the Apache virtual host for your Drupal installation.
Before you start configuring a virtual host, be sure your domain name that will be used for Drupal is pointed to your server IP address. Also, be sure your SSL certificates are ready.
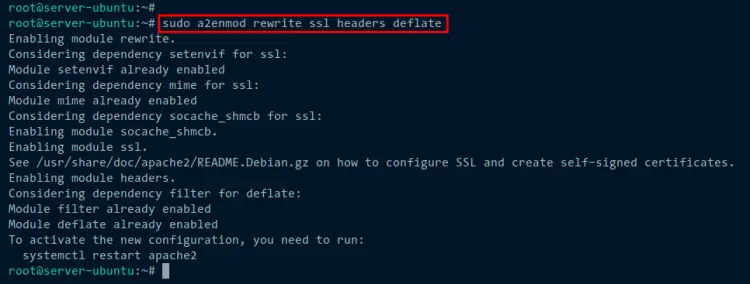
Run the following a2enmod command to enable some Apache2 modules for your Drupal.
sudo a2enmod rewrite ssl headers deflate
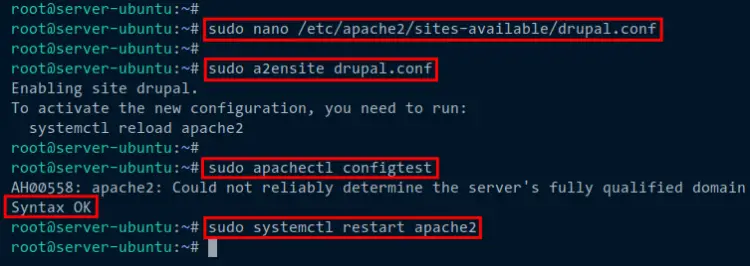
Now create a new virtual host file for drupal '/etc/apache2/sites-available/drupal.conf' using the following command. This example uses the 'nano' editor.
sudo nano /etc/apache2/sites-available/drupal.conf
Add the following complete configuration for the Drupal virtual host. Be sure to change the domain name and the path of SSL certificates. In this demo, we will use the domain 'howtoforge.local' for our Drupal installation.
<VirtualHost *:80>

    ServerName howtoforge.local
    ServerAdmin [email protected]

    # Redirect Requests to SSL
    Redirect permanent "/" "https://howtoforge.local/"

    ErrorLog ${APACHE_LOG_DIR}/howtoforge.local.error.log
    CustomLog ${APACHE_LOG_DIR}/howtoforge.local.access.log combined

</VirtualHost>

<IfModule mod_ssl.c>

    <VirtualHost _default_:443>

        ServerName howtoforge.local
        ServerAdmin [email protected]
        DocumentRoot /var/www/drupal

        # Add security
        php_flag register_globals off

        ErrorLog ${APACHE_LOG_DIR}/howtoforge.local.error.log
        CustomLog ${APACHE_LOG_DIR}/howtoforge.local.access.log combined

        SSLEngine on
        SSLCertificateFile /etc/letsencrypt/live/howtoforge.local/fullchain.pem
        SSLCertificateKeyFile /etc/letsencrypt/live/howtoforge.local/privkey.pem

        <FilesMatch "\.(cgi|shtml|phtml|php)$">
                SSLOptions +StdEnvVars
        </FilesMatch>

        <Directory /var/www/drupal>
                Options FollowSymlinks
                #Allow .htaccess
                AllowOverride All
                Require all granted
                <IfModule security2_module>
                        SecRuleEngine Off
                        # or disable only problematic rules
                </IfModule>
        </Directory>

        <Directory /var/www/drupal/>
            RewriteEngine on
            RewriteBase /
            RewriteCond %{REQUEST_FILENAME} !-f
            RewriteCond %{REQUEST_FILENAME} !-d
            RewriteRule ^(.*)$ index.php?q=$1 [L,QSA]
        </Directory>

    </VirtualHost>

</IfModule>
Save your configuration and close the file when finished.
Next, run the following command to activate the 'drupal.conf' virtual host file. Then, test and verify your Apache configurations. If your Apache configuration is correct, you will receive an output message such as 'Syntax OK'.
sudo a2ensite drupal.conf
sudo apachectl configtest
Lastly, restart the 'apache2' service to apply new changes and the new virtual host file. You can now access the Drupal installer via the domain name and web browser.
sudo systemctl restart apache2
Running the Drupal Web Installer
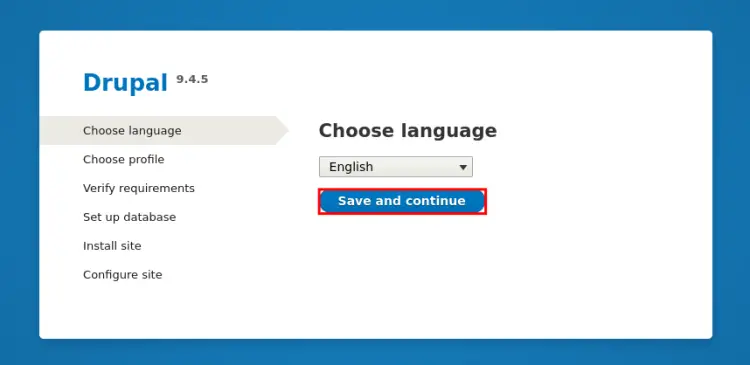
To access the Drupal installer, open your web browser and visit the domain name of your Drupal installation (i.e: https://howtoforge.local/).
On the language settings, select your preferred language and click 'Save and continue. The default language setting is 'English'.
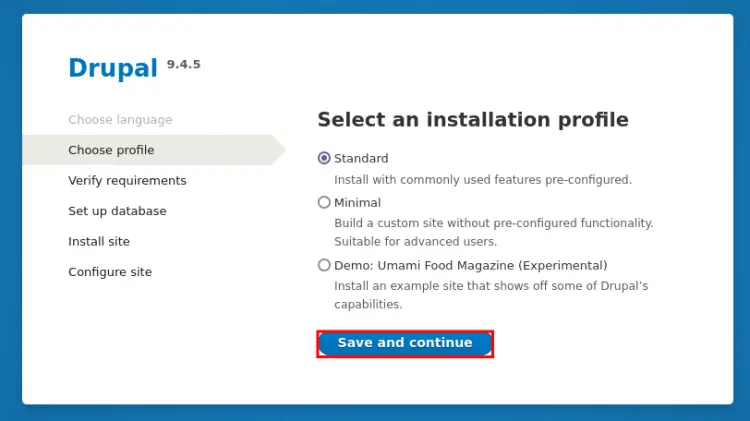
Select the installation profile for your Drupal installation. Then, click 'Save and continue.
You use a 'standard' profile that is recommended for new Drupal users or use 'Minimal' if you are familiar with Drupal', or use the 'Demo' profile that includes examples of Drupal sites and configurations.
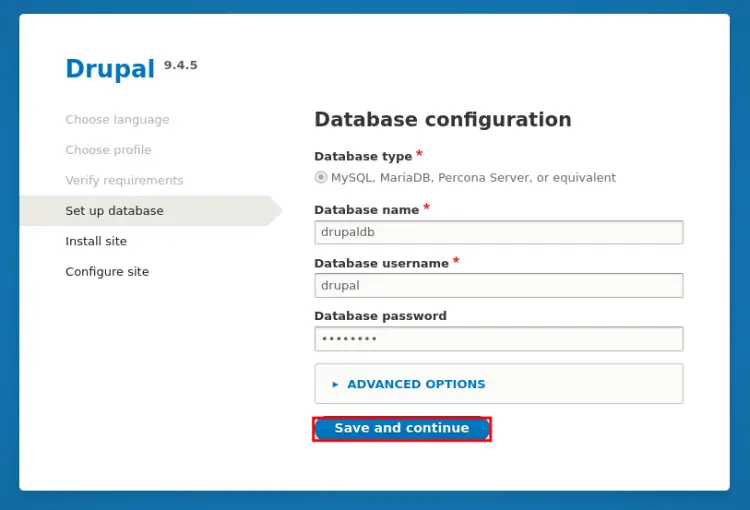
Now input details MariaDB database for your drupal installation and click 'Save and continue. If you are using MariaDB on a different host, use the 'ADVANCED OPTIONS' to input the MariaDB server host IP address.
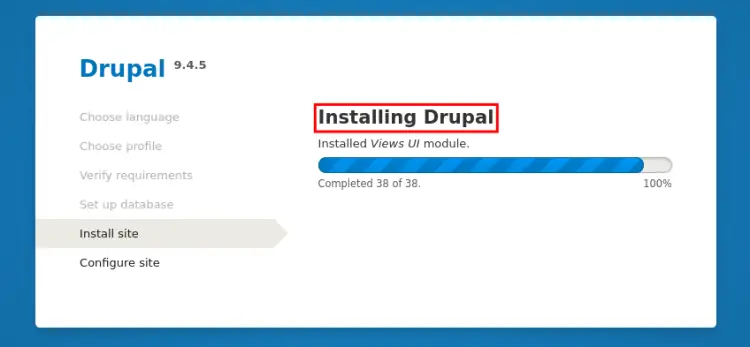
And the Drupal installation will begin.
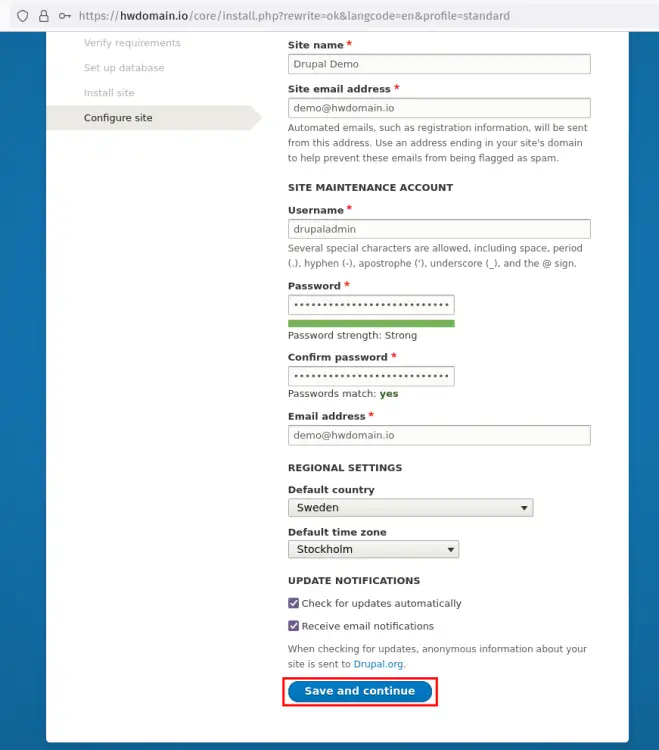
Next, input details of your Drupal site configurations which include the site name and the administrator user of your Drupal. When finished, click 'Save and continue.
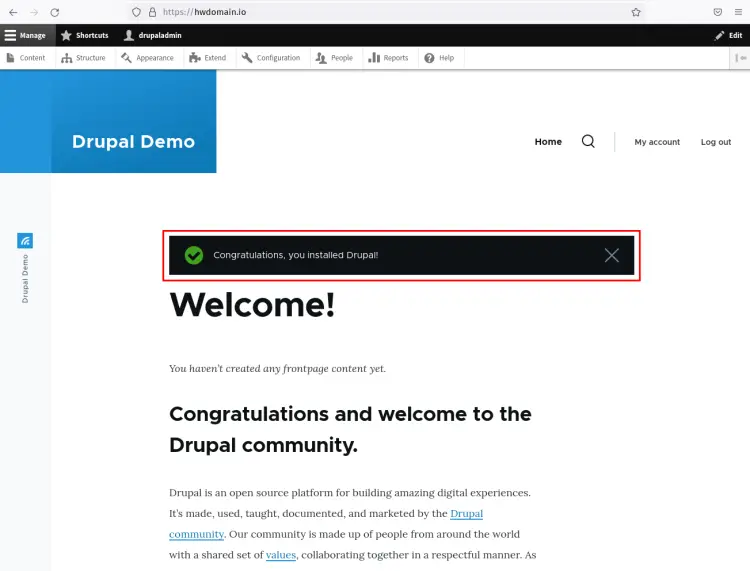
Now you should get the page that informs you of the Drupal installation is finished. You can see a message such as "Congratulations, you installed Drupal!'.
You have now finished the Drupal installation, but you still need to set up additional configurations. In this example, you will set up the Drupal 'trusted_host' configuration, which will protect your Drupal installation against the HTTP HOST header attacks.
To enable the 'trusted_host' configuration, you will need to edit the Drupal configuration '/var/www/drupal/sites/default/settings.php'.
Run the following to make the file '/var/www/drupal/sites/default/settings.php' writable. Then, open the file using your text editor. In this demo, we will use 'nano'.
sudo chmod 644 /var/www/drupal/sites/default/settings.php
sudo nano /var/www/drupal/sites/default/settings.php
Press 'Ctrl+w' to search for pattern of 'trusted_host'. Then, add the following configuration to the file, and be sure to change the domain name with your Drupal installation. The domain name should be formatted in Regex.
$settings['trusted_host_patterns'] = [
  '^hwdomain\.io$',
];
Save the configuration and exit when you are finished. Then, change again the permission of the file to make it unwritable using the following command.
sudo chmod 444 /var/www/drupal/sites/default/settings.php
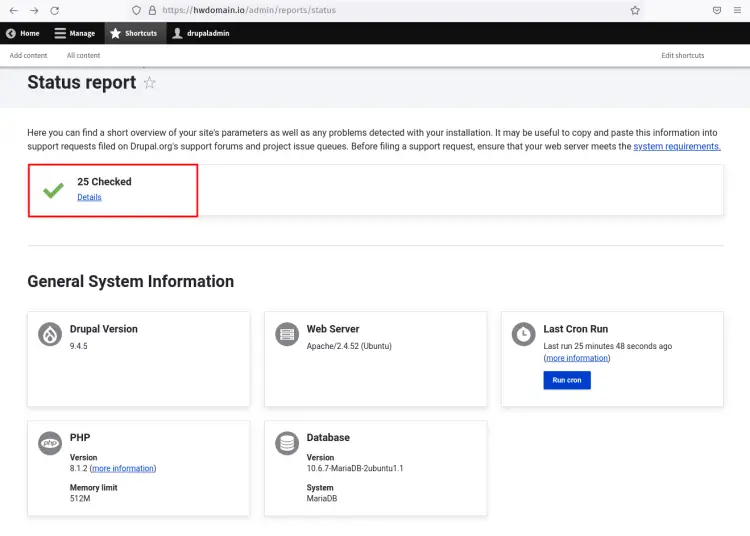
Lastly, back to your web browser and visit the status report of your Drupal installation (i.e: https://howtoforge.local/admin/reports/status).
You will see the detailed server configurations of your Drupal installation. Also, you can see all 25 Drupal configurations are successfully checked.
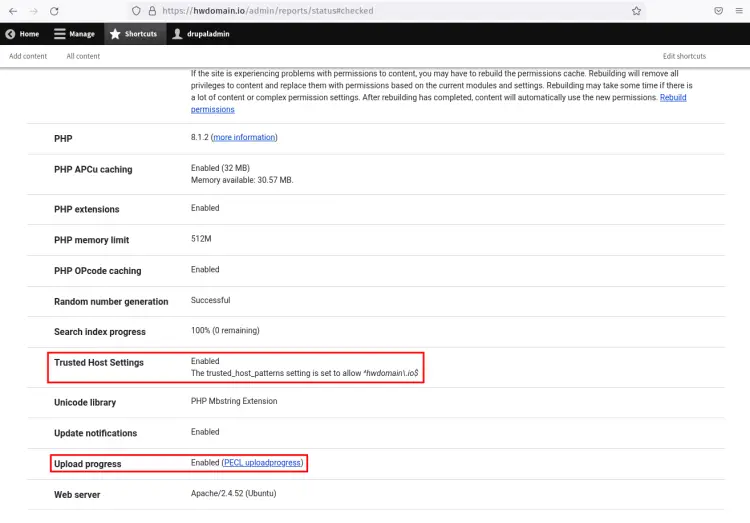
Scroll the page to the bottom and you will see detailed system configurations of your Drupal installation. In the following, you can see 'trusted_host' and the 'Upload Progress' settings are enabled.
Conclusion
In this guide, you installed and configure the latest version of Drupal v9 on the Ubuntu 22.04 server. You also learned the basic installation of LAMP Stack (Linux, Apache, MariaDB, and PHP) on the Ubuntu system and the basic installation of PHP extension from the PECL (PHP Extension Community Library) repository.
Now that you have Drupal installed and secured with SSL certificates and the 'trusted_host' settings enabled. You can extend your current Drupal installation by installing themes for your site and installing some additional Drupal plugins.

