How To Configure An Email Account In Thunderbird
This guide explains how you can configure a POP3 account in Mozilla Thunderbird. I'm assuming that Mozilla Thunderbird is already installed.
1. First Step
Open Thunderbird, if you open it the first time you will see a window like that:
We select "Email account", which is already marked and click "continue".
2. Identity
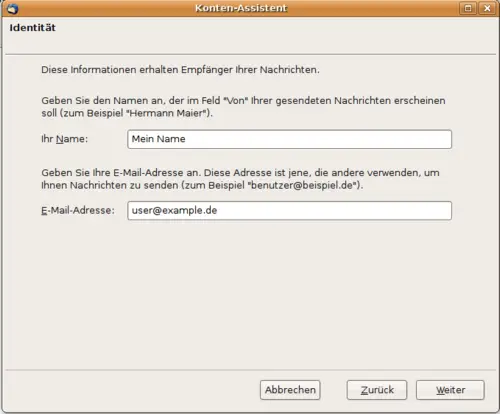
Now you have to personalize your Thunderbird. In the first field you have to type in your name, in the second your email address.
3. Account assistant
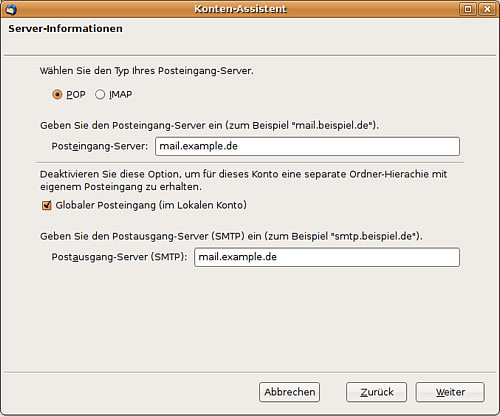
We select POP for the incoming mail server, then we enter our incoming mail server and our outgoing mail server. For this example it is
mail.example.de
4. Incoming Mails
Now you have to make some server settings. Then you have to fill the configuration with the details of your provider. Here is a list with some information. If your provider isn't listed, you can have a look at your provider's homepage or write a mail to your provider.
| Provider | Inbox | Outbox | Username |
| GMX | pop.gmx.net | mail.gmx.net | gmx email adresse |
| Google Mail | pop.googlemail.com | smtp.googlemail.de | googlemail adresse |
| WEB.de | pop3.web.de | smtp.web.de | Username |
| Yahoo | pop.mail.yahoo.de | smtp.mail.yahoo.de | Username |
| Freenet | mx.freenet.de | mx.freenet.de | Freenet Email adresse |
| Strato | post.strato.de | post.strato.de | [email protected] |
| Arcor | pop3.arcor.de | mail.arcor.de | Username |
| Mnet | pop.mnet-online.de | mail.mnet-online.de | mnet email Adresse |
| 1und1 | pop.1und1.de | smtp.1und1.de | 1und1 Emailadresse |
5. Username
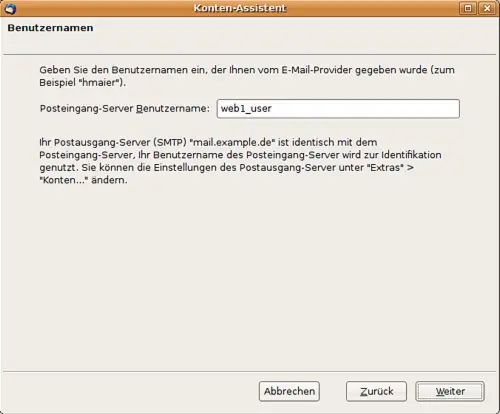
As Username you have to type in your username or your email address that your provider told you. You can also find this information in the table above.
Here you can give your account a name. You can choose your own name or your email address or any name you want. This description is only for you.
6. Summary
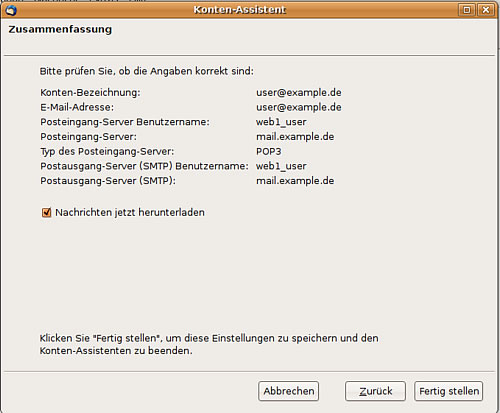
After you have clicked continue, the menu shows you a summary of your settings. Please control your settings and click continue.
7. Connect with Server
Now we click on the button "retrieve" in the left corner. Then a window will open, including the question about your mail server password. Here you enter your password of the email account. Optionally you may save the password by checking the option field, because then you will never be asked for the password again if you want to read your emails. Afterwards your emails will be downloaded from the server. The question for the password appears again if you want to send an email. So you have to save the password again.
8. Finish
I hope this Howto helped you to configure Thunderbird.


