Getting Started with Podman (Docker Alternative) on Rocky Linux
This tutorial exists for these OS versions
- Rocky Linux 8.4
- Rocky Linux 8.4
On this page
Podman is a Linux-native tool for deploying applications using Open Container Initiative (OCI) containers and container images. It supports multiple container image formats, including Docker images and OCI container images. Also, Podman supports managing pods, groups of containers.
Podman is a daemon-less tool, running as a single binary command-line without a service. It provides a command-line similar to Docker, you can use an alias such as 'alias docker=podman'.
To run containers and manage container images, Podman relies on libpod and OCI container runtimes such as runc, crun, and runv.
Prerequisites
In this guide, you will learn how to install Podman on the Rocky Linux system. Also, you will learn the basic usage of Podman for managing containers and container images.
Before you start, ensure you've got the following requirements:
- Operating System: Rocky Linux 8.4 (Green Obsidian)
- Root privileges: For installing new packages and editing system configuration
Now let's start the Podman installation.
Installing Podman on Rocky Linux
By default, the Rocky Linux appstream repository provides podman packages.
1. Execute the DNF command below to show information about the podman package.
sudo dnf info podman
You will see a similar output as below.
Last metadata expiration check: 0:07:09 ago on Tue 16 Nov 2021 09:30:27 AM UTC.
Available Packages
Name         : podman
Version      : 3.3.1
Release      : 9.module+el8.5.0+710+4c471e88
Architecture : x86_64
Size         : 12 M
Source       : podman-3.3.1-9.module+el8.5.0+710+4c471e88.src.rpm
Repository   : appstream
Summary      : Manage Pods, Containers and Container Images
URL          : https://podman.io/
License      : ASL 2.0 and GPLv3+
Description  : podman (Pod Manager) is a fully featured container engine that is a simple
             : daemonless tool.  podman provides a Docker-CLI comparable command line that
             : eases the transition from other container engines and allows the management of
             : pods, containers and images.  Simply put: alias docker=podman.
             : Most podman commands can be run as a regular user, without requiring
             : additional privileges.
             :
             : podman uses Buildah(1) internally to create container images.
             : Both tools share image (not container) storage, hence each can use or
             : manipulate images (but not containers) created by the other.
             :
             : Manage Pods, Containers and Container Images
             : podman Simple management tool for pods, containers and images
The appstream repository provides the Podman package version '3.3.1'.
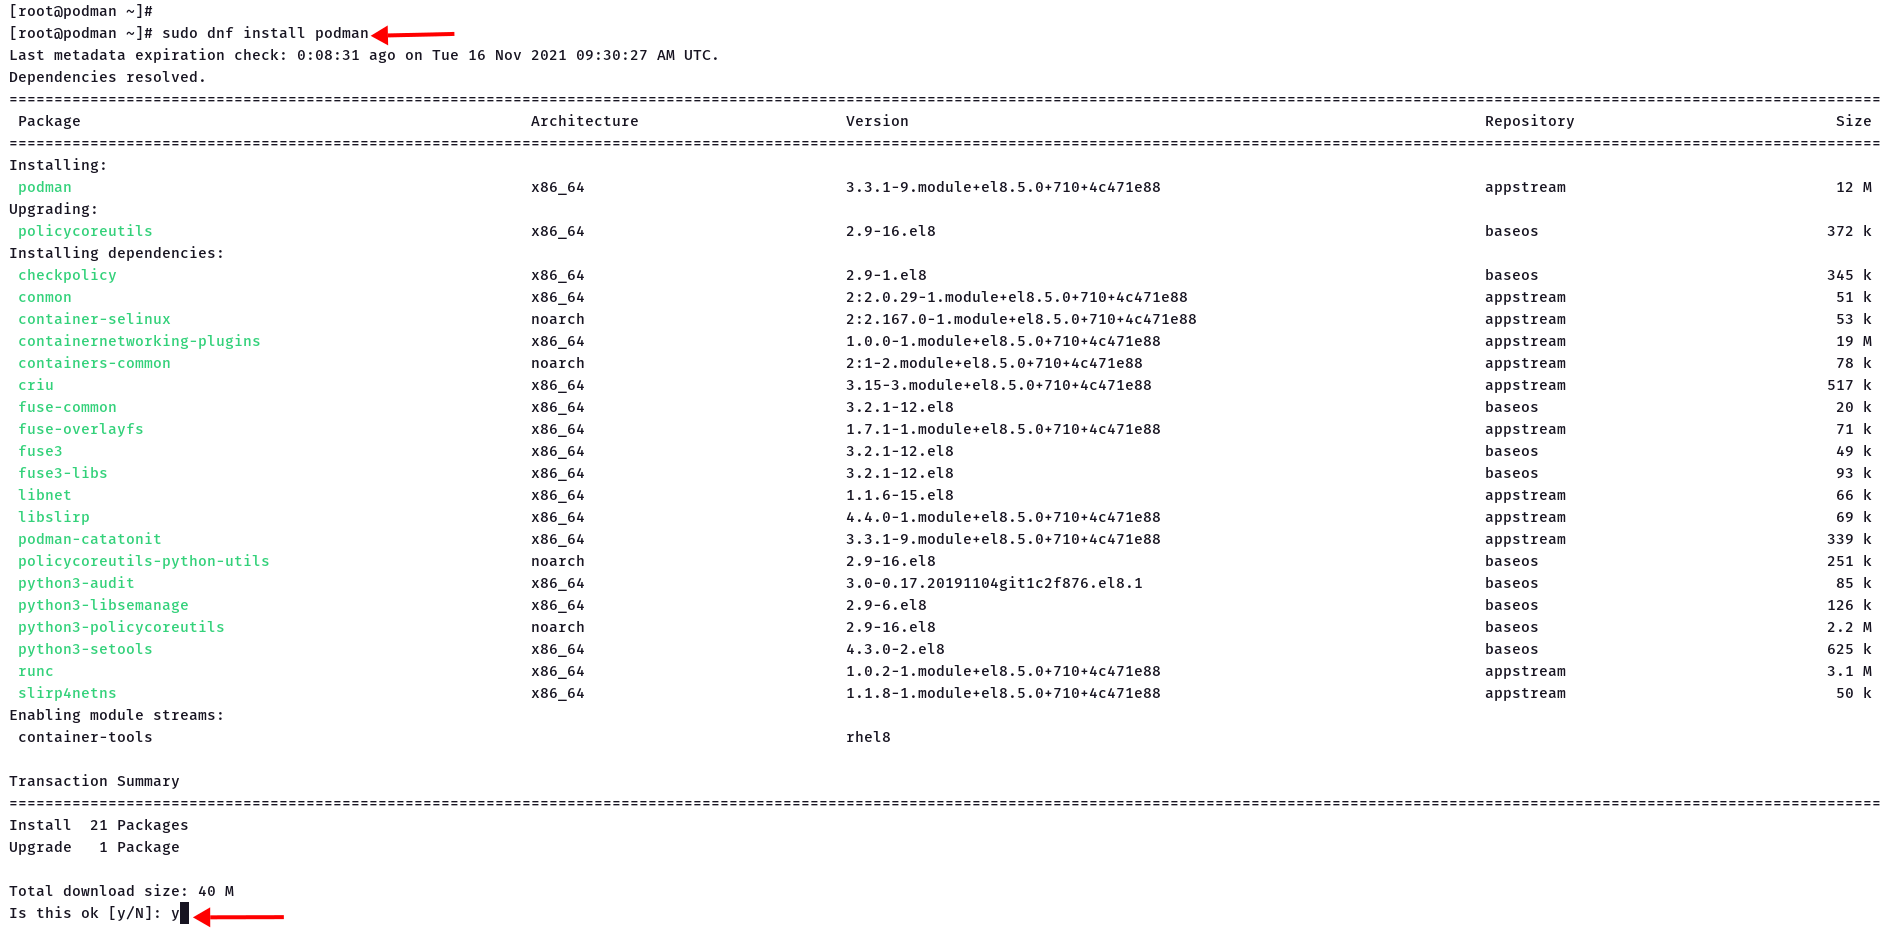
2. Install Podman using the DNF command below.
sudo dnf install podman
Type 'y' to confirm and press 'Enter' to continue the installation.
3. If Podman installation completes, verify using the following command.
podman version
You will see a similar output as below.
Version:      3.3.1
API Version:  3.3.1
Go Version:   go1.16.7
Built:        Wed Nov 10 01:48:06 2021
OS/Arch:      linux/amd64
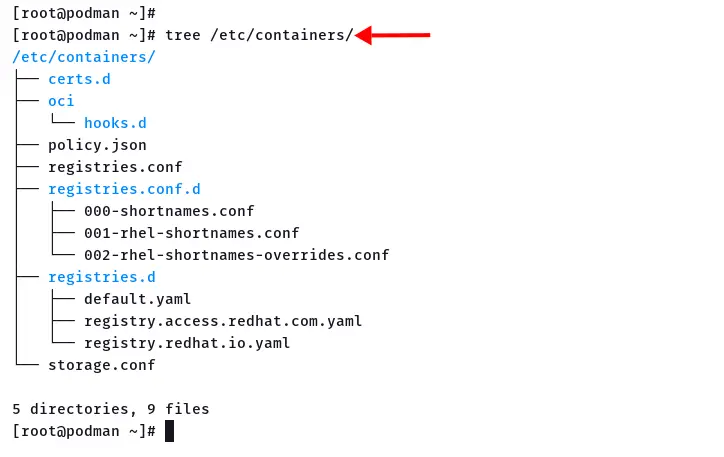
Podman Important Configuration
The Podman package comes with some default configuration located at the '/etc/containers' directory.
Below are some Podman configurations you must know.
- policy.json. Policy configuration for image signing.
- registries.conf. List of available container image registries such as Docker Registry, RHEL Container image registry, and Fedora Container images registry.
- storage.conf. Configuration of default storage for Podman. Includes drivers, location, etc.
- Directory registries.d/. Additional registries configuration and image signing
- Directory registries.conf.d/. Additional configuration for container images aliases.
Setup New User
In this step, you will be creating a new user and verifying the Podman installation by running the Docker image 'hello-world'.
1. Run the command below to add a new user 'johndoe'.
useradd -m -s /bin/bash johndoe
passwd johndoe
Type new strong password for user 'johndoe'.
2. Next, log in as user 'johndoe' using the following command.
su - johndoe
3. Now execute the following command to run a new container based on the Docker image 'hello-world'.
podman run hello-world
You will see the output 'Hello World' messages, which means the container is running but now exited.
? docker.io/library/hello-world:latest
Trying to pull docker.io/library/hello-world:latest...
Getting image source signatures
Copying blob 2db29710123e done
Copying config feb5d9fea6 done
Writing manifest to image destination
Storing signatures

Hello from Docker!
This message shows that your installation appears to be working correctly.

To generate this message, Docker took the following steps:
 1. The Docker client contacted the Docker daemon.
 2. The Docker daemon pulled the "hello-world" image from the Docker Hub.
    (amd64)
 3. The Docker daemon created a new container from that image which runs the executable that produces the output you are currently reading.
 4. The Docker daemon streamed that output to the Docker client, which sent it to your terminal.

To try something more ambitious, you can run an Ubuntu container with:
 $ docker run -it ubuntu bash

Share images, automate workflows, and more with a free Docker ID:
 https://hub.docker.com/

For more examples and ideas, visit:
 https://docs.docker.com/get-started/
4. Check containers status on your system using the Podman command below
podman ps -a
You will see the container based on the Docker image 'hello-world' with the current status 'Exited'.
CONTAINER ID  IMAGE                                 COMMAND     CREATED        STATUS                    PORTS       NAMES
cea9bbfeac4d  docker.io/library/hello-world:latest  /hello      6 minutes ago  Exited (0) 6 minutes ago              recursing_shaw
Podman Basic Usages
In this step, you will learn the basic usage of Podman for managing containers and container images.
Search Container Images
1. To find container images using Podman, use the following command. In this example, we're searching container images with the name 'nginx'.
podman search nginx
You will see a lot of container images from the multiple registries.
2. You can limit the search results from each container images registry using the option '--limit n'.
podman search nginx --limit 3
Now you will see each registry with 3 results of container images with the name 'nginx'.
INDEX              NAME                                                DESCRIPTION                                      STARS       OFFICIAL    AUTOMATED
fedoraproject.org  registry.fedoraproject.org/f29/nginx                                                                 0
fedoraproject.org  registry.fedoraproject.org/f29/origin-nginx-router                                                   0
redhat.com         registry.access.redhat.com/ubi8/nginx-120           Platform for running nginx 1.20 or building ...  0
redhat.com         registry.access.redhat.com/ubi8/nginx-118           Platform for running nginx 1.18 or building ...  0
redhat.com         registry.access.redhat.com/rhscl/nginx-18-rhel7     Nginx 1.8 server and a reverse proxy server      0
centos.org         registry.centos.org/bamachrn/nginx-header                                                            0
centos.org         registry.centos.org/centos/nginx                                                                     0
centos.org         registry.centos.org/centos/nginx-110-centos7                                                         0
docker.io          docker.io/library/nginx                             Official build of Nginx.                         15839       [OK]
docker.io          docker.io/jwilder/nginx-proxy                       Automated Nginx reverse proxy for docker con...  2096                    [OK]
docker.io          docker.io/nginxinc/nginx-unprivileged               Unprivileged NGINX Dockerfiles                   54
Manage Container Images
Podman supports OCI and Docker images format. In this stage, you will be managing container images with Podman.
1. Download container image 'nginx:alpine' using the following command.
podman pull nginx:alpine
Select the container registry you want to use, then press 'Enter' to confirm. For this example, we will use the Docker registry.
? Please select an image:
    registry.fedoraproject.org/nginx:alpine
    registry.access.redhat.com/nginx:alpine
    registry.centos.org/nginx:alpine
  ? docker.io/library/nginx:alpine
The download process will begin.
? docker.io/library/nginx:alpine
Trying to pull docker.io/library/nginx:alpine...
Getting image source signatures
Copying blob a4e156412037 done
Copying blob a2402c2da473 done
Copying blob e0bae2ade5ec done
Copying blob 97518928ae5f done
Copying blob 3f3577460f48 done
Copying blob e362c27513c3 done
Copying config b46db85084 done
Writing manifest to image destination
Storing signatures
b46db85084b80a87b94cc930a74105b74763d0175e14f5913ea5b07c312870f8
2. If the container image download process completes, verify downloader images using the following command.
podman images
Below is the similar output you will get.
REPOSITORY                     TAG         IMAGE ID      CREATED      SIZE
docker.io/library/nginx        alpine      b46db85084b8  3 days ago   24.7 MB
docker.io/library/hello-world  latest      feb5d9fea6a5  7 weeks ago  19.9 kB
Run Container with Podman
After downloading the container image 'nginx:alpine', you will learn how to run a new container using Podman.
1. Execute the following command to run the container based on image 'nginx:alpine'.
podman run -it --rm -d -p 8080:80 --name web nginx:alpine
You will get the random string and number of the container.
2. Verify the container running on your system using the following command.
podman ps
You will see similar output as below.

The container names 'web' is 'Up' and exposes the port '8080' on the host machine.
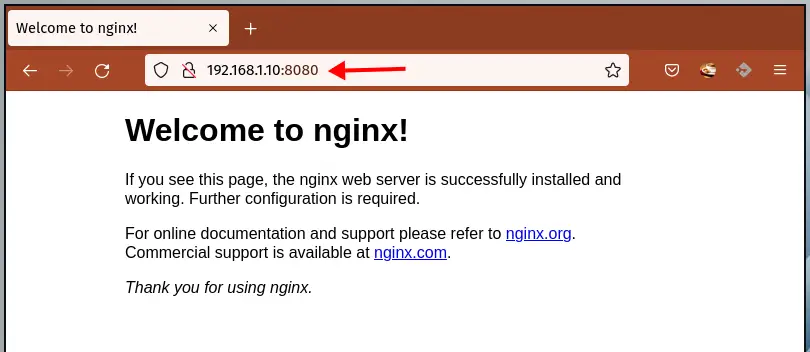
3. Now open your web browser and type the Rocky Linux IP address on the address bar. For this example, the Rocky Linux machine has the IP address '192.168.1.10'.
http://192.168.1.10:8080/
You will see the default index.html from the container 'web', which is based on the container image 'nginx:alpine'.
Check Container Logs with Podman
Now you will learn the Podman command for checking container logs using the option 'logs'.
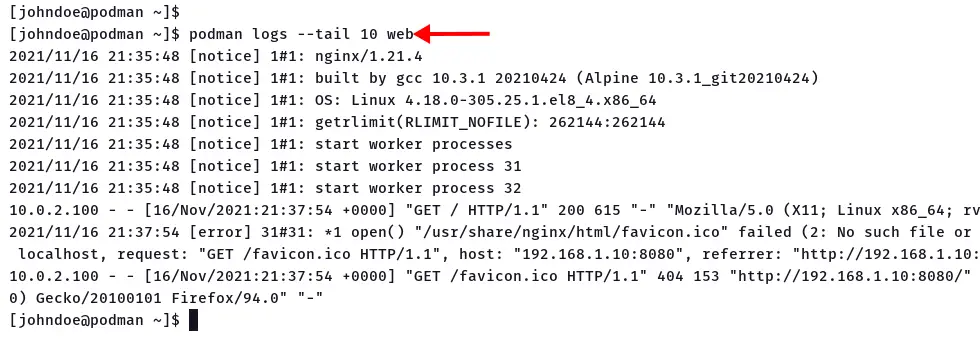
1. To check logs of the container, you can use the Podman command below.
podman logs web
You will see detailed logs of the container 'web'.
2. To limit container logs output, use the option '--tail n'.
podman logs --tail 10 web
Below is the similar log output of the container 'web'.
Stopping Container with Podman
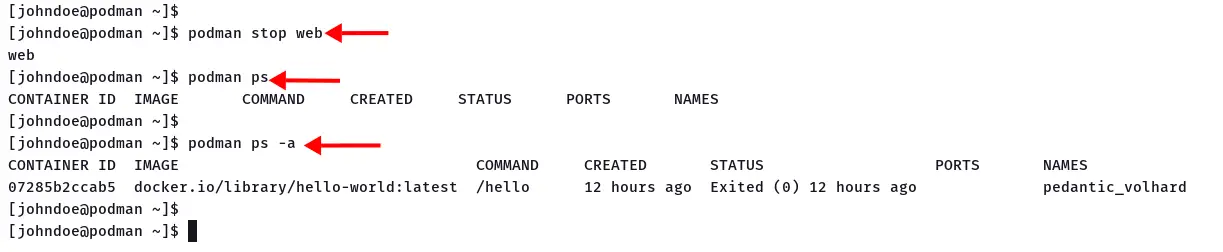
1. To stop the container 'web', use the Podman command below.
podman stop web
Now the container 'web' will be stopped.
2. Verify using the following command.
podman ps
podman ps -a
You will see the container 'web' is automatically deleted because you're using the option '--rm' when you run the container.
Setup Custom Volume with Podman
In this step, you will learn how to manage volumes with the Podman.
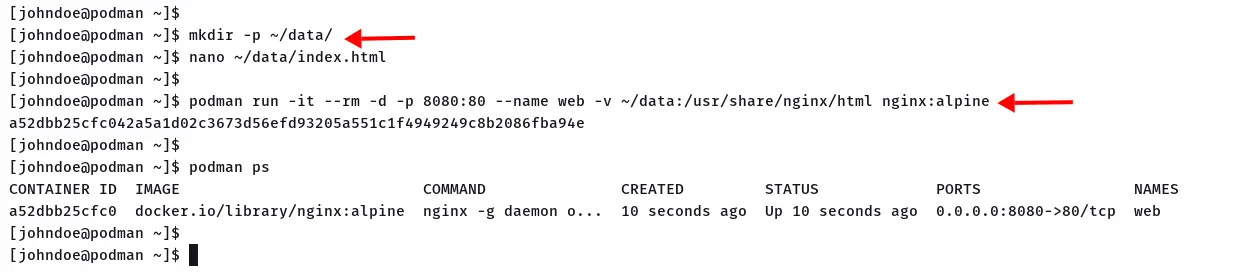
1. Create new directory 'data' and the custom file 'index.html'. This will replace the default Nginx 'index.html' file on the Nginx container.
mkdir -p ~/data/
nano ~/data/inde.html
Copy and paste the following HTML script.
<!doctype html>
<html lang="en">
<head>
  <meta charset="utf-8">
  <title>Welcome to Container Nginx</title>
</head>
<body>
  <h2>Hello from Nginx container - Managed with Podman</h2>
</body>
</html>
Save the script and exit.
2. Next, execute the following command to create a new container with custom volume.
podman run -it --rm -d -p 8080:80 --name web -v ~/data:/usr/share/nginx/html nginx:alpine
Use the option '-v data:/usr/share/nginx/html' to setup custom volume for your new container. The 'data' directory will be mounted to the container directory '/usr/share/nginx/html'.
3. Check running containers using the Podman command below.
podman ps
The new container names 'web' is 'Up' with the custom volume.
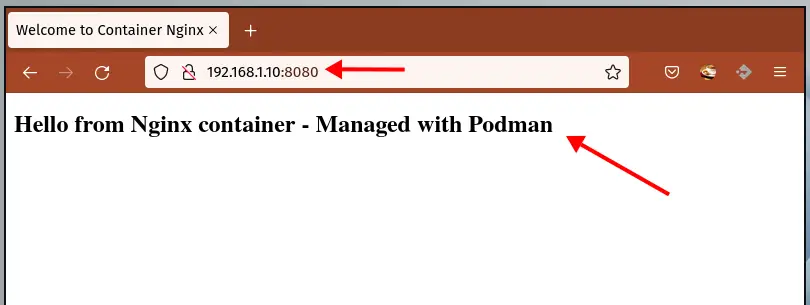
4. Open your web browser and type the server IP address with port '8080'.
http://192.168.1.10:8080/
Now you will see the custom 'index.html' page as below.
SSH to Running Container
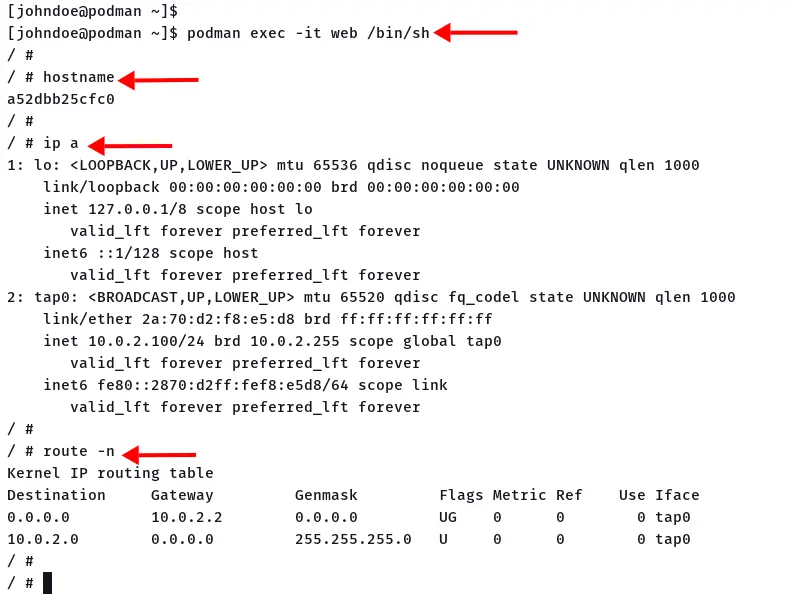
In this step, you will be accessing the shell of the running container.
1. To log in to the running container, use the Podman with the 'exec' option as below.
podman exec -it web /bin/sh
2. After you logged in to the container, check the container hostname, IP address, and the routing table.
hostname

ip a
route -n
Now type 'exit' and pres 'Enter' to log out from the container.
Clean up environment
In the last step, you will be clean up your environment.
1. Stop the container 'web' using the following command.
podman stop web
2. Next, remove all containers with the status 'Exited' using the podman command below.
podman rm $(podman ps --filter "status=exited" -q)
Now you've completes the basic usage of Podman for managing containers and container images.
Conclusion
Congratulation! You've successfully installed Podman on the Rocky Linux system. Also, you've learned the basic usage of Podman for managing containers and container images.
For the next step, you may be interested in creating custom Container images based on the Docker image format or OCI container image specification.

