Continuous Deployment With Jenkins And Rex - Page 2
Configuring Jenkins
A word at the start: Be carefull, don't use spaces in the project name!
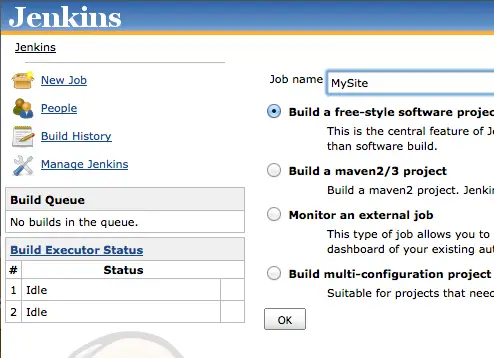
Start your Browser and point it to your Jenkins installation. Create a new "Free Style" Project.
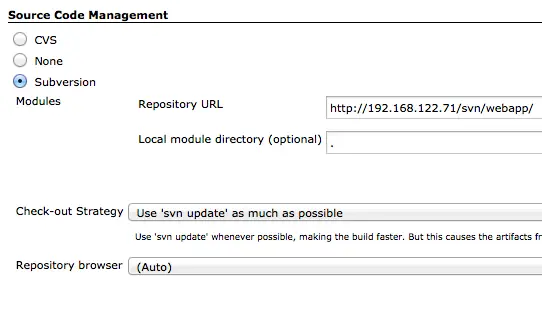
Check "Subversion" at the Source-Code-Management category. Add the Repository URL. http://your-subversion-server/svn/webapp
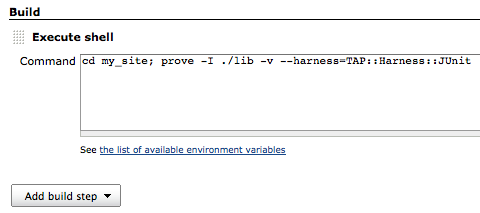
Now add a new build step and select "Execute Shell". Paste the following command to the text field.
cd my_site; prove -I ./lib -v --harness=TAP::Harness::JUnit
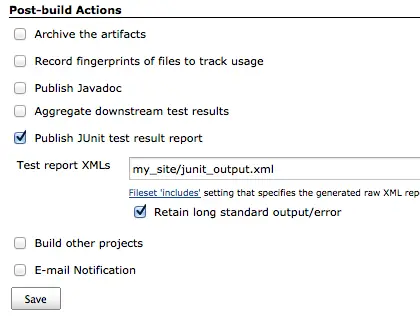
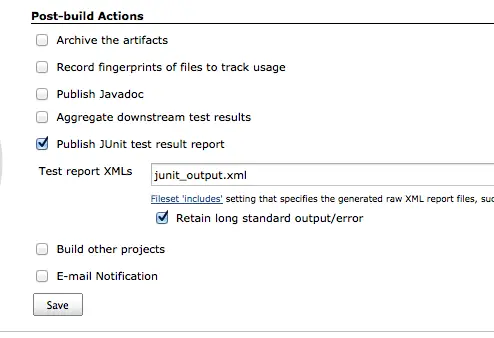
And advise Jenkins to publish the JUnit test prove created. Check "Publish JUnit test result report" in the Post-build Actions section. And check "Retain long standard output/error", too. Put the following line into the textfield.
my_site/junit_output.xml
Save the project.
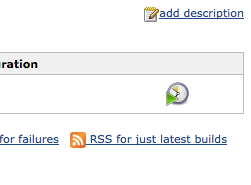
Now you can schedule a test build by clicking on the "Schedule a build" button.
If you refresh the Jenkins page after a few seconds, you will have a successfull testbuild.
Okay, now we need to create a Job to deploy our application on our Webservers.
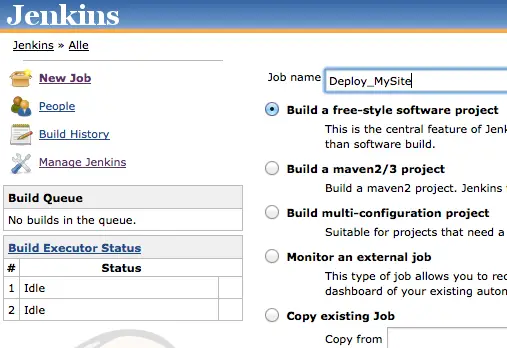
Go to the Jenkins start page and select "new Job". And, as before, choose the "Free Style" project.
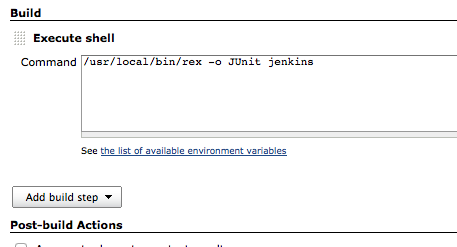
Use the same options as before (but use an other Job name). Select "Execute shell" in the "Build" Section and use the following command.
/usr/local/bin/rex -o JUnit jenkins
If you've used the packages installing rex, you have to use the following command.
/usr/bin/rex -o JUnit jenkins
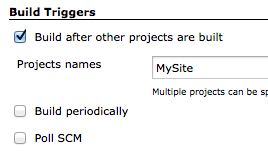
You alse need to check "Build after other projects are built" in "Build Triggers" section.
This will guarantee that the Deploy Job will be started on a successfull build.
Check "Publish JUnit test result report" and this time use the filename "junit_output.xml".
Save the job.
Create a Rexfile
Now go back to your project and create a Rexfile in the top of it.
 use strict;
 use warnings;

 # we want to use transactions to rollback on deploy failures
 use Rex::Transaction;

 use Rex::Apache::Build;
 use Rex::Apache::Deploy "Symlink";

 # we login as root with password test
 user "root";
 password "test";
 pass_auth;

 # configure 2 webservers. You just want to use one here.
 group frontend => "www01", "www02";

 # we need to get the current revision, so the build task
 # can create the right deploy package.
 get_version_from "svn-info.tmp", qr{Revision: (\d+)};

 task "build", sub {

    # first get the current svn revision
    run "svn info >svn-info.tmp";

    # build a package
    build "mysite",
       path => "my_site",
       exclude => [".svn", "log"];

 };

 # this is the directory where rex will upload the deployment package
 # and extract it
 deploy_to "/var/deploy";
 document_root "/var/www/html";

 # generate the right directory to extract the deploy package.
 generate_deploy_directory sub {
    my ($file) = @_;
    $file =~ m/-(\d+)\.tar\.gz$/;
    return $1;
 };

 task "deploy", group => "frontend", sub {

    # on failure, roll back to the old version
    my $old_live = get_live_version;
    on_rollback {
       say "Rolling back to $old_live\n";
       switch_to_version($old_live);
       reload();
    };

    deploy "mysite";

    # create dependencies on the tasks "test" and "reload"
    needs "test";
    needs "reload";

 };

 task "test", group => "frontend", sub {
    run "cd /var/www/html; perl Makefile.PL; make; make test;";
    if($? != 0) {
       die("Error testing deployment.");
    }

    # Add more tests, for example some Selenium tests
 };

 task "reload", group => "frontend", sub {
    # quit hynotoad
    eval { kill cat "/var/run/hypnotoad.pid"; };

    # and restart it
    run "cd /var/www/html; hypnotoad script/my_site";
 };

 task "jenkins", sub {
    transaction {
       do_task [ qw/build deploy/ ];
    };
 };
Commit the Rexfile to the repository.
svn add Rexfile
svn ci -m "Added Rexfile" Rexfile
After you created your Rexfile, login to your CI server and install subversion.
apt-get install subversion
Preparing the Webserver
On your Webserver, we will use the build-in webserver of Mojolicious. So install Mojolicious on the Webserver.
sudo apt-get install curl build-essential
sudo sh -c "curl -L cpanmin.us | perl - Mojolicious"
Create the directories /var/deploy and /var/www. The first is the directory where all the deployments will be placed, the latter is the directory where your Webapp will run. Rex will create symlinks from your DocumentRoot pointing to the version currently live. So it is easy to rollback to older versions if needed.
mkdir /var/deploy
mkdir /var/www
Now your're ready to start the deploy job in jenkins.
After running the job (without failures), you can point your browser to http://your-web-server/ and the Mojolicious default 404 site should pop up.
Playing with Jenkins
Well, after we have set up everything, lets just add an index page to our Mojolicious Application.
To do so, open the file lib/MySite.pm and add a new route.
$r->route('/')->to('root#index');
Save the file and create a new file lib/MySite/Root.pm and paste the following content into it.
 package MySite::Root;
 use Mojo::Base 'Mojolicious::Controller';

 # This action will render a template
 sub index {
    my $self = shift;

    # Render template "root/index.html.ep" with message
    $self->render(msg => "Welcome here.");
 }

 1;
And create the file templates/root/index.html.ep.
 <html>
   <head>
      <meta http-equiv="content-type" content="text/html; charset=utf-8">

      <title>Testpage</title>

   </head>
   <body>
      <h1>Welcome Mojo</h1>
      <p><%= $msg%>
   </body>
 </html>
Save the file and add it to version control.
svn add lib/MySite/Root.pm templates/root
svn ci -m "added root page" templates/root lib/MySite/Root.pm lib/MySite.pm
And now, start the MySite Jenkins job.
As you see, if you reload your browser after the jobs ran, the new page is deployed.
Now it's up to you
Now it's up to you to improve these basic steps. For example add some commit- check scripts to validate coding standards before the commit is accepted by subversion. Or, to prohibit new code from being checked in if a build fails. The last one is, imho, a very usefull and important thing to get a first feedback loop and to fix builds fast.
Before you try to deploy to your livesystems, build some testsytems and add another Job to Jenkins to deploy to the testsystem first. And on success to the live systems. You can use Rex Environments to archive this easily.

