On this page
- @Mail Webmail System On Your ISPConfig Server Within 10 Easy Steps
- Step 1 - Create a website:
- Step 2 – Create an Administator user for the website:
- Step 3 - Create a MySQL database for the website:
- Step 4 – Download/extract the packages and remove some files:
- Step 5 - Make your Atmail system writeable for Apache:
- Step 6 – Start the AtMail Installation program
- Step 7 – Connect to the MySQL database:
- Step 8 – Define the SMTP Host:
- Step 9 - Import data from another webmail system:
- Step 10 – Login to Atmail:
@Mail Webmail System On Your ISPConfig Server Within 10 Easy Steps
Version 1.0
Author: <hans> [at] bb-hosting [dot] org>
This guide explains how to set up the Open Source version of Atmail (Atmail Open) on your ISPConfig server.
In this how to I will use as an example:
- domainname webmail.myhostingcompany.tld
- MySQL databasename: web1db1
- MySQL username: web1u1
- MySQL user password: mysqlpassword
- Atmailopen version 1.01
When you are finished with this “How to”, you have a nice webmail system at URL http://webmail.myhostingcompany.tld.
Step 1 - Create a website:
In ISPConfig, create a website via “New site” in the main menu.
On the tab called “Basis” use webmail for the hostname and myhostingcompany.tld for the domain name. Enable MySQL and PHP scripts for this website but disable PHP Safe Mode. AtMail makes use of .htaccess files. To allow these files within your website, add the following lines within the Apache directive field of your website:
<Directory "/var/www/web1/web">
   Options FollowSymLinks
   AllowOverride All
</Directory>
Step 2 – Create an Administator user for the website:
In ISPConfig, create a Administrator user, so you can upload the website later via FTP:
In the main menu select “ISP Manager”, select your new website called webmail.myhostingcompany.tld in the structure tree and press the tab “User and Email”.
Press “new” and define a new user and its email address. Give this user administrator rights and press “Save”.
Step 3 - Create a MySQL database for the website:
Click on the tab called “Options” and create a new database for the website.
ISPConfig will show you:
Database name: web1db1 (example)
Database user: web1u1 (example)
Then you define a password for the database user and press “Save”.
Step 4 – Download/extract the packages and remove some files:
- Log in to your server as root and execute the following commands:
cd /var/www/web1/web/
wget http://downloads.sourceforge.net/atmailopen/atmailopen-1.01.tgz
tar xvfz atmailopen-1.01.tgz
cd atmailopen
mv * ../
rm –r atmailopen
rm atmailopen-1.01.tgz
Step 5 - Make your Atmail system writeable for Apache:
cd../
chown –R [Apache-user] web/
Note: On Debian systems, replace [Apache-user] with "www-data". The Apache user on other Linux distributions might be different.
Step 6 – Start the AtMail Installation program
Within your webbrowser point to the URL of your new Atmail webmail system. In our example this is http://webmail.myhostingcompany.tld. Now you see the Atmail installation program. Read the instructions on the screen and accept the license agreement.
Step 7 – Connect to the MySQL database:
At step 2 of the Atmail installation program, we connect to our MySQL database. This MySQL database exists already, so don’t check “Create Database”.
Step 8 – Define the SMTP Host:
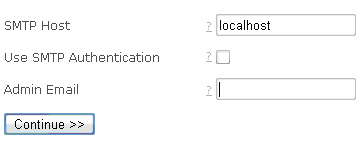
At step 3 of the Atmail installation program, we define our smtp-host and the e-mail address of the admin. For example, you can use here the e-mailaddress of the Administrator user of the site as defined at Step 2 of this guide. “Use SMTP Authentication” is not required.
Step 9 - Import data from another webmail system:
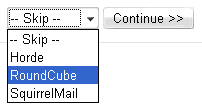
After clicking “Continue >>” you will jump to Step 6 of the Atmail installation program. At this step, you have the possibility to import data from other popular webmail systems. Select “Skip” as we don’t want to import data at this time.
Now you’re done.
Step 10 – Login to Atmail:
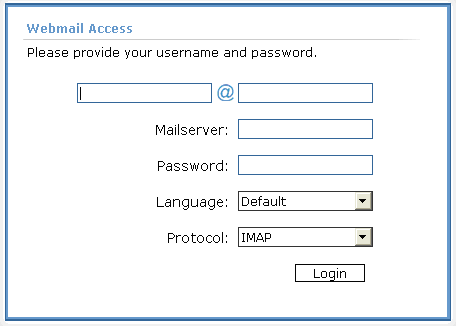
Log in to your new webmail system an enjoy this beautiful Ajax driven webmail system!


