Virtualization With Xen On CentOS 6.3 (x86_64) (Paravirtualization & Hardware Virtualization) - Page 2
4 Paravirtualization
4.1 Creating An Image-Based Virtual Machine
We will create our image-based virtual machines in the directory /var/lib/libvirt/images/ which was created automatically when we installed libvirt.
CentOS has a nice tool called virt-install with which we can create virtual machines for Xen. To start it, we simply run
virt-install --prompt --network bridge=br0 --virt-type=xen
(We must specify our network bridge with --network bridge=br0 so that the virtual machine uses our network bridge which we created in chapter2.)
The tools asks a few questions before it creates a virtual machine. I want to call my first virtual machine vm01, with 1024MB RAM and a disk size of 10GB. I want to store it in the file /var/lib/libvirt/images/vm01.img:
Would you like a fully virtualized guest (yes or no)? This will allow you to run unmodified operating systems.
<-- no
What is the name of your virtual machine?
<-- vm01
How much RAM should be allocated (in megabytes)?
<-- 1024
What would you like to use as the disk (file path)?
<-- /var/lib/libvirt/images/vm01.img
How large would you like the disk (/var/lib/libvirt/images/vm01.img) to be (in gigabytes)?
<-- 10
What is the install URL?
<-- http://ftp.tu-chemnitz.de/pub/linux/centos/6.3/os/x86_64
In this chapter I want to create a paravirtualized guest, not a fully (hardware) virtualized guest, that's why I answer the first question with no.
As install URL, you should specify a mirror close to you where the installer can download all files needed for the installation of CentOS 6.3 in our virtual machine. You can find a list of CentOS mirrors here: http://www.centos.org/modules/tinycontent/index.php?id=13
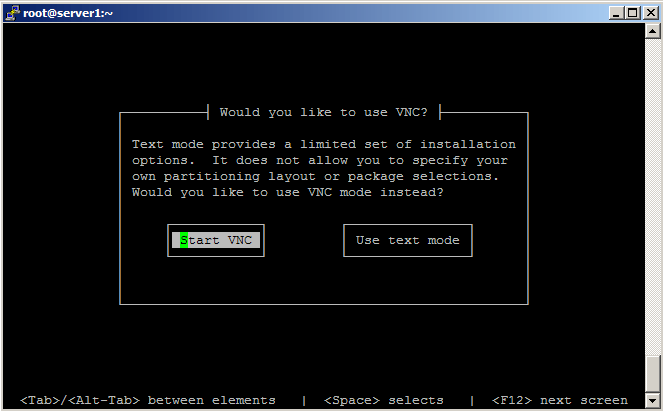
After we have answered all questions, virt-install starts the normal CentOS 6.3 installer (in text mode) in our vm01 virtual machine. After a few moments the installer gives you the choice to use VNC or to continue with the text mode installer. Using text mode is no problem if you are familiar with the CentOS installer, but if you like a little more comfort, select Start VNC here:
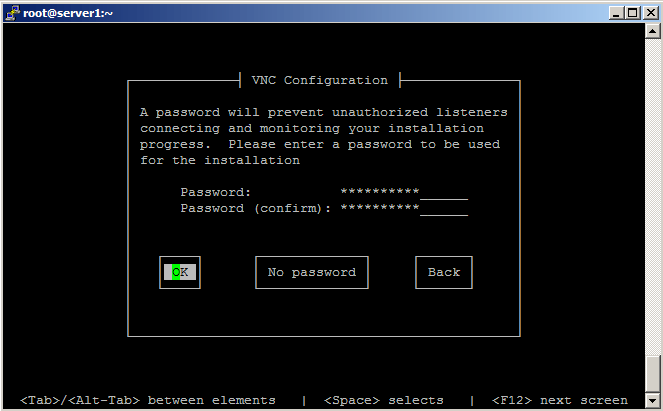
On the next screen you can provide a password for the VNC connection (recommended). If you don't want to use a password, hit No password:
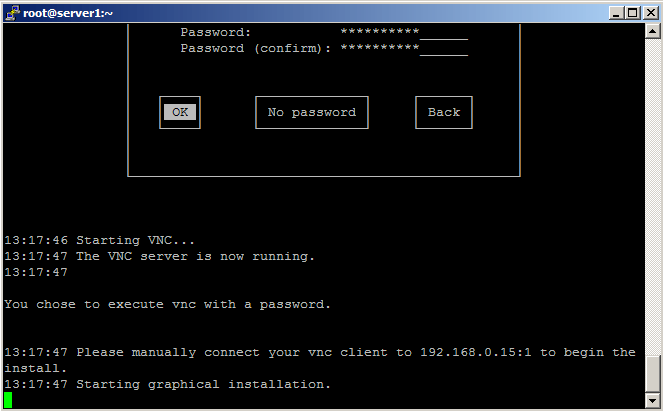
Afterwards, the installer tells you how you can connect to the installer via VNC (192.168.0.15:1 in this case):
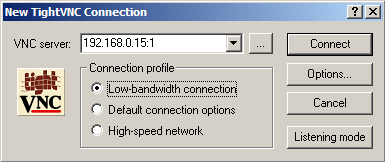
Now open a VNC client (like TightVNC) and type in the connection details (192.168.0.15:1 in this case) and click on Connect:
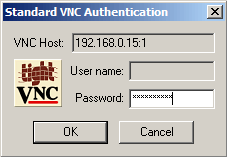
If you have specified a password for the VNC connection, you must now provide it:
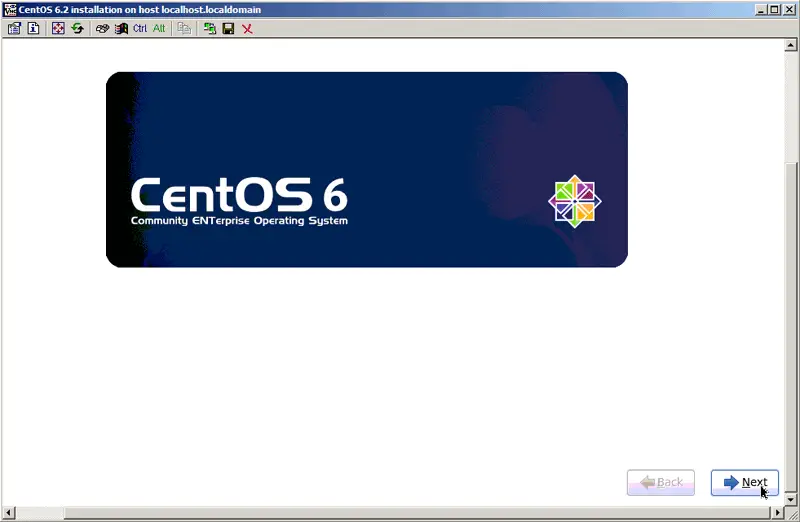
Afterwards you can use the CentOS installer in your VNC client:
After the installation, we stay at the vm01 console. To leave it, type CTRL+] if you are at the console, or CTRL+5 if you're using PuTTY. You will then be back at the dom0 console.
Run
virsh console vm01
to log in on that virtual machine again (type CTRL+] if you are at the console, or CTRL+5 if you're using PuTTY to go back to dom0), or use an SSH client to connect to it.
To get a list of running virtual machines, type
virsh list
The output should look like this:
[root@server1 ~]# virsh list
 Id Name                 State
----------------------------------
  0 Domain-0             running
  2 vm01                 idle

[root@server1 ~]#
To shut down vm01, do this:
virsh shutdown vm01
To start vm01 again, run
virsh start vm01
Here are the most important Xen commands:
virsh start <name> - Start a virtual machine.
virsh shutdown <name> - Stop a virtual machine.
virsh destroy <name> - Stop a virtual machine immediately without shutting it down. It's as if you switch off the power button.
virsh list - List all running systems.
virsh console <name> - Log in on a virtual machine.
virsh help - List of all commands.
4.2 Creating An LVM-Based Virtual Machine (Paravirtualization)
This chapter explains how you can set up LVM-based virtual machines instead of virtual machines that use disk images. Virtual machines that use disk images are very slow and heavy on disk IO.
In this example I'm using a CentOS 6.3 host with the LVM volume group /dev/VolGroup00 that has about 465GB of space. /dev/VolGroup00 contains two logical volumes, /dev/VolGroup00/LogVol00 and /dev/VolGroup00/LogVol01 that consume about 104GB of space - the rest is not allocated and can be used to create logical volumes for our virtual machines:
vgdisplay
[root@server1 ~]# vgdisplay
  --- Volume group ---
  VG Name               VolGroup00
  System ID
  Format                lvm2
  Metadata Areas        1
  Metadata Sequence No  3
  VG Access             read/write
  VG Status             resizable
  MAX LV                0
  Cur LV                2
  Open LV               2
  Max PV                0
  Cur PV                1
  Act PV                1
  VG Size               465.26 GiB
  PE Size               4.00 MiB
  Total PE              119106
  Alloc PE / Size       26250 / 102.54 GiB
  Free  PE / Size       92856 / 362.72 GiB
  VG UUID               LCdZgy-jVrp-S92Q-RQeI-H87G-jiko-4fmaHF

[root@server1 ~]#
lvdisplay
[root@server1 ~]# lvdisplay
  --- Logical volume ---
  LV Name                /dev/VolGroup00/LogVol01
  VG Name                VolGroup00
  LV UUID                n5remv-KYEE-O0Ry-g2r6-OrUe-rjyV-x65rHu
  LV Write Access        read/write
  LV Status              available
  # open                 1
  LV Size                4.88 GiB
  Current LE             1250
  Segments               1
  Allocation             inherit
  Read ahead sectors     auto
  - currently set to     256
  Block device           252:0

  --- Logical volume ---
  LV Name                /dev/VolGroup00/LogVol00
  VG Name                VolGroup00
  LV UUID                CnvnGP-sDL8-OtBU-OzTT-VjZQ-ZIUo-yzISkX
  LV Write Access        read/write
  LV Status              available
  # open                 1
  LV Size                97.66 GiB
  Current LE             25000
  Segments               1
  Allocation             inherit
  Read ahead sectors     auto
  - currently set to     256
  Block device           252:1

[root@server1 ~]#
I want to create the virtual machine vm02 now which uses the logical volume /dev/VolGroup00/vm02. I want the virtual machine to have a disk space of 10GB, so I create the logical volume /dev/VolGroup00/vm02 as follows:
lvcreate -L10G -n vm02 VolGroup00
Afterwards we can run
virt-install --prompt --network bridge=br0 --virt-type=xen
again:
Would you like a fully virtualized guest (yes or no)? This will allow you to run unmodified operating systems.
<-- no
What is the name of your virtual machine?
<-- vm02
How much RAM should be allocated (in megabytes)?
<-- 1024
What would you like to use as the disk (file path)?
<-- /dev/VolGroup00/vm02
What is the install URL?
<-- http://ftp.tu-chemnitz.de/pub/linux/centos/6.3/os/x86_64
As the disk file path, we specify our new volume group /dev/VolGroup00/vm02. Please note that virt-install doesn't ask for the disk space anymore because the disk space is determined by the size of the logical volume (10GB).

