How to Install Ansible AWX with Nginx Reverse Proxy on Ubuntu 18.04 LTS
AWX is an open source web application that provides the user interface, REST API, and task engine for Ansible. It's the open source version of the Ansible Tower. The AWX allows you to manage Ansible playbooks, inventories, and schedule jobs to run using the web interface.
In this tutorial, we're going to show you how to install and configure the AWX on Ubuntu server 18.04. We're going to install the AWX with Nginx as a reverse proxy and built on the HTTPS secure connection.
Prerequisite
- Ubuntu server 18.04
- RAM memory +4GB and 2 Cores
- Root privileges
What we will do:
- Install Docker and Ansible
- Install Additional Packages
- Download and Configure Ansible AWX Source Code
- Install Ansible AWX
- Install and Configure Nginx as a Reverse Proxy
- Setup UFW Firewall
- Testing
Step 1 - Install Docker and Ansible
Firstly, we are going to install the main packages needed for AWX installation, it's the Docker and Ansible itself. Before installing these packages, update the Ubuntu repository using the following command.
sudo apt update
Now install the Docker and Ansible.
sudo apt install ansible -y
sudo apt install docker.io -y
Once the installation is complete, check the docker and ansible using the following commands.
docker version
ansible --version
Below is the result.

Step 2 - Install Additional Packages
Now we're going to install additional packages for AWX installation. We will install the 'python-pip' package to the system, and then install the docker-compose and docker-py from the PyPI python repository.
Install the 'python-pip' using the apt command below.
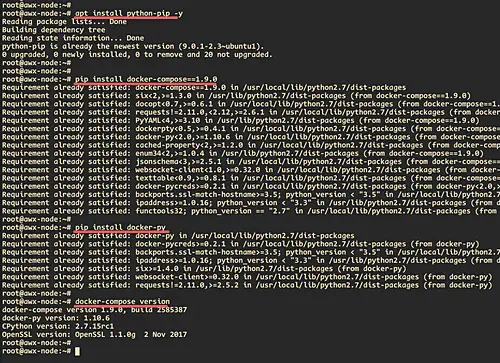
sudo apt install python-pip -y
Once the installation completed, install the docker-compose 1.9.0 and docker-py packages from the PyPI repository using the pip commands below.
pip install docker-compose==1.9.0
pip install docker-py
Next, we need to install the nodejs and the npm on the server.
Run the following command.
sudo apt install nodejs npm -y
Once it's completed, upgrade the npm to the latest version.
npm install npm --global
And as a result, all dependencies have been installed to the system. And we're ready to install the AWX.
Step 3 - Download the AWX Source Code and Configure
In this step, we will download the AWX source code and configure the inventory file for the AWX installation.
Download the AWX source code from the git repository and go to the awx installation directory.
git clone https://github.com/ansible/awx.git
cd awx/installer/
After that, generate the new secret key for the awx using the openssl command below.
openssl rand -hex 32
Copy the generated secret key to your note.
Now edit the 'inventory' configuration file.
vim inventory
Change the 'postgres_data_dir' to the '/var/lib/pgdocker' directory.
postgres_data_dir=/var/lib/pgdocker
Change the 'host_port' to '8080'.
host_port=8080
Uncomment the 'use_docker_compose' line and change the value to 'true', because we're going to manage the awx using the docker compose.
use_docker_compose=true
Now make sure the 'docker_compose_dir' is located to the '/var/lib/awx' directory.
docker_compose_dir=/var/lib/awx
Change the credentials for the 'pg_password', 'rabbitmq_password', 'rabbitmq_erlang_cookie', 'admin_user' and 'admin_password' with your own password credentials.
...
 pg_password=hakaseposgresawx
 ...
 rabbitmq_password=hakaserabbitmqawx
 rabbitmq_erlang_cookie=cookiemonster
 ...
 admin_user=hakase
 admin_password=hakasepass
 ...
after that, change the secret key of the awx configuration using the generated key on top.
secret_key=cbdd4c70bbf82d572bfbdd454b28172642e6b8061b8c8b4937d9134294d30e33
Then uncomment the 'project_data_dir' and leave the value as default.
project_data_dir=/var/lib/awx/projects
Save and close the configuration.
Below is the edited of the 'inventory' file.
grep -v '^#' inventory
inventory configuration file.
localhost ansible_connection=local ansible_python_interpreter="/usr/bin/env python"

 [all:vars]

 dockerhub_base=ansible

 awx_task_hostname=awx
 awx_web_hostname=awxweb
 postgres_data_dir=/var/lib/pgdocker
 host_port=8080

 use_docker_compose=true
 docker_compose_dir=/var/lib/awx

 pg_username=awx
 pg_password=hakaseposgresawx
 pg_database=awx
 pg_port=5432

 rabbitmq_password=hakaserabbitmqawx
 rabbitmq_erlang_cookie=cookiemonster

 admin_user=hakase
 admin_password=hakasepass

 create_preload_data=True

 secret_key=cbdd4c70bbf82d572bfbdd454b28172642e6b8061b8c8b4937d9134294d30e33

 project_data_dir=/var/lib/awx/projects
And as a result, we're ready to install the awx on the next stage.
Step 4 - Install the Ansible AWX
Install the awx using the following ansible-playbook command.
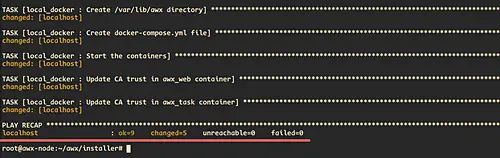
ansible-playbook -i inventory install.yml
The playbook will do some tasks including downloading docker images and creating new containers postgresql, memcached, rabbitmq, the awx web-application, and the awx task.
And below is the result.
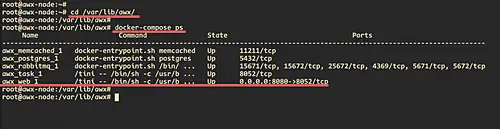
Next, go to the '/var/lib/awx' directory and you will get the 'docker-compose.yml' configuration. Then check all available docker containers using the docker-compose command.
cd /var/lib/awx
docker-compose ps
And you will be shown awx containers as below.
Additionally, you can check logs of the 'task' service using the following command.
docker-compose logs task
Step 5 - Install and Configure Nginx as a Reverse Proxy
After installing the awx, we will install and configure the Nginx as a reverse proxy for the awx that running port '8080'.
Install Nginx using the following apt command.
sudo apt install nginx -y
Once the installation is completed, go to the '/etc/nginx/sites-available/' directory and create a new virtual host configuration called 'awx' using vim editor.
cd /etc/nginx/sites-available/
vim awx
Now paste the configuration below.
server {
   listen 80;
   server_name awx.hakase-labs.io;
   add_header Strict-Transport-Security max-age=2592000;
   rewrite ^ https://$server_name$request_uri? permanent;
}

server {
    listen 443 ssl http2;
    server_name awx.hakase-labs.io;

    access_log /var/log/nginx/awx.access.log;
    error_log /var/log/nginx/awx.error.log;

    ssl on;
    ssl_certificate /etc/nginx/ssl/fullchain.pem;
    ssl_certificate_key /etc/nginx/ssl/privkey.pem;
    ssl_session_timeout 5m;
    ssl_ciphers EECDH+CHACHA20:EECDH+AES128:RSA+AES128:EECDH+AES256:RSA+AES256:EECDH+3DES:RSA+3DES:!MD5;
    ssl_protocols TLSv1.2;
    ssl_prefer_server_ciphers on;

location / {
    proxy_http_version 1.1;
    proxy_set_header Host $host;
    proxy_set_header X-Real-IP $remote_addr;
    proxy_set_header X-Forwarded-For $proxy_add_x_forwarded_for;
    proxy_set_header X-Forwarded-Proto $scheme;
    proxy_set_header Upgrade $http_upgrade;
    proxy_set_header Connection "upgrade";
    proxy_pass http://10.5.5.20:8080/;
    }
}
Change the domain name and the proxy_pass IP address with your own, then save and exit.
Now activate the 'awx' virtual host and test the nginx configuration.
ln -s /etc/nginx/sites-available/awx /etc/nginx/sites-enabled/
nginx -t

Ensure there is no error with nginx configuration, then restart the nginx service.
sudo systemctl restart nginx
As a result, the Nginx installation and configuration as a reverse proxy for awx has been finished.
Step 6 - Configure the UFW Firewall
Add the SSH, HTTP, and HTTPS services to the UFW firewall configuration.
ufw allow ssh
ufw allow http
ufw allow https
Now start and enable the ufw firewall service.
ufw enable
Type 'y' to yes and the ufw firewall has been configured.
Step 7 - Testing
Open your web browser and type your awx URL in the address bar.
https://awx.hakase-labs.io
And you will be shown the awx login page as below.
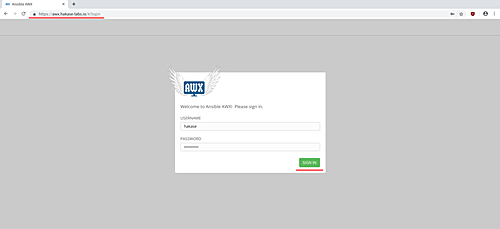
Now type the user 'hakase' and password 'hakasepass', then click the 'sign in' button.
Now you get the awx admin dashboard as below.

And the installation of Ansible AWX with Nginx reverse proxy has been completed successfully.

