Virtual Multiserver Environment With Dedicated Web & MySQL, Email & DNS Servers On Debian Squeeze With ISPConfig 3
Version 1.0
Author: Michel Käser <info [at] rackster [dot] ch>
This tutorial describes how you can set up a single dedicated server as a virtual multiserver environment using OpenVZ with dedicated Web & MySQL, Email and DNS servers on Debian Squeeze. Also, you will learn how to maintain all these servers. As an addition, you will learn how to install some very useful packages on all of them, how to protect them and how to monitor them.
At the end you will have a fully functional virtual multiserver environment, ready for shared hosting.
I do not issue any guarantee that this will work for you!
1 Requirements
To follow this tutorial you will need the following:
- a dedicated server
- at least 5 IPs
- a lot of time
2 Preliminary Note
In this tutorial I use this dedicated server: http://www.hetzner.de/hosting/produkte_rootserver/ex4 with the Flexi-Pack and an additional /28 subnet (14 IPs).
The goal is to have these servers:
- Type: Node
- Hardware: Dedicated
- Hostname: root.example.tld
- 192.168.1.1
- Type: Container
- Hardware: Virtual
- Hostname: web.example.tld
- 192.168.1.2
- Type: Container
- Hardware: Virtual
- Hostname: mail.example.tld
- 192.168.1.3
- Type: Container
- Hardware: Virtual
- Hostname: ns1.example.tld
- 192.168.1.4
- Type: Container
- Hardware: Virtual
- Hostname: ns2.example.tld
- 192.168.1.5
3 The Base System
I assume you took the same dedicated server as I did. The Hetzner Web-Interface allows you to install a range of distributions. Take the minimal Debian 6.0 64-bit.
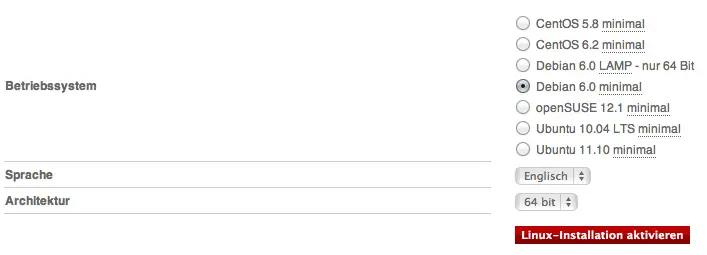
This will install the base system for you and you do not have to configurate it yourself. You will get the root password as well.
4 Installing OpenVZ + OVZ Web Panel
As soon as your server is ready, login using the received credentials. We first will do an update/upgrade:
apt-get update && apt-get -y upgrade && apt-get -y dist-upgrade
which will upgrade our server to latest version.
We install some additional packages to:
apt-get -y install nano wget ntp ntpdate
4.1 Installing OpenVZ
We now want to install OpenVZ, the base for our virtual multiserver environment.
An OpenVZ kernel and the vzctl, vzquota, and vzdump packages are available in the Debian Squeeze repositories, so we can install them as follows:
apt-get install linux-image-openvz-amd64 vzctl vzquota vzdump
Create a symlink from /var/lib/vz to /vz to provide backward compatibility:
ln -s /var/lib/vz /vz
Open /etc/sysctl.conf and make sure that you have the following settings in it:
nano /etc/sysctl.conf
[...]
net.ipv4.conf.all.rp_filter=1
net.ipv4.icmp_echo_ignore_broadcasts=1
net.ipv4.conf.default.forwarding=1
net.ipv4.conf.default.proxy_arp = 0
net.ipv4.ip_forward=1
kernel.sysrq = 1
net.ipv4.conf.default.send_redirects = 1
net.ipv4.conf.all.send_redirects = 0
net.ipv4.conf.eth0.proxy_arp=1
[...]
If you needed to modify /etc/sysctl.conf, run
sysctl -p
afterwards.
The following step is important if the IP addresses of your virtual machines are from a different subnet than the host system's IP address. If you don't do this, networking will not work in the virtual machines!
Open /etc/vz/vz.conf and set NEIGHBOUR_DEVS to all:
nano /etc/vz/vz.conf
[...]
# Controls which interfaces to send ARP requests and modify APR tables on.
NEIGHBOUR_DEVS=all
[...]
Finally, reboot the system:
reboot
If your system reboots without problems, then everything is fine!
Run
uname -r
and your new OpenVZ kernel should show up:
root@root:~# uname -r
2.6.32-5-openvz-amd64
Since Hetzner mounts /home on a separate hard disk, we can use it as the OpenVZ backup location. To do so, run:
rm -rf /var/lib/vz/dump
ln -s /home/backup/vz /var/lib/vz/dump
As we will use fail2ban within our virtual containers, we have to enable some IPTables support for them. We do that by editing the /etc/vz/vz.conf file:
nano /etc/vz/vz.conf
Search the line starting with IPTABLES and comment it (#). Paste the following afterwards:
[...]
IPTABLES="ipt_REJECT ipt_tos ipt_limit ipt_multiport iptable_filter iptable_mangle ipt_TCPMSS ipt_tcpmss ipt_ttl ipt_length ipt_state"
Next, active the state module in the kernel:
modprobe xt_state
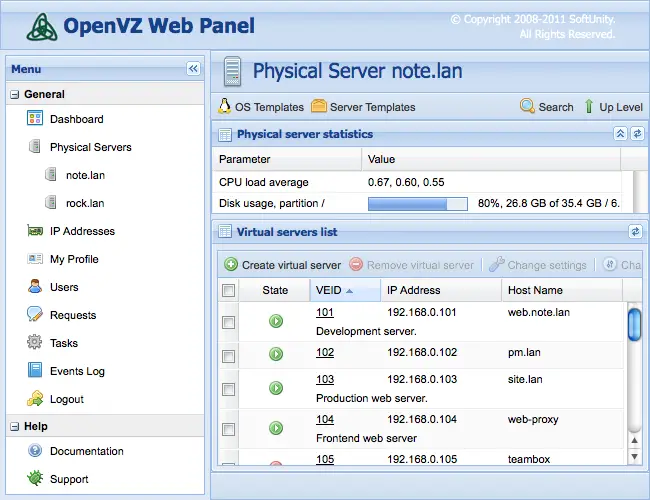
4.2 Installing OVZ Web Panel
The OpenVZ Web Panel is a GUI web-based frontend for controlling of the hardware and virtual servers with the OpenVZ virtualization technology.
The most simple way to install OpenVZ Web Panel is to run the following command:
wget -O - http://ovz-web-panel.googlecode.com/svn/installer/ai.sh | sh
After installation Panel should be available by the following URL:
http://<192.168.1.1>:3000
Default administrator's credentials are: admin/admin. Don't forget to change default password.

