Setting Up A PXE Install Server For Multiple Linux Distributions On Debian Lenny
Version 1.0
Author: Falko Timme
This tutorial shows how to set up a PXE (short for preboot execution environment) install server on Debian Lenny. A PXE install server allows your client computers to boot and install a Linux distribution over the network, without the need of burning Linux iso images onto a CD/DVD, boot floppy images, etc. This is handy if your client computers don't have CD or floppy drives, or if you want to set up multiple computers at the same time (e.g. in a large enterprise), or simply because you want to save the money for the CDs/DVDs. In this article I show how to configure a PXE server that allows you to boot multiple distributions (i386 and x86_64): Debian Lenny, Ubuntu 9.04, Fedora 10, CentOS 5.3, OpenSuSE 11.1, and Mandriva 2009.1.
I want to say first that this is not the only way of setting up such a system. There are many ways of achieving this goal but this is the way I take. I do not issue any guarantee that this will work for you!
1 Preliminary Note
It is important that you have a decent Internet connection because your client computers will fetch all needed packages from the repositories in the Internet (I tested this on a 30MBit connection which seems to be fast enough. ;-)). It is possible to store all packages on the PXE server as well so that you don't need an Internet connection (just the LAN connection to the PXE server), but then you need a lot of storage space on the PXE server (remember, it will serve multiple distributions), so I don't cover this here.
And the most important thing is that your client computers support booting over the network. You should check each computer's BIOS for this option.
On our system that should serve as the PXE server you should have already set up a basic Debian Lenny server system, for example as shown in the chapters 1 - -7 of this tutorial: https://www.howtoforge.com/perfect-server-debian-lenny-ispconfig2
2 Install All Necessary Packages
First we update our packages database by running
aptitude update
We need to install the packages netkit-inetd, tftpd-hpa, dhcp3-server, and lftp, so we run
aptitude install netkit-inetd tftpd-hpa dhcp3-server lftp
Afterwards run
netstat -uap | grep tftp
and check if you see something like this:
server1:~# netstat -uap | grep tftp
udp 0 0 *:tftp *:* 2242/inetd
server1:~#
If you don't see the tftp line, please open /etc/inetd.conf and make sure you find the following in it:
vi /etc/inetd.conf
[...] #:BOOT: TFTP service is provided primarily for booting. Most sites # run this only on machines acting as "boot servers." tftp dgram udp wait root /usr/sbin/in.tftpd /usr/sbin/in.tftpd -s /var/lib/tftpboot [...] |
Then restart inetd:
/etc/init.d/openbsd-inetd restart
Now
netstat -uap | grep tftp
should show tftp.
3 Configure The DHCP Server
We need a DHCP server in our local network. If there's no DHCP server in your local network, just configure and use the one on your future PXE server. Simply edit /etc/dhcp3/dhcpd.conf:
cp /etc/dhcp3/dhcpd.conf /etc/dhcp3/dhcpd.conf_orig
cat /dev/null > /etc/dhcp3/dhcpd.conf
vi /etc/dhcp3/dhcpd.conf
option domain-name-servers 145.253.2.75, 213.191.92.86;

default-lease-time 86400;
max-lease-time 604800;

authoritative;

subnet 192.168.0.0 netmask 255.255.255.0 {
        range 192.168.0.10 192.168.0.49;
        filename "pxelinux.0";
        option subnet-mask 255.255.255.0;
        option broadcast-address 192.168.0.255;
        option routers 192.168.0.1;
}
|
This will dynamically assign IP addresses from the range 192.168.0.10 to 192.168.0.49 to your client computers; the gateway is 192.168.0.1. Of course, you must adjust this configuration to your own environment!
It is important that you have the line
filename "pxelinux.0";
in your configuration!
Then restart your DHCP server:
/etc/init.d/dhcp3-server restart
If you already have a DHCP server in your network, you must modify its configuration. Let's assume you have something like
subnet 192.168.0.0 netmask 255.255.255.0 {
        range 192.168.0.10 192.168.0.49;
        option subnet-mask 255.255.255.0;
        option broadcast-address 192.168.0.255;
        option routers 192.168.0.1;
}
|
in the configuration. You must add
filename "pxelinux.0";
next-server 192.168.0.100;
to it (where 192.168.0.100 is the IP address of our Debian Lenny PXE server) so that it looks like this:
subnet 192.168.0.0 netmask 255.255.255.0 {
        range 192.168.0.10 192.168.0.49;
        option subnet-mask 255.255.255.0;
        option broadcast-address 192.168.0.255;
        option routers 192.168.0.1;
        filename "pxelinux.0";
        next-server 192.168.0.100;
}
|
Then restart your DHCP server.
4 Set Up Debian Lenny Netboot (i386)
Now we are ready to set up the netboot for our first distribution, Debian Lenny (i386). The necessary files for the netboot can be found on http://ftp.de.debian.org/debian/dists/lenny/main/installer-i386/current/images/netboot/. We download the files now and copy them to the /var/lib/tftpboot directory. This is the directory from where our PXE server will serve the installation images:
cd /tmp
lftp -c "open http://ftp.de.debian.org/debian/dists/lenny/main/installer-i386/current/images/; mirror netboot/"
mv netboot/* /var/lib/tftpboot
rm -fr netboot
(You can download the files from any other Debian mirror as well. Use one that is close to you.)
That's it already. Now have a look at the file /var/lib/tftpboot/pxelinux.cfg/default:
cat /var/lib/tftpboot/pxelinux.cfg/default
# D-I config version 1.0 include debian-installer/i386/boot-screens/menu.cfg default debian-installer/i386/boot-screens/vesamenu.c32 prompt 0 timeout 0 |
Debian uses included files in this file, so there's not much to learn from here (unless you take a look at the included files). All paths in this file are relative to the /var/lib/tftpboot directory, so debian-installer/i386/boot-screens/menu.cfg translates to /var/lib/tftpboot/debian-installer/i386/boot-screens/menu.cfg. As we add more distributions and architectures (i386 <-> x86_64) to our PXE install server, we will modify the /var/lib/tftpboot/pxelinux.cfg/default file radically.
The output of
ls -la /var/lib/tftpboot
should look like this now:
server1:/tmp# ls -la /var/lib/tftpboot
total 15432
drwxr-xr-x 6 root root 4096 2009-05-06 14:59 .
drwxr-xr-x 22 root root 4096 2009-05-06 14:57 ..
drwxr-xr-x 3 root root 4096 2009-04-09 01:32 debian-installer
drwxr-xr-x 4 root root 4096 2009-04-09 01:33 gtk
-rw-r--r-- 1 root root 8302592 2009-04-08 23:32 mini.iso
-rw-r--r-- 1 root root 7430381 2009-04-08 23:32 netboot.tar.gz
-rw-r--r-- 1 root root 15820 2009-04-08 23:33 pxelinux.0
drwxr-xr-x 2 root root 4096 2009-04-09 01:32 pxelinux.cfg
drwxr-xr-x 2 root root 4096 2009-04-09 01:34 xen
server1:/tmp#
When a client computer boots up over the network, it will look for the file /var/lib/tftpboot/pxelinux.cfg/default and load it.
5 Our First Test
(Please make sure that the computers that you don't want to reinstall have the network boot option disabled in their BIOS settings because otherwise it is possible that you or someone else accidentally installs Debian Lenny over the existing operating system!)
Now you can boot up your first client computer. Make sure you specified in its BIOS settings that it should use the network as its first boot device. If everything goes well, you should see the usual Debian Lenny installation screen:
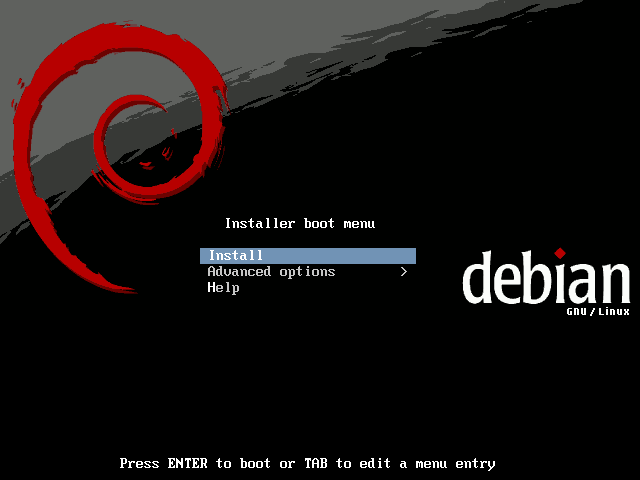
Don't forget to change the order of the boot devices after the successful installation (e.g. disable booting over the network and make the HDD the first boot device) because otherwise you will start another installation!

