On this page
Installing Windows TTF Fonts Automatically
Sometimes you miss some good looking fonts available over the Internet, mostly because you work on design or you just want to make something look better. However, most of the fonts are in the truetype format, which is a little bit tricky to get to work in Ubuntu.
The process of installing TTF fonts manually isn't very complex, but doing it over and over again everytime you want to install a new font can become tiring. That's why I wrote a little application in C which does all the work for you.
To start using it you just have to download it from here. Then extract the archive and using the terminal, go to the folder where you extracted it, using the command cd.
Now that you're in the folder, type:
sudo cp ttfinstall /bin/
Now that ttfinstall is in your system, you can now install fonts much more easily, let's see:
If I wanted to install the font myfont.ttf which was located in the folder Downloads in my home folder I would open the terminal and type:
cd ~/Downloads/
sudo ttfinstall myfont.ttf
That's it! Now the font is installed and ready to be used.
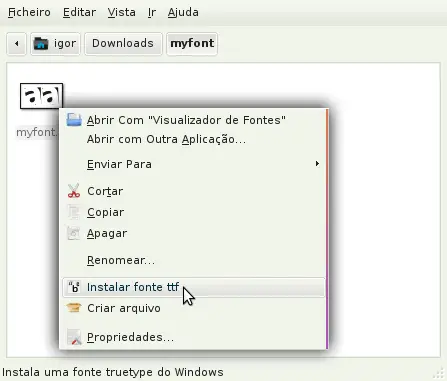
If you use Thunar as your default file browser it can also be very usefull having an option in the file's context menu which installs the font for you. That way you wouldn't even need to open the terminal, you would just have to right click on the font and select "Install".
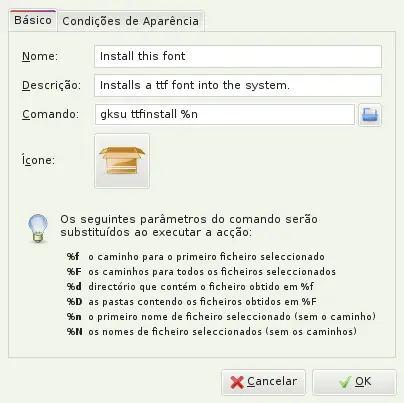
Doing this is very simple, open Thunar and go through Edit > Configure custom actions. Then add a new action, let's call it Install this font, put some description of your choice and for the command, write the following: gksu ttfinstall %n
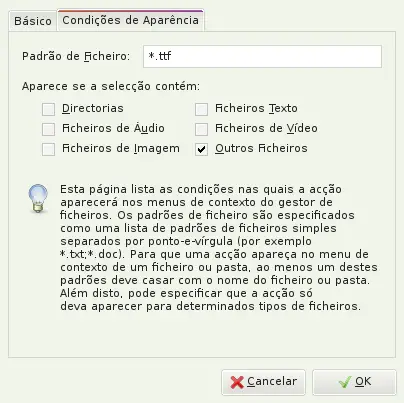
Switch to the Appearance Conditions tab and for the File Pattern write: *.ttf. Remove the check from "Text files" and put "Other files" instead.
Click OK and close the Custom actions window. Now just right click under some ttf file and test it, your new option should be right there.


