Installing PowerDNS (With MySQL Backend) And Poweradmin On Fedora 10
Version 1.0
Author: Falko Timme
This article shows how you can install the PowerDNS nameserver (with MySQL backend) and the Poweradmin control panel for PowerDNS on a Fedora 10 system. PowerDNS is a high-performance, authoritative-only nameserver - in the setup described here it will read the DNS records from a MySQL database (similar to MyDNS), although other backends such as PostgreSQL are supported as well. Poweradmin is a web-based control panel for PowerDNS.
I do not issue any guarantee that this will work for you!
1 Preliminary Note
In this example I'm using a Fedora 10 host with the hostname server1.example.com and the IP address 192.168.0.100, set up according to the first 6 chapters of this tutorial: The Perfect Server - Fedora 10.
I will set up just one PowerDNS server in this example (a master); adding PowerDNS slave(s) can easily be achieved by using MySQL database replication from the master to the slave(s), therefore no zone transfers are needed (this again is similar to MyDNS). MySQL database replication can be set up according to this tutorial: How To Set Up Database Replication In MySQL (PowerDNS also supports native zone transfers (for scenarios where you cannot use MySQL replication) - see http://downloads.powerdns.com/documentation/html/replication.html).
2 Installing MySQL
To install MySQL, we do this:
yum install mysql mysql-server
Then we create the system startup links for MySQL (so that MySQL starts automatically whenever the system boots) and start the MySQL server:
chkconfig --levels 235 mysqld on
/etc/init.d/mysqld start
Now check that networking is enabled. Run
netstat -tap | grep mysql
It should show something like this (*:mysql means that MySQL is listening on all interfaces which is important for MySQL replication!):
[root@server1 ~]# netstat -tap | grep mysql
tcp 0 0 *:mysql *:* LISTEN 2407/mysqld
[root@server1 ~]#
If it does not, edit /etc/my.cnf and comment out the option skip-networking:
vi /etc/my.cnf
[...] #skip-networking [...] |
and restart your MySQL server:
/etc/init.d/mysqld restart
Run
mysqladmin -u root password yourrootsqlpassword
mysqladmin -h server1.example.com -u root password yourrootsqlpassword
to set a password for the user root (otherwise anybody can access your MySQL database!).
If the last command throws an error at you...
[root@server1 named]# mysqladmin -h server1.example.com -u root password yourrootsqlpassword
mysqladmin: connect to server at 'server1.example.com' failed
error: 'Access denied for user 'root'@'localhost' (using password: NO)'
[root@server1 named]#
... we can set the password as follows: connect to MySQL:
mysql -u root -p
Type in the password for the MySQL root user. Then, on the MySQL shell, do this:
mysql> USE mysql;
mysql> UPDATE user SET Password = password('yourrootsqlpassword') WHERE Host = 'server1.example.com' AND User = 'root';
mysql> UPDATE user SET Password = password('yourrootsqlpassword') WHERE Host = '127.0.0.1' AND User = 'root';
Run
mysql> SELECT * FROM user;
to make sure that all rows where the user is root have a password.
If everything is looking ok, run
mysql> FLUSH PRIVILEGES;
... and leave the MySQL shell:
mysql> quit;
3 Installing PowerDNS
To install PowerDNS, we run
yum install pdns pdns-backend-mysql
The PowerDNS configuration is located in the /etc/pdns directory - I'll come to that in a moment.
Now we connect to MySQL:
mysql -u root -p
Type in your MySQL root password, and you should be on the MySQL shell. On the MySQL shell, we create a database for PowerDNS:
CREATE DATABASE powerdns;
Next we create a database user (powerdns) for PowerDNS:
GRANT ALL ON powerdns.* TO 'power_admin'@'localhost' IDENTIFIED BY 'power_admin_password';
GRANT ALL ON powerdns.* TO 'power_admin'@'localhost.localdomain' IDENTIFIED BY 'power_admin_password';
FLUSH PRIVILEGES;
(Replace power_admin_password with a password of your choice.)
Now we create the tables needed by PowerDNS...
USE powerdns;
CREATE TABLE domains (
id INT auto_increment,
name VARCHAR(255) NOT NULL,
master VARCHAR(128) DEFAULT NULL,
last_check INT DEFAULT NULL,
type VARCHAR(6) NOT NULL,
notified_serial INT DEFAULT NULL,
account VARCHAR(40) DEFAULT NULL,
primary key (id)
);
CREATE UNIQUE INDEX name_index ON domains(name);
CREATE TABLE records (
id INT auto_increment,
domain_id INT DEFAULT NULL,
name VARCHAR(255) DEFAULT NULL,
type VARCHAR(6) DEFAULT NULL,
content VARCHAR(255) DEFAULT NULL,
ttl INT DEFAULT NULL,
prio INT DEFAULT NULL,
change_date INT DEFAULT NULL,
primary key(id)
);
CREATE INDEX rec_name_index ON records(name);
CREATE INDEX nametype_index ON records(name,type);
CREATE INDEX domain_id ON records(domain_id);
CREATE TABLE supermasters (
ip VARCHAR(25) NOT NULL,
nameserver VARCHAR(255) NOT NULL,
account VARCHAR(40) DEFAULT NULL
);
... and finally leave the MySQL shell:
quit;
Now we must configure PowerDNS so that it uses the MySQL backend:
vi /etc/pdns/pdns.conf
Add the following lines to pdns.conf:
[...] ################################# # launch Which backends to launch and order to query them in # # launch= launch=gmysql gmysql-host=127.0.0.1 gmysql-user=power_admin gmysql-password=power_admin_password gmysql-dbname=powerdns [...] |
Then create the system startup links for PowerDNS and start it:
chkconfig --levels 235 pdns on
/etc/init.d/pdns start
That's it, PowerDNS is now ready to be used. To learn more about it, please refer to its documentation: http://downloads.powerdns.com/documentation/html/index.html
4 Installing Poweradmin
Now let's install Poweradmin, a web-based control panel for PowerDNS. Poweradmin is written in PHP, so we must install a web server (I'm using Apache2 in this example) and PHP:
yum install httpd php php-devel php-gd php-imap php-ldap php-mysql php-odbc php-pear php-xml php-xmlrpc php-mbstring php-mcrypt php-mhash gettext
Create the system startup links for Apache2 and start it:
chkconfig --levels 235 httpd on
/etc/init.d/httpd start
Poweradmin also requires the following two PEAR packages:
yum install php-pear-DB php-pear-MDB2-Driver-mysql
Now all prerequisites for Poweradmin are installed, and we can begin with the Poweradmin installation (I will install it in a subdirectory of /var/www/html - /var/www/html is the document root of Apache's default web site on Fedora; if you've created a vhost with a different document root, please adjust the paths).
Go to https://www.poweradmin.org/trac/wiki/GettingPoweradmin and download the latest Poweradmin package, e.g. as follows:
cd /tmp
wget https://www.poweradmin.org/download/poweradmin-2.1.2.tgz
Then install it to the /var/www/html/poweradmin directory as follows:
tar xvfz poweradmin-2.1.2.tgz
mv poweradmin-2.1.2 /var/www/html/poweradmin
touch /var/www/html/poweradmin/inc/config.inc.php
chown -R apache:apache /var/www/html/poweradmin/
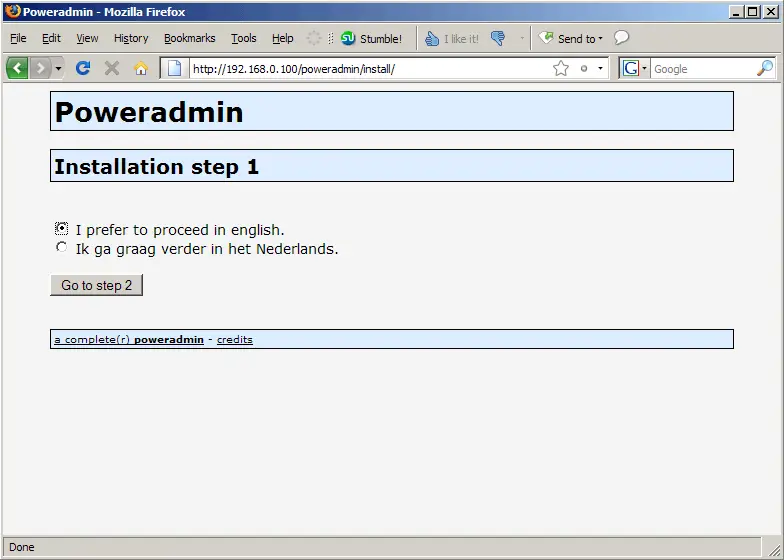
Now open a browser and launch the web-based Poweradmin installer (http://server1.example.com/poweradmin/install or http://192.168.0.100/poweradmin/install).
Select your language (English or Dutch):
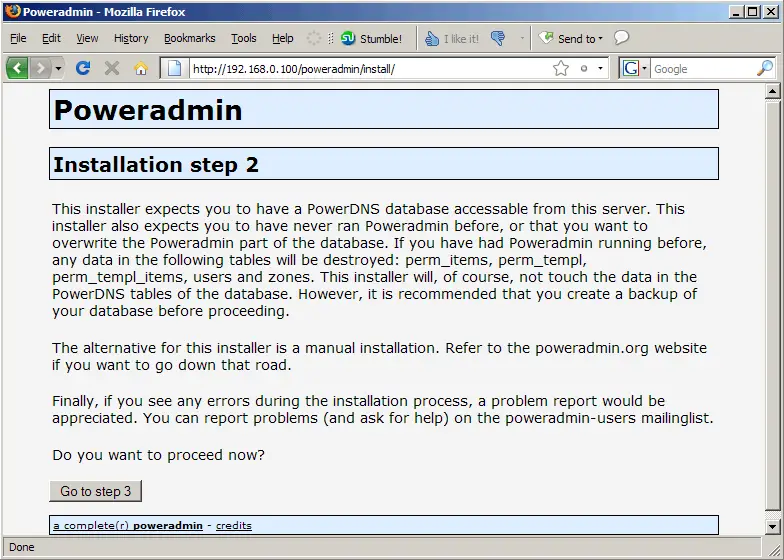
Click on the Go to step 3 button to proceed:
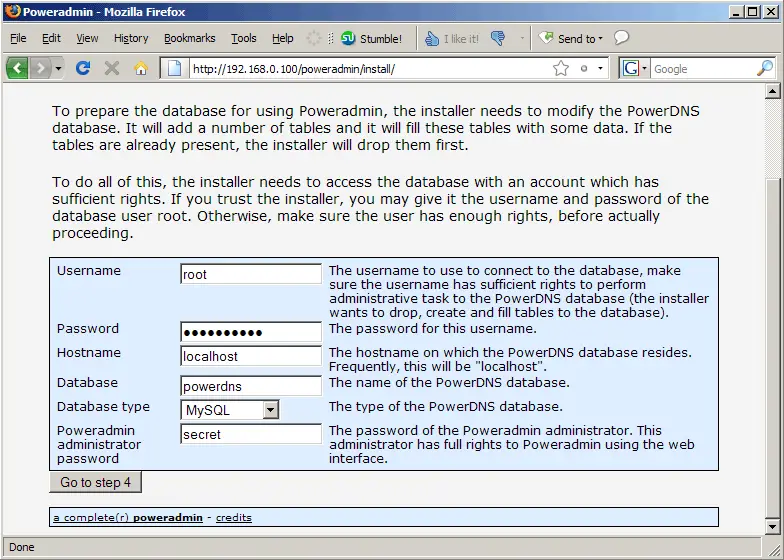
Now fill in your database details. It is important that you fill in the details for the MySQL root user, not the powerdns MySQL user we created earlier! Also provide a password for the admin user for the Poweradmin web interface (that's the password that the user admin will use to log in to Poweradmin later on):
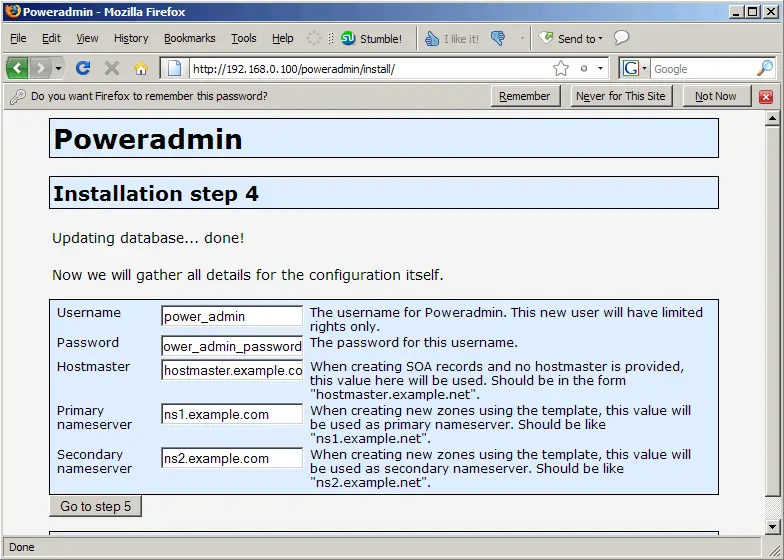
On the next page, fill in the details for the power_admin MySQL user that we created in chapter 3. Also fill in the two default nameservers that will be used in your zones unless you provide different nameservers when you create a zone (typically these are the names of the current system and of the slave server (for which you can set up MySQL replication, see my preliminary notes in chapter 1)):