Creating a dd/dcfldd Image Using Automated Image & Restore (AIR)
What is Automated Image & Restore
Automated Image & Restore (AIR) is an open source application that provides a GUI front end to the dd/dcfldd (Dataset Definition (dd)) command. AIR is designed to easily create forensic disk/partition images. It supports MD5/SHAx hashes, SCSI tape drives, imaging over a TCP/IP network, splitting images, and detailed session logging. To date, the AIR utility has only been developed for use on Linux distributions. In its simplest form, AIR provides a convenient interface to execute the dd set of commands. It eliminates the risk of "fat fingering" an error in the shell terminal and ultimately makes using the dd command more user-friendly for those who are not as experienced. Please note that using the AIR front end still requires some basic knowledge of how the dd (or dcfldd) commands work.
The dd command has been around for quite a while. It is well known throughout the Unix/Linux community, well documented, and as I can only imagine extensively used. A dd image is a bit by bit image of a source device or file. The uses for dd range from creating and maintaining system backups and restore images to the forensic application of imaging evidence that will be returned to the lab and examined.
This tutorial is not designed to teach the use of the dd command; this is well documented and a simple internet search will yield a plethora of results. Instead, the intent of this mini "how-to" is to introduce users to the AIR front end application, increase overall awareness of the utility, and provide a brief example of creating a dd image using this tool.
DISCLAIMER: I do not claim to be expert at using dd or Automated Image & Restore.
Setting up AIR
The first thing you will want to do is download and install the latest version of the AIR application. The AIR application is available for download at www.sourceforge.net/projects/air-imager.
Once you have downloaded the files to your system, decompress, extract, and install the application. [In this example, I have downloaded the .tar.gz package and will display the commands related to this particular file type]
-- Make sure you are in a root shell
sudo -s
-- Check your current directory to make sure you are in the right location to access the package you downloaded
pwd
-- Decompress and extract ("untar") the AIR files
tar -zxvf /path/air-1.2.8.tar.gz
-- If you desire, this is a good time to read the README.txt file
-- Switch to your AIR directory
cd /path/air-1.2.8
-- Run the install script
./install-air-1.2.8
The AIR GUI
Note that AIR does not work on all Linux distributions. Refer to the project information on sourceforge.net and the README.txt file for a list of known supported distibutions - I am using Ubuntu which is not among the list. Ubuntu can still run AIR, however, some functionality is unavailable. Now that you have successfully downloaded and installed the application, run AIR in root shell by typing "air" in the terminal. AIR will run through a series of checks and the GUI will launch automatically.
Take a moment to familiarize yourself with the AIR GUI. Note how the buttons and options relate to various dd commands that can be used in the terminal.
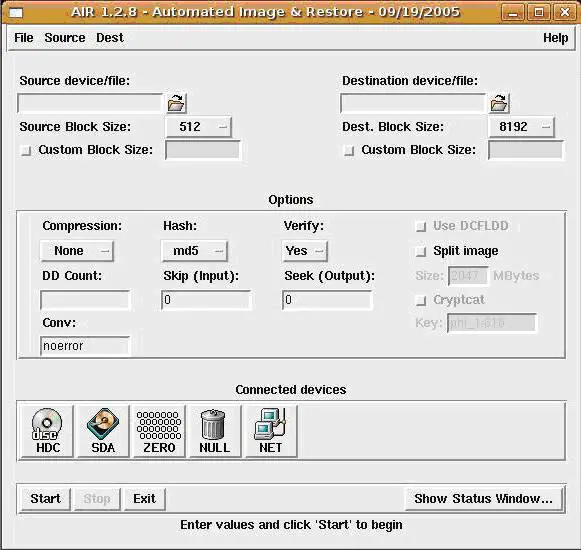
Creating a dd Image Using AIR
For this exercise, we will create a dd image of a .jpg in the root folder and copy it to a CD-ROM. AIR will run the commands behind the scenes that will create the image and copy it to the CD-ROM. (In a real scenario, this .jpg could very easily represent a compromised hard drive or other piece of evidence).
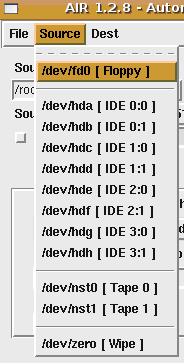
First, select the source device or file that you would like to image. This can be a particular drive/partition, a file such as a .jpg, a folder, or any number of other items on a computer. We'll select /root/ectf.jpg which is the original file.
Next, select the destination device/file where you would like the image to be copied. We'll choose /dev/hdc which represents the CD/DVD drive.

[Note, selecting the source and destination devices/files can be done a few different ways:
A. Choose source/destination from the drop-down list in the toolbar - may not be available if using an unsupported Linux distribution
B. Click the folder button to browse folders on your system
C. Click on the desired "Connected Devices" button at the bottom of the application and set as source or destination
D. Type the known path in the source/destination window]

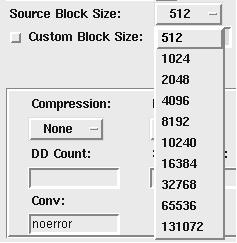
After identifying the source and the destination, choose the desired block size of your source and destination devices/files. It is recommended that these match. This step requires some knowledge of your source device/file and an understanding of block sizes. [General information on block sizes can be found through web search].
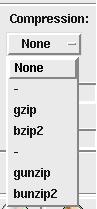
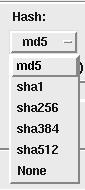
Lastly, you are presented with a few options to tailor your image. Here you have the ability to choose device/file compression, hash method, and whether or not you would like to verify the hashes post image.
At this point, you have identified all the necessary criteria to create your dd image. Click "Start" and let AIR do the rest. Click on "Show Status Window" to view the commands which AIR is running in the background. The status window will display a detailed logging summary. This is where you can view the data transfer status and hash verification results.
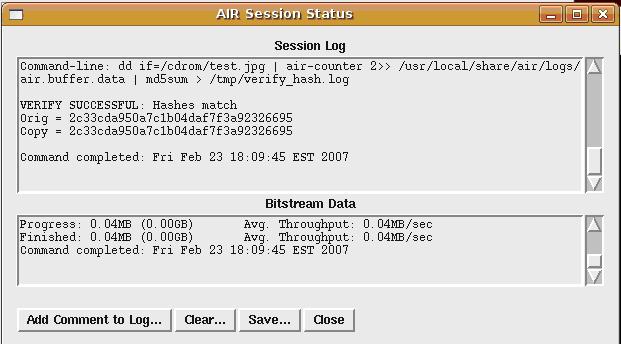
IMPORTANT: The hash values MUST be identical to ensure you have an exact dd image of the source device/file.
Congratulations! You have just created a dd image using the Automated Image & Restore GUI front end application.

